
The Two-Sided Triangle
In his latest blog post, Resident Artisan Wesley Hathaway shares a secret to carving eye-catching patterns: learning the two-sided triangle.
My passion is working in the medium of wood and wood products. Specifically, what gets me excited within the realm of carving is adding embellishments and decoration to the things I make. I get quite a lot of questions on how I carve these “elaborate patterns'' that look complex and complicated while in reality, it’s a very approachable type of carving and just a series of two-sided triangles stacked in different sequences and patterns that create different effects. There is already a great deal of quality information and guides on how to chip carve out in the world—with more continually being created—but here is my small, light-hearted contribution to that ever-expanding pool of information.
How to create the two-sided triangle △
One triangle is created in three simple steps!
Step one: Plunge
Step two: Plunge
Step three: Slice
It really is that simple, but here is a more complete explanation.
Step 1)
First, I must say, once you’ve done your layout and you’re ready to start carving, always make sure whatever tool you are using to carve with is sharp! Whether you use a chisel, a pocket knife, a chip carving knife, or a straight knife, sharp is key.
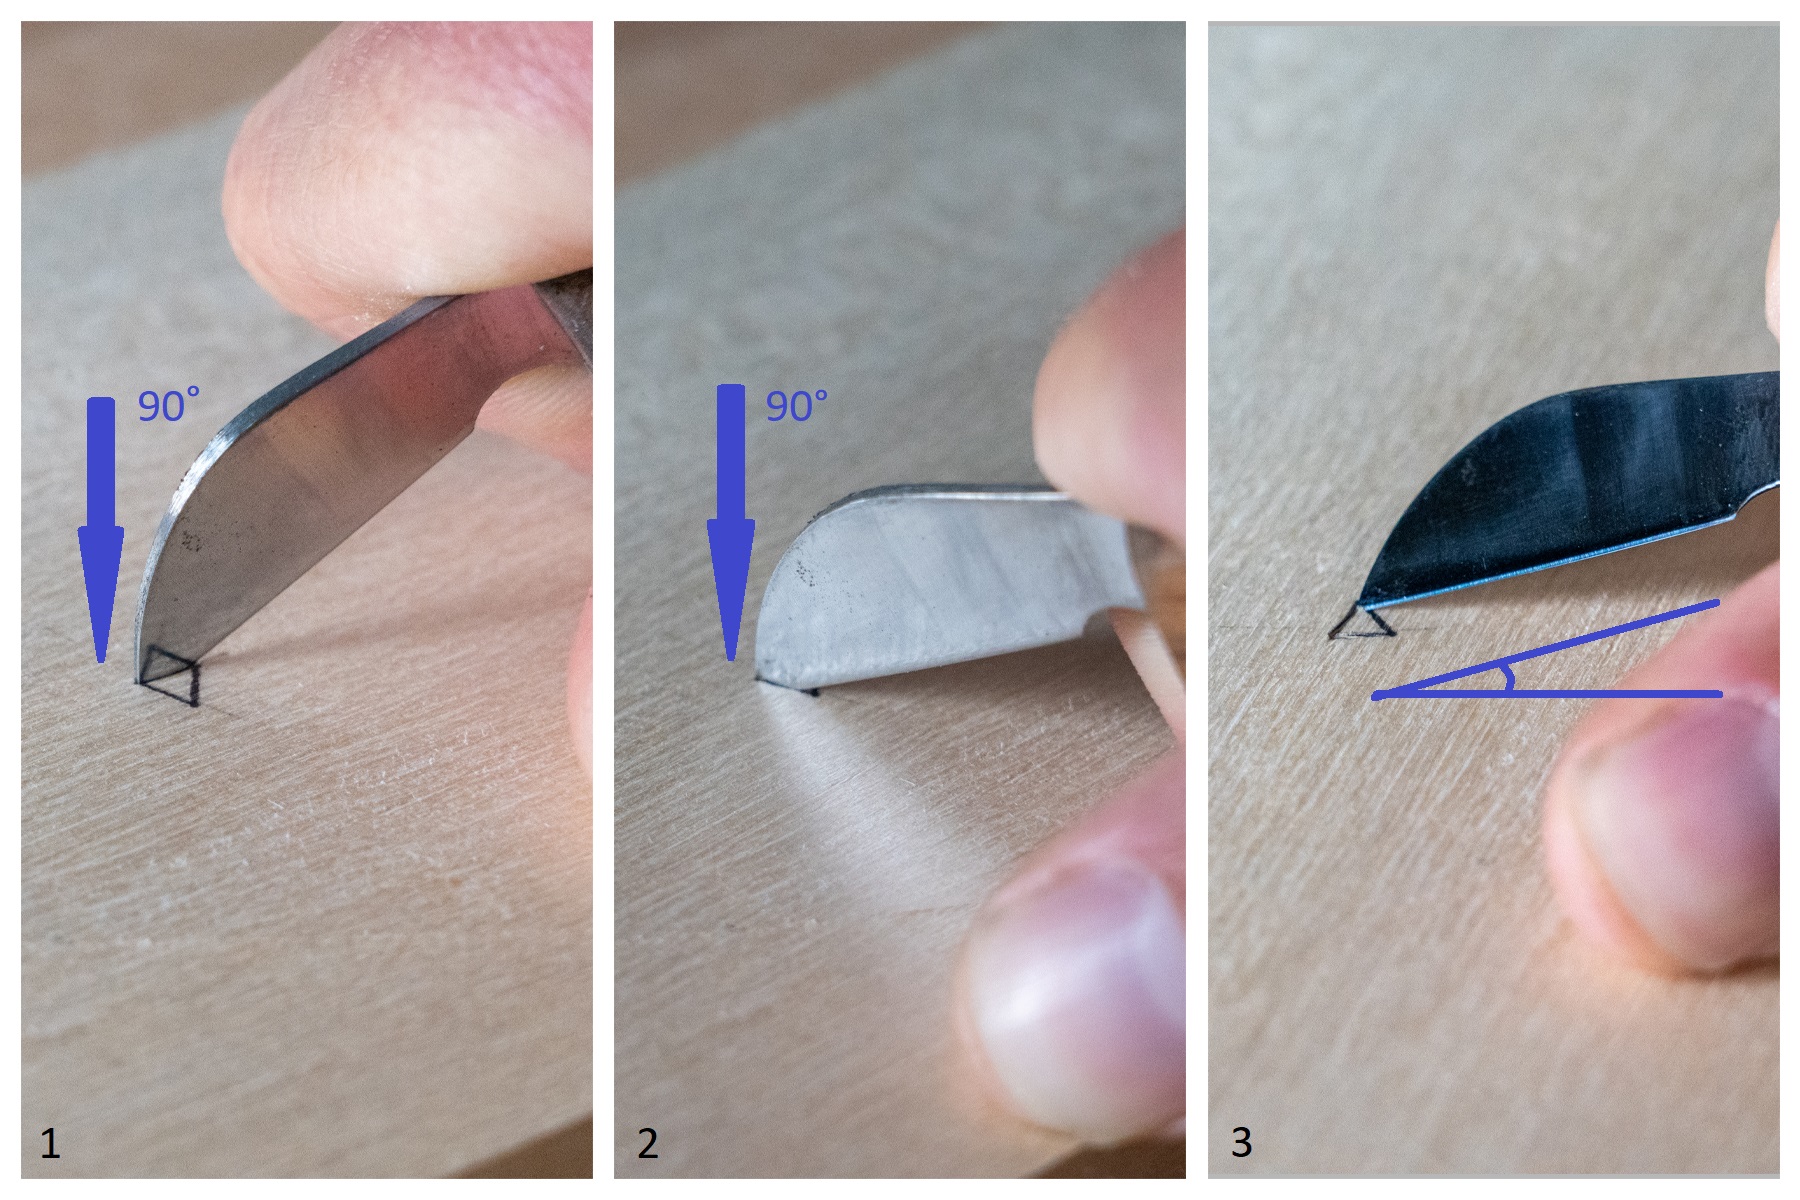
Okay, the first thing you do to carve a two-sided triangle is a straight down, plunge-cut 90 degrees to the surface you’re working. This cut severs the wood fibers on that side of the triangle. The deeper you plunge the deeper the triangle, which in turn will cast a stronger shadow; the shallower the cut, the less shadow will be cast. Because the bottom of the triangle is sloped, the tool you’re using must create that sloped bottom while still cutting at 90 degrees to the piece. Just as you would color inside the lines, it’s also important to cut within the lines, this will help keep the triangles clean.
Step 2)
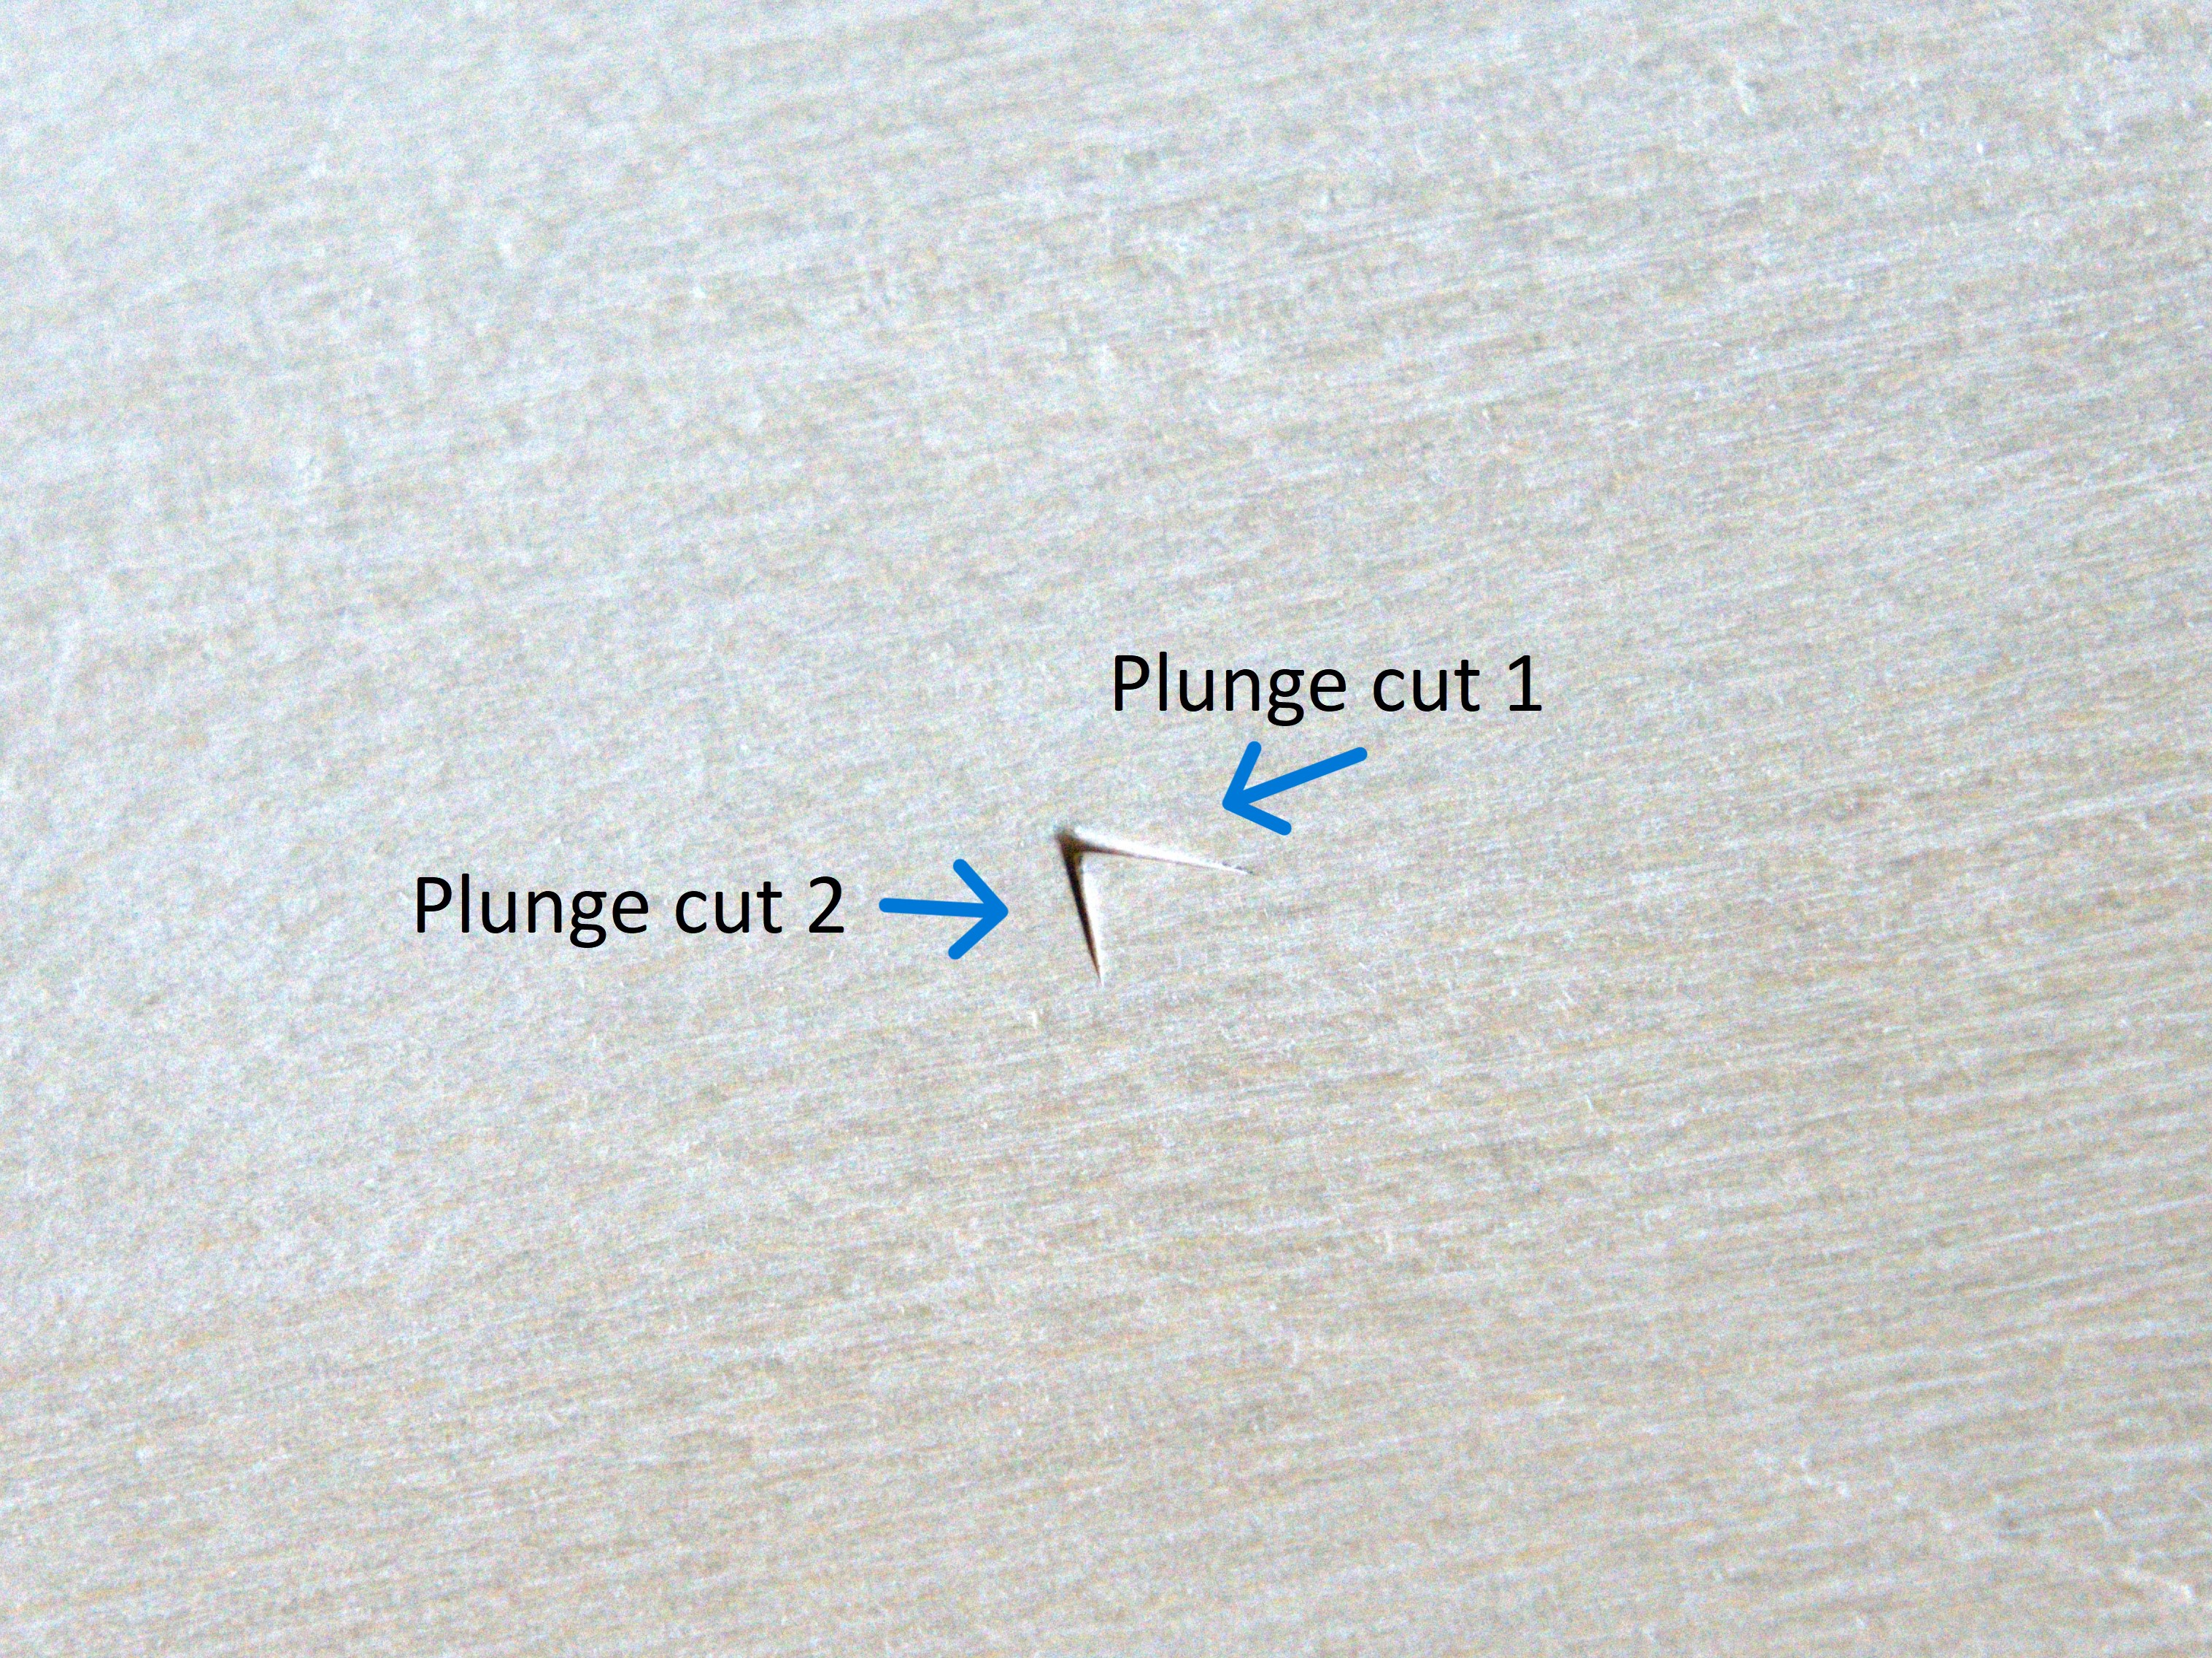
Repeat step one. Plunge cut on the other side of the triangle so that the now two plunge cuts have created two uniform angled cuts but still 90 degrees to the surface you’re working on. Both cuts should look something like this inside the wood.
Step 3)
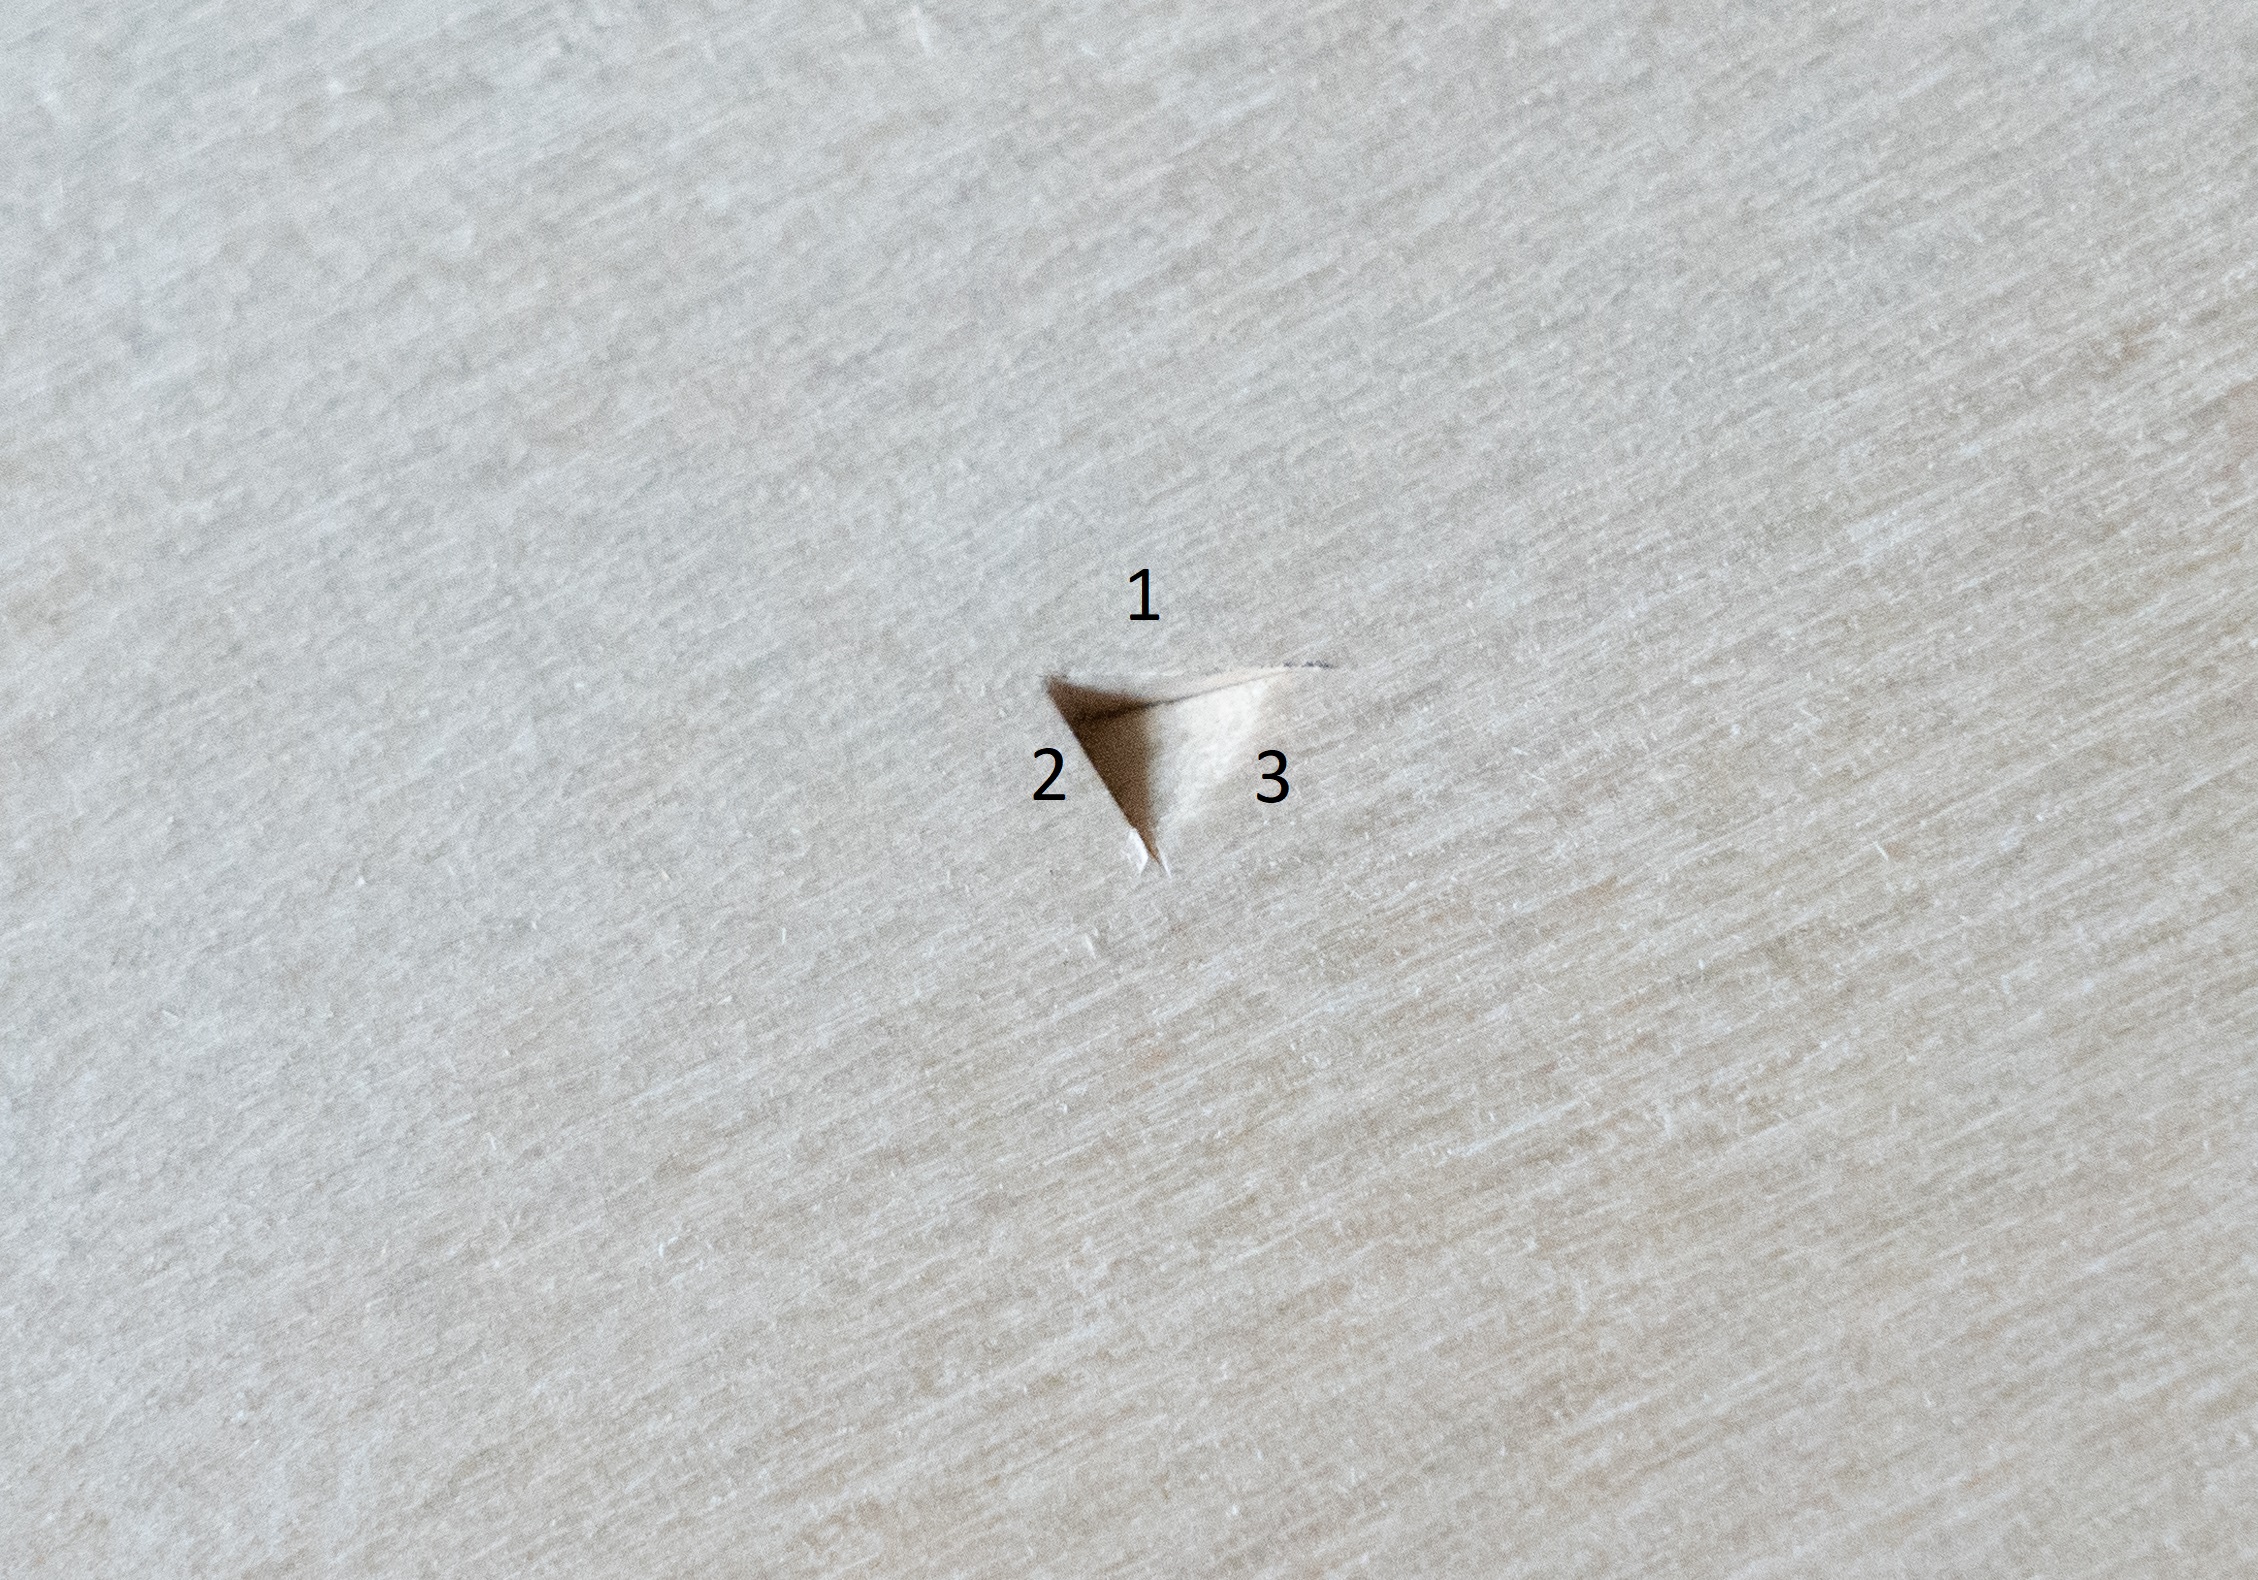
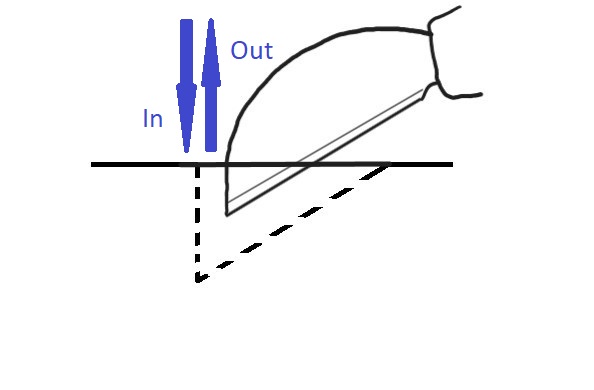
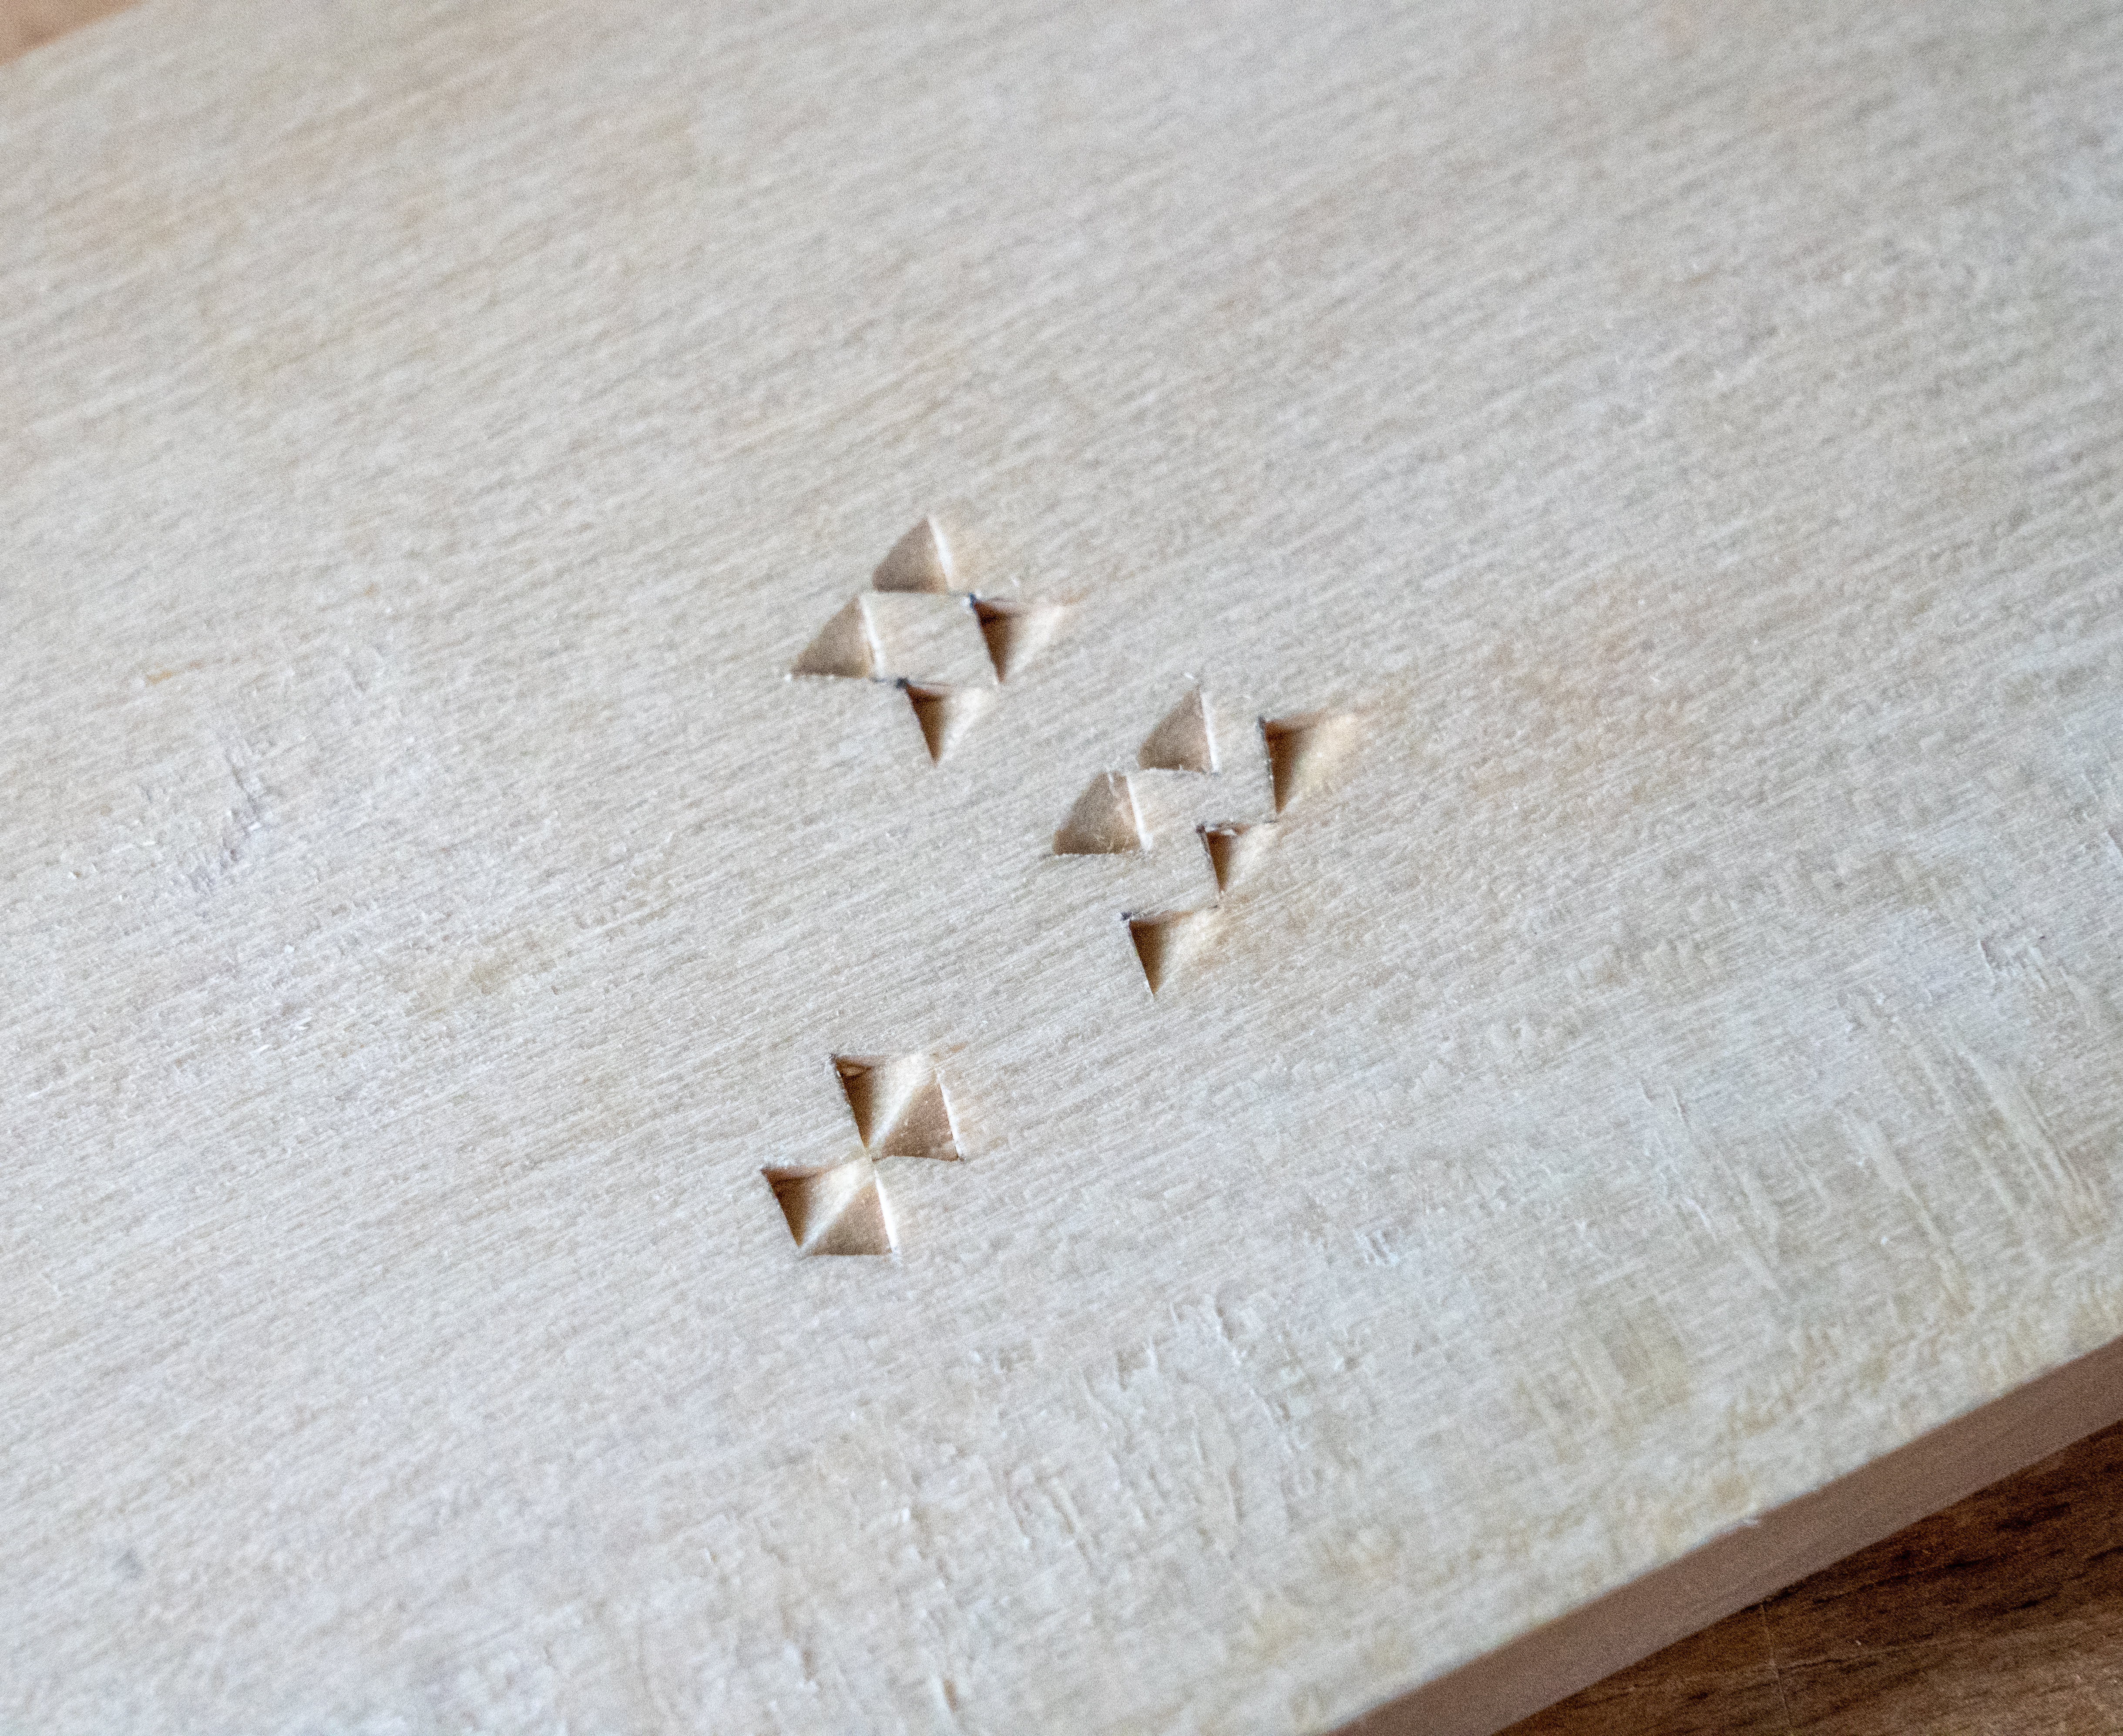
Now, starting at one of the two corners that are shallowest, angle the cutting edge to match the angle in which your two plunge cuts have created, slice out the wood from side to side and you’ve got yourself a two-sided triangle!

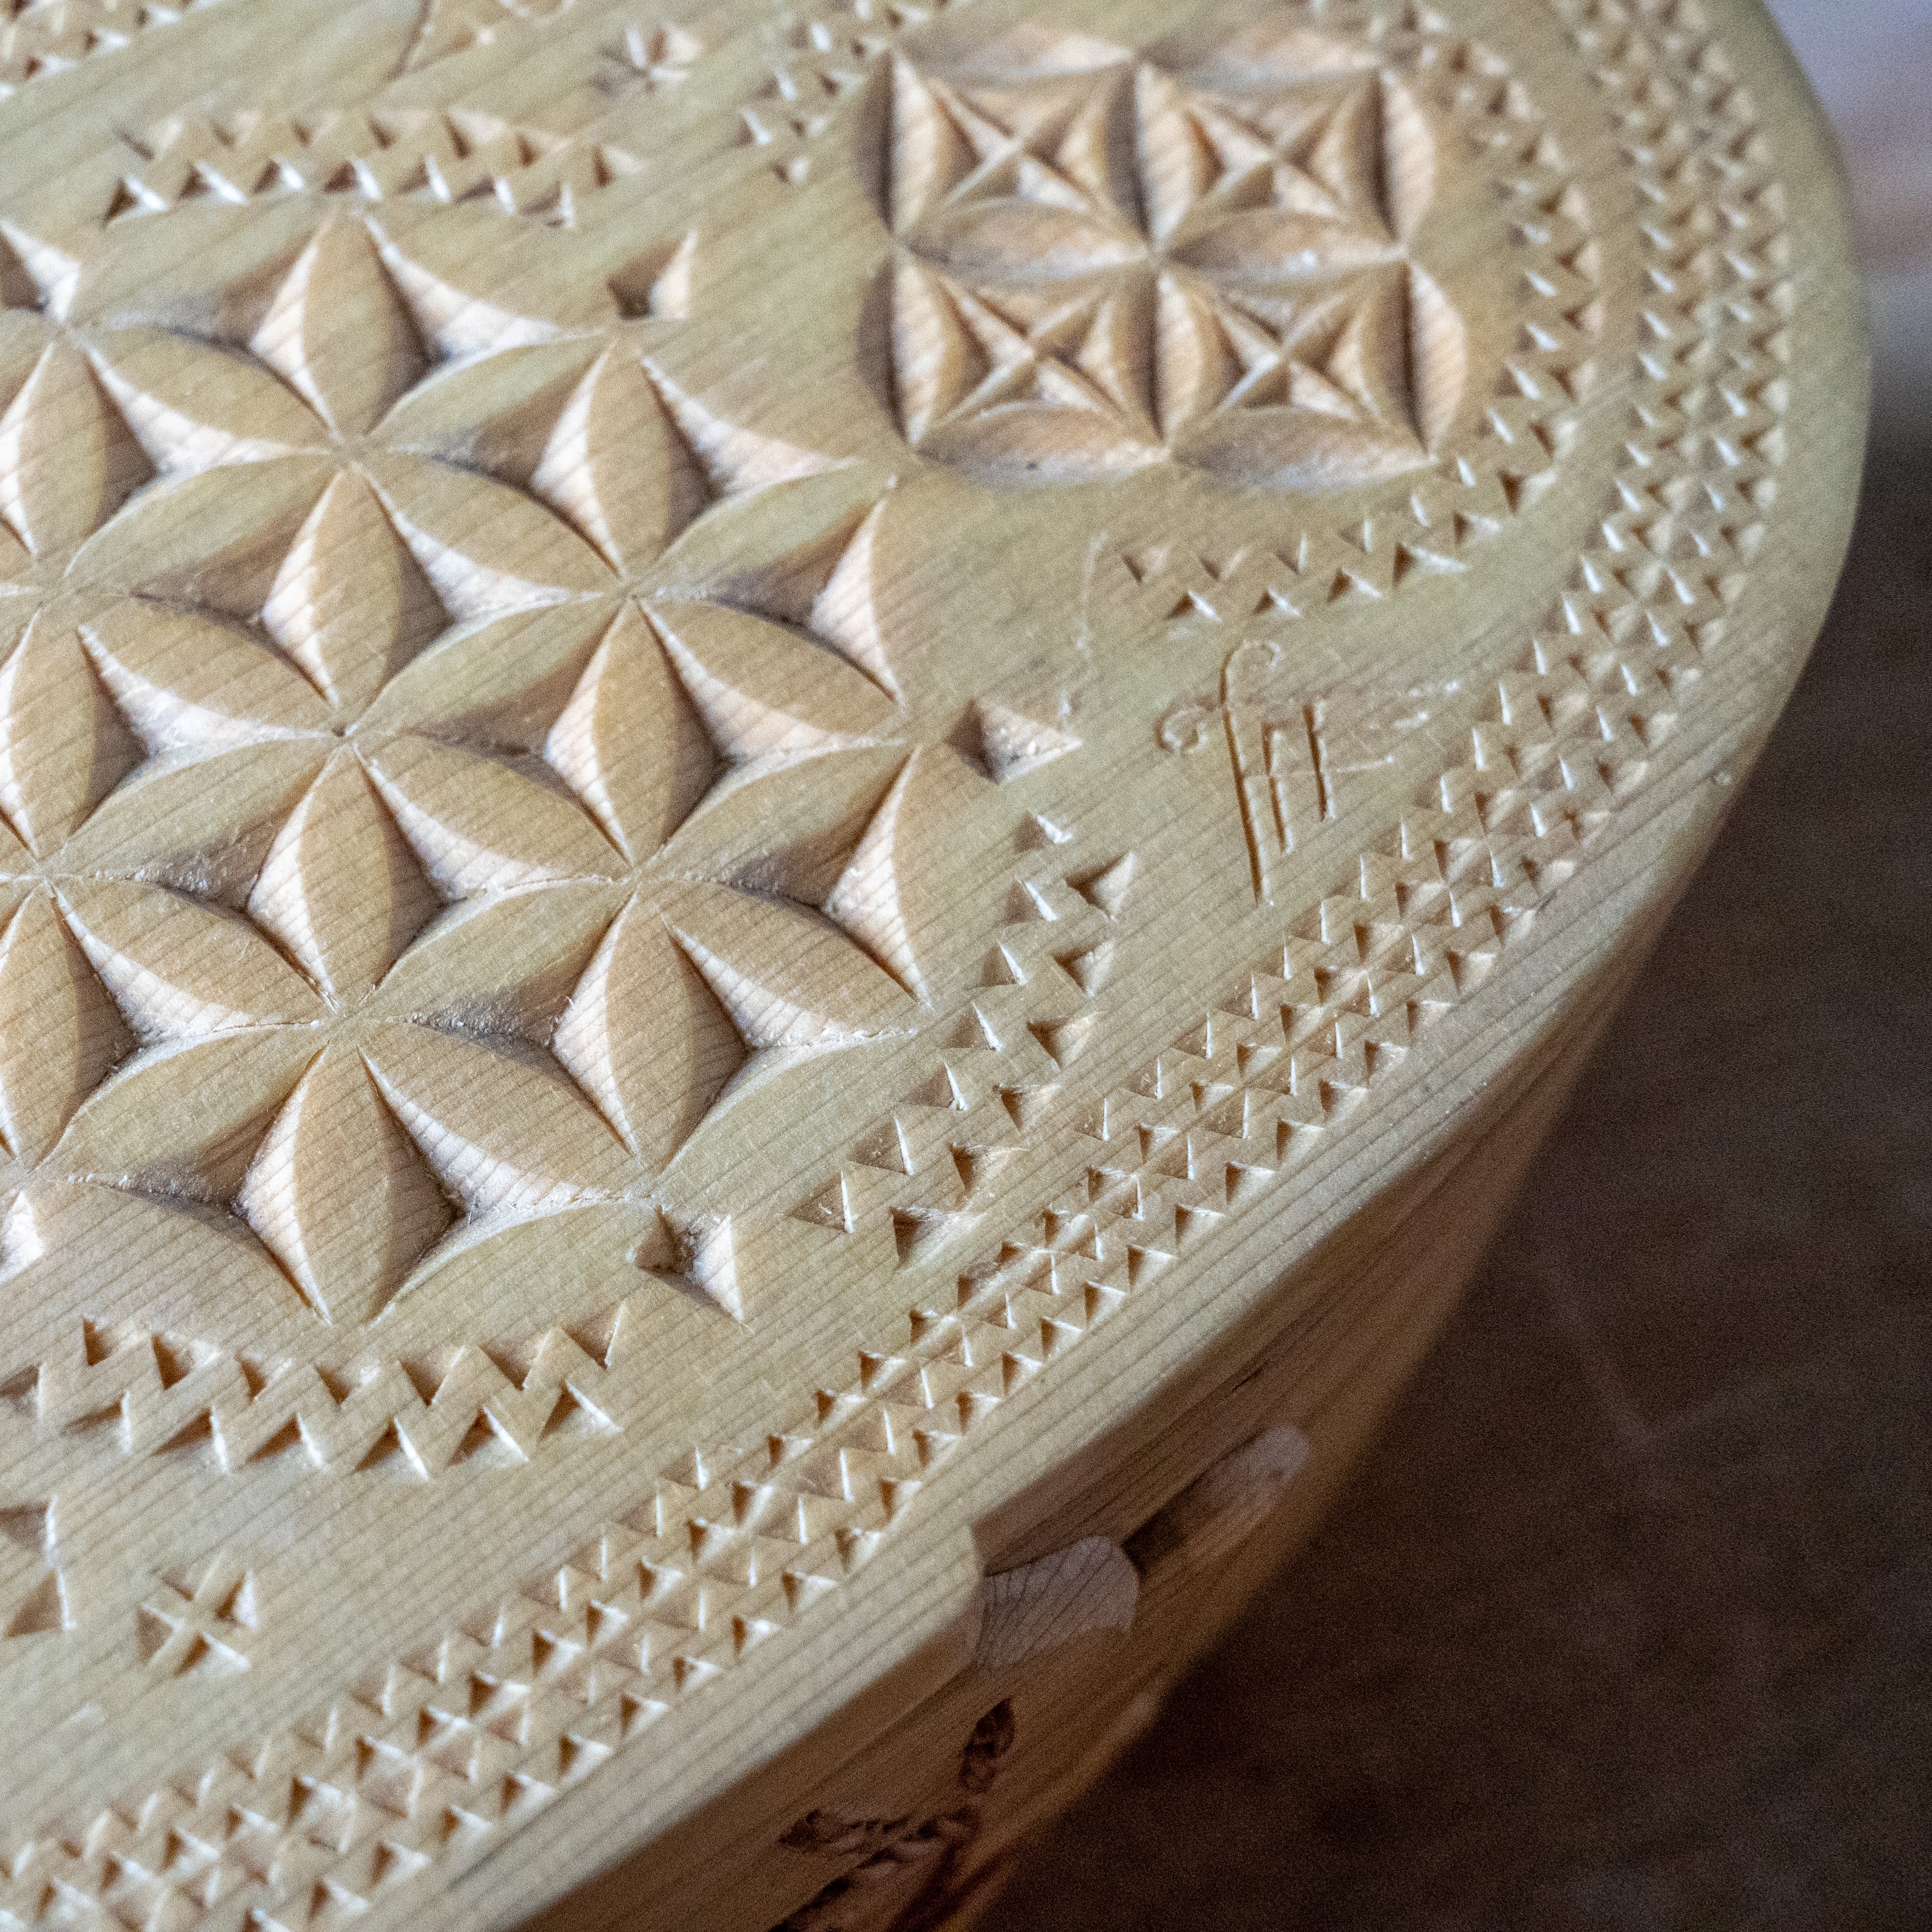
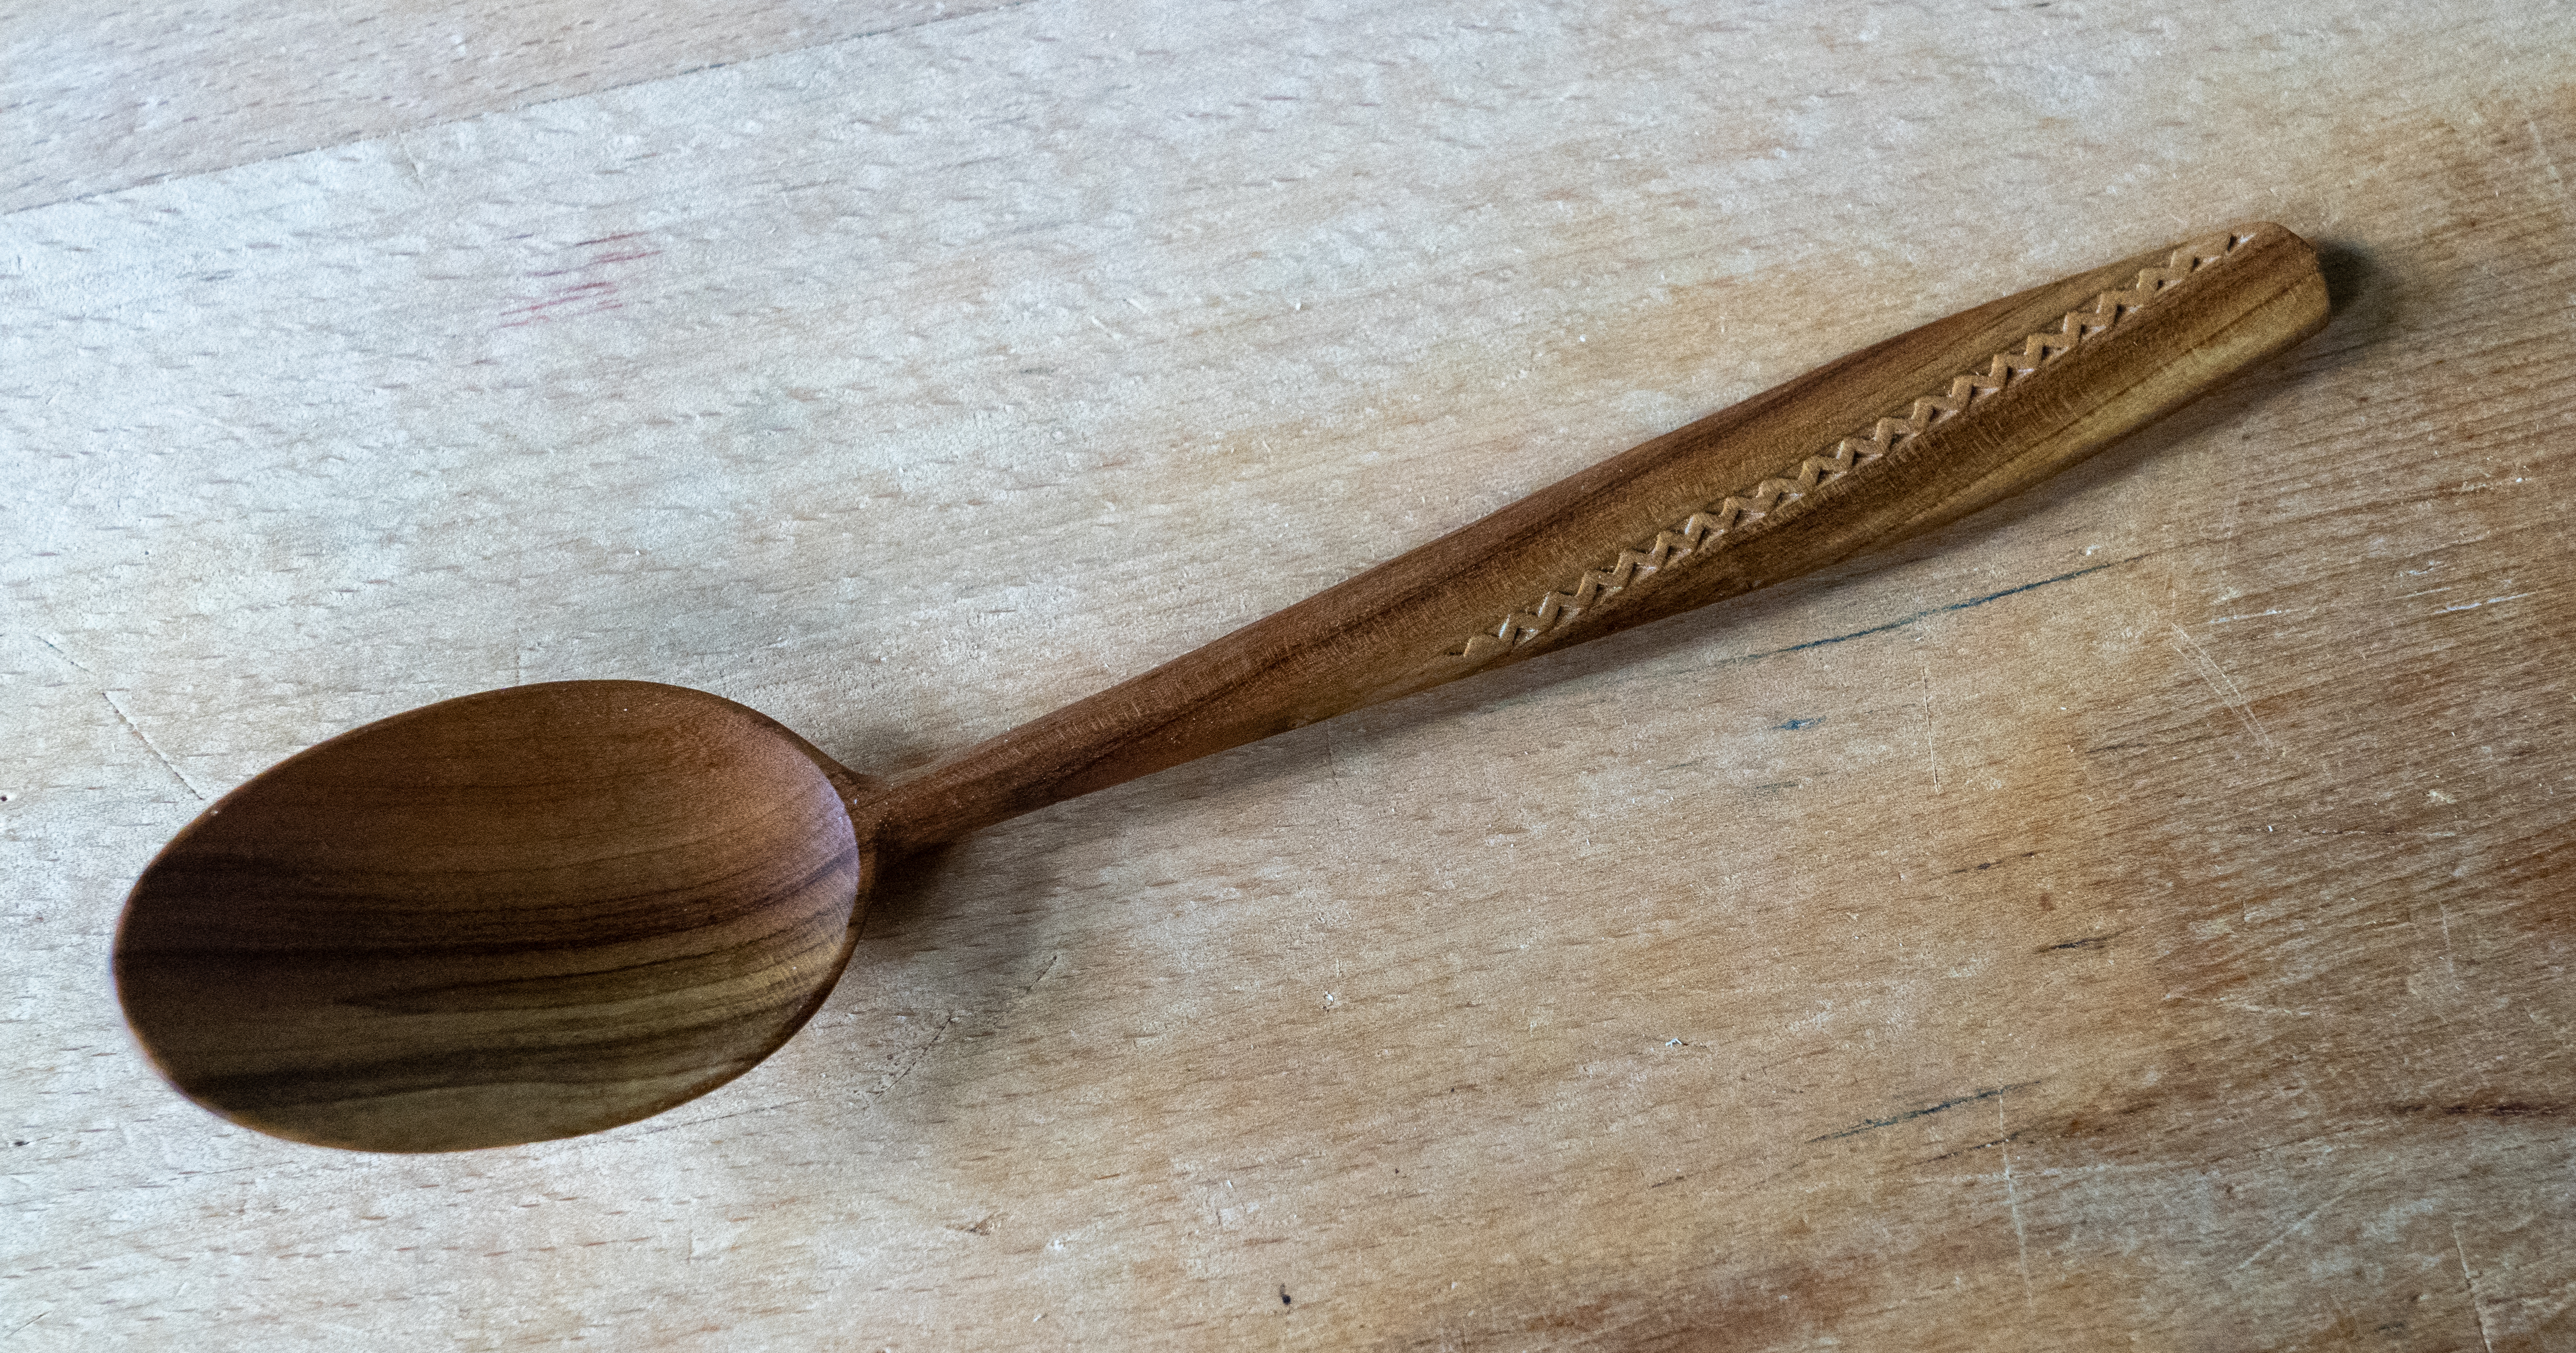
Here are a couple of examples of ways I’ve decorated pieces and different ways you can use the two-sided triangle for embellishment. I personally think the two-sided triangle is wonderful because it's such an easy way to add personalization to pieces, and I think the results are spectacular and eye-catching.
.jpg)
If you’re interested in carving, I hope this is a small nudge to try it, and if you’ve been carving and feel you have some room for improvement, my secret for clean carving is to always have sharp tools, never compromise on that; the sharper you keep your tools, the easier it is to sharpen the next time.