
The Shoemaker and the Tanner
A pair of shoes from the leather up! Emily Derke discusses her collaboration with Candace LaCosse in her latest blog post.
“Experimentation is necessary in creating your own truths,” a friend of mine recently told me.
Right now I am all about trying the things I have not done before and using the knowledge I already have to see what is possible with a material, or to understand more deeply why things work the way they do. Doing what I already know I can do feels less interesting at the moment.
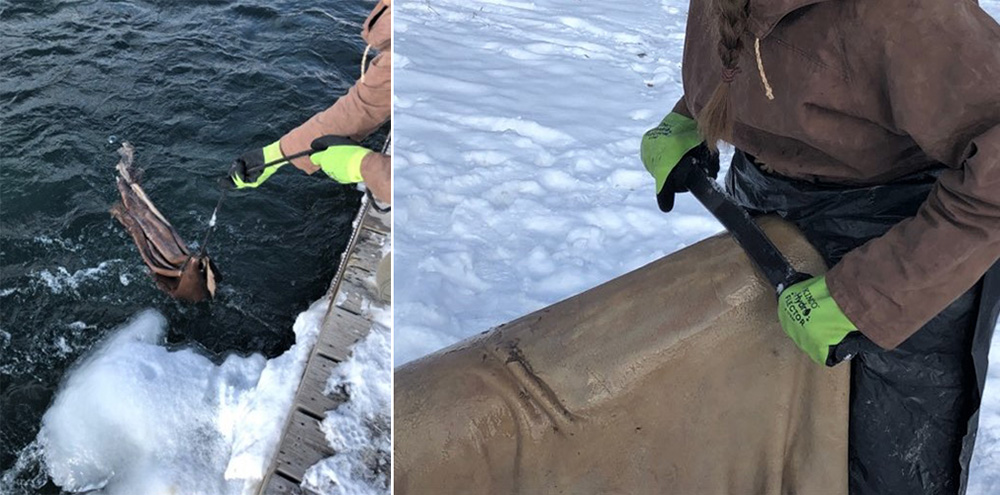
I’ve been working on a lot of different projects in the last year, and tanning leather in a variety of ways has been ongoing. People often ask what I will do with the leather, and I really do not know. I have just been working on becoming a better hide tanner while giving myself the time and experience to learn the intricate details of creating that material, and the freedom to experiment.
Last year Candace LaCosse of Hemlocks Leatherworks was here visiting and teaching a workshop at North House. Candace is an accomplished craftsperson in Duluth and makes beautiful shoes, bags and other goods in her shop. She is also a friend and loves a good brainstorm. So I showed her some of the leather I had been making and asked her if it might be suitable for making shoes. She enthusiastically said yes, so we made a plan to work together.
The shoes we decided to make use two different types of leather: bark tanned and brain tanned. I could write a lot about each of those methods. In fact, there are entire books about the tanning processes, and one could go on and on about all the steps and variations. So I will try to summarize, and will certainly leave out many details.
Bark tanned leather: Picture a boot or belt leather. This type of tanning is widely practiced around the world and dates back 6,000 years or so (i’ve heard a number of different dates, so i’m not exactly sure)

This leather has the grain layer left on and is less stretchy, but can be stiff or soft, depending on how it is dressed. First, with all hides, the meat and fat layers are scraped off. Next, the hair is removed. I do this by soaking in a wood ash solution for several days, which makes the hide alkaline and causes the hair follicles to lose their grip, making the hair easily scraped away while the grain layer is left intact. The hide is then rinsed very thoroughly, usually in a stream for a few days, to bring the hide back to a neutral PH.
Then the hide is soaked in tannins (think of a too strong cup of black tea. It makes your mouth feel dry and puckery- that’s from the tannin in the tea!). Tannins can be found in a wide range or plant materials. This year I have been using willow bark and sumac leaves as sources of tannin, but there are many plants with high tannin contents. The plant material is simmered for quite some time, and poured off. The same plant matter is boiled again to yield weaker solution.
The hides are placed in a weak solution, and gradually worked into a very strong, full strength solution over a period of time. For deer hides it can take 2-3 months for them to be fully tanned.
Then the hides are rinsed for a few days in running water to rinse out the unbound tannins, scraped again.
Finally, the hide is oiled with a fat mixture of choice and worked and softened until dry to achieve the desired finish. I use a mix of deer tallow and bear grease.

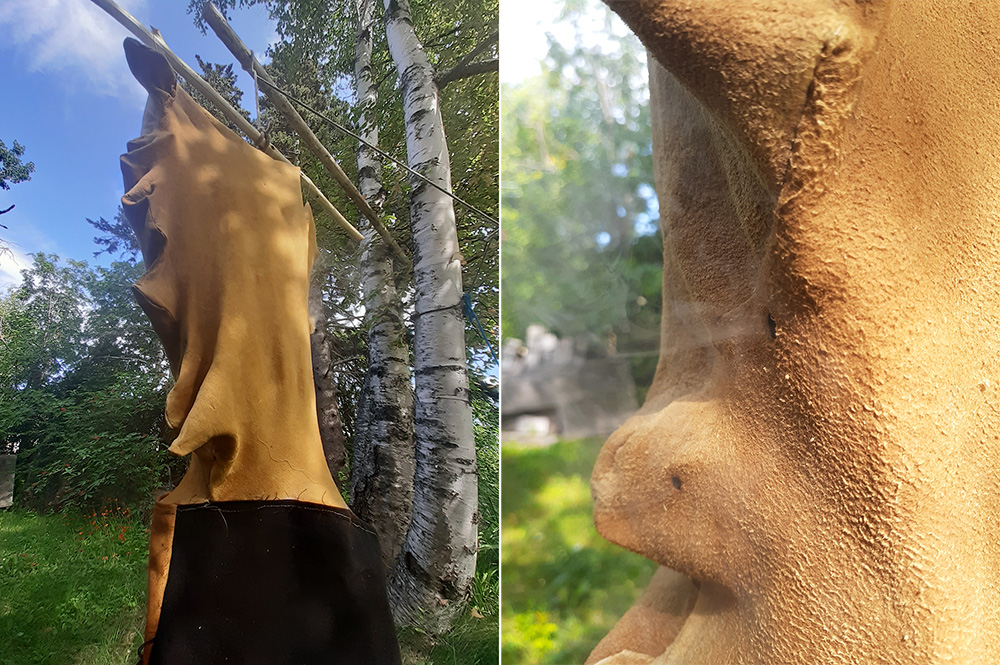
Brain tanned leather: Also known as smoke tanned, or buckskin, and looks and feels like a soft stretchy suede. This is known to be the oldest form of tanning with widespread roots around the world, and is also the method of tanning traditional to the Anishinaabe people in this area.

For this leather I start similar to the bark tanning process by scraping and soaking in wood ash, but this time I scrape away the grain layer with the hair. The hide is rinsed, then soaked in an emulsified fat liquor. This can be brains (which are fat), or a mixture of other things like egg yolks, soap, or oil. The hide is rung out and stretched and moved as it is drying, ensuring that the fibers of the skin are coated in a good layer of fat, creating a soft, moveable fabric. It can take many dressings in the fat liquor, and several hours of hard work to soften and finish.

Then the hide is smoked. The leather is sewn up like a pillow case, and sewn to a “skirt”. The skirt is draped over a bucket of coals that are covered in dry, punky wood, which makes a lot of smoke, but no fire or heat as long as the skirt is keeping the air from getting into the bucket. This funnels smoke up into the skin, coating the fibers in what will keep them preserved as a soft material, and transforming the hide into a finished leather.
So, Candace was up for experimenting with this leather I've been making. It is durable, well made stuff, but the traditional tanning processes I am using are different from what is used in larger scale modern leather production, so there is some experimentation going on here. We chose hides that seemed like the right stuff for the job.
This project felt like an exciting collaboration of knowledge and a merging of our two worlds. Candace has the expertise of creating high quality, usable goods that are durable and attractive and has a vast range of skills and experience related to her work. I work almost exclusively with the raw materials I can harvest myself, exploring the alchemy of the source - the plant, animal, or mineral, mixed with all the steps and ingredients involved in creating something useful.
Candace so gracefully and skillfully guided me through the detailed and laborious shoe making process.
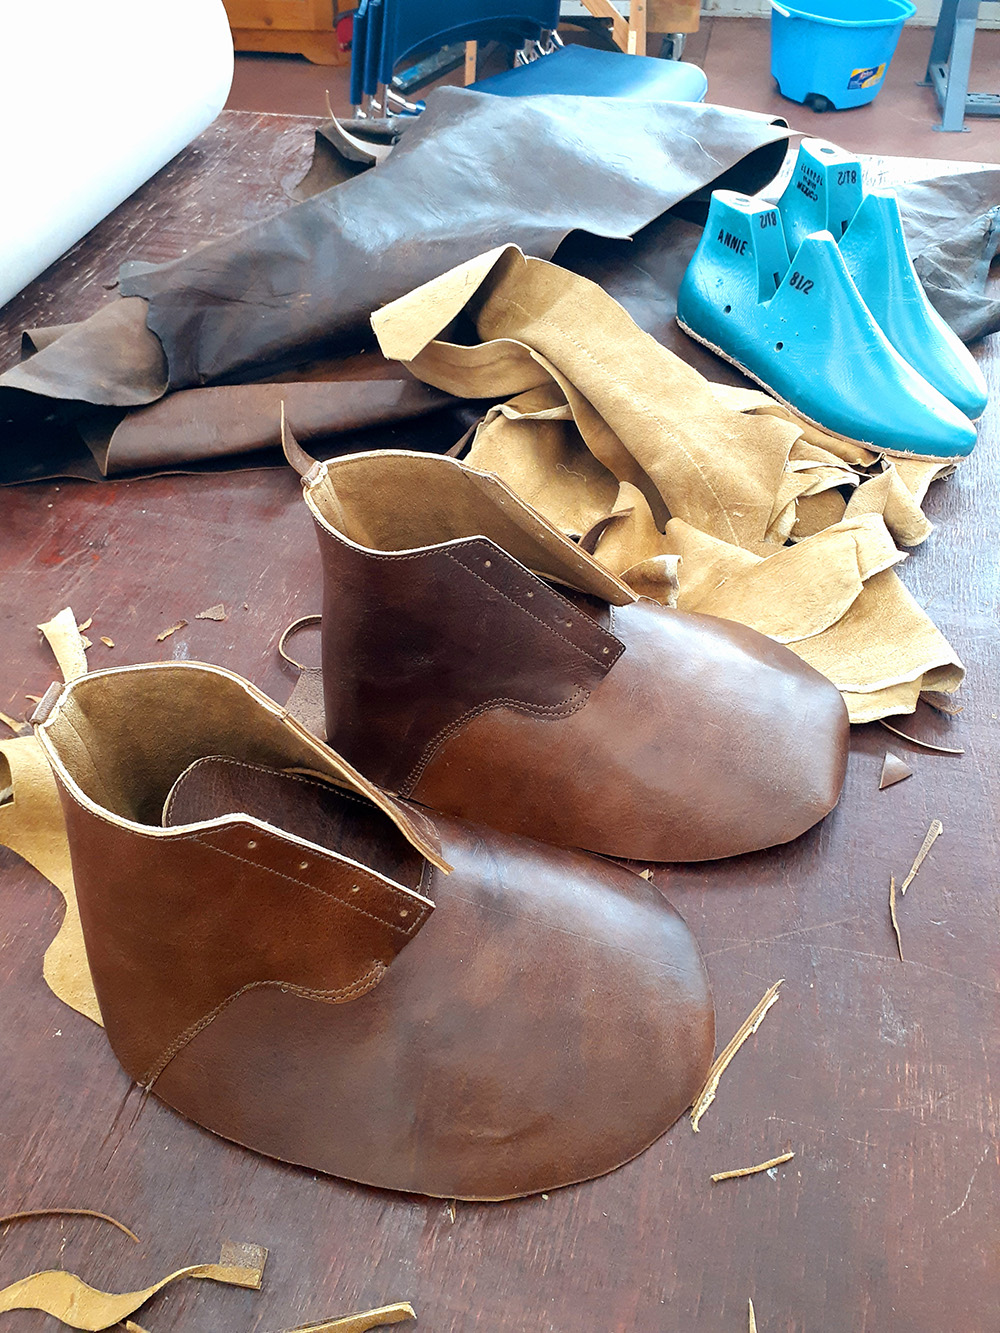
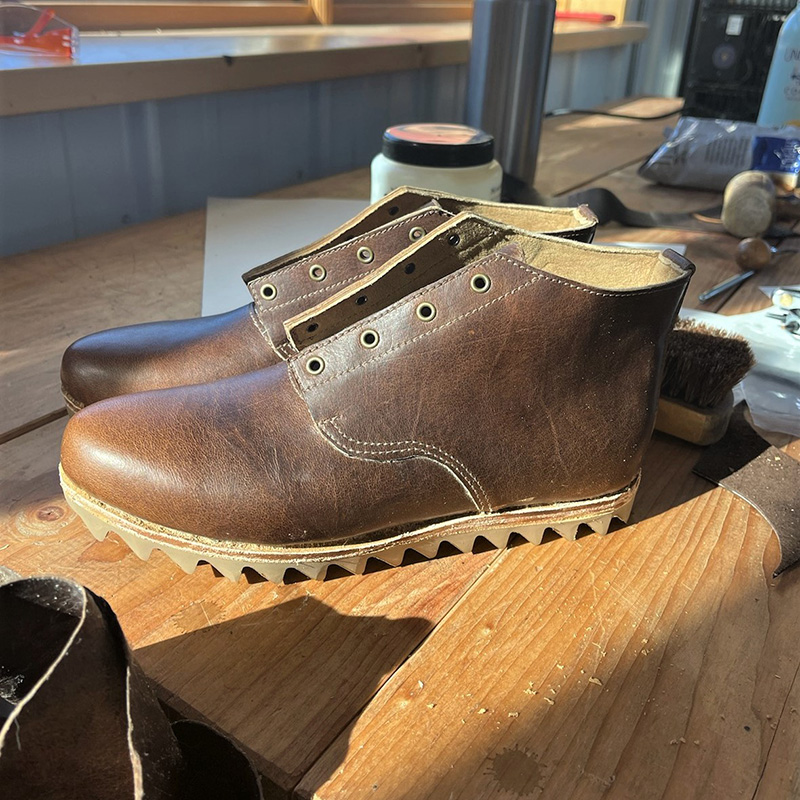
First, we made a design and pattern. The outside would be the bark tanned leather from a deer shot by my friend Karen 2 years ago, and the inside is lined with soft buckskin from a deer I shot 4 years ago.
You can read more about the first steps in the process- acquiring the skins here.
Candace discussed the finer points of shoemaking and some small details that I needed to decide upon. For example, derby or oxford style? It sounded like derby was a bit less formal, which I thought suited me better. I thought carefully about the curves and lines as I drew out the pattern. The pieces were cut out from the leather and sewn together, carefully layered in the proper order.
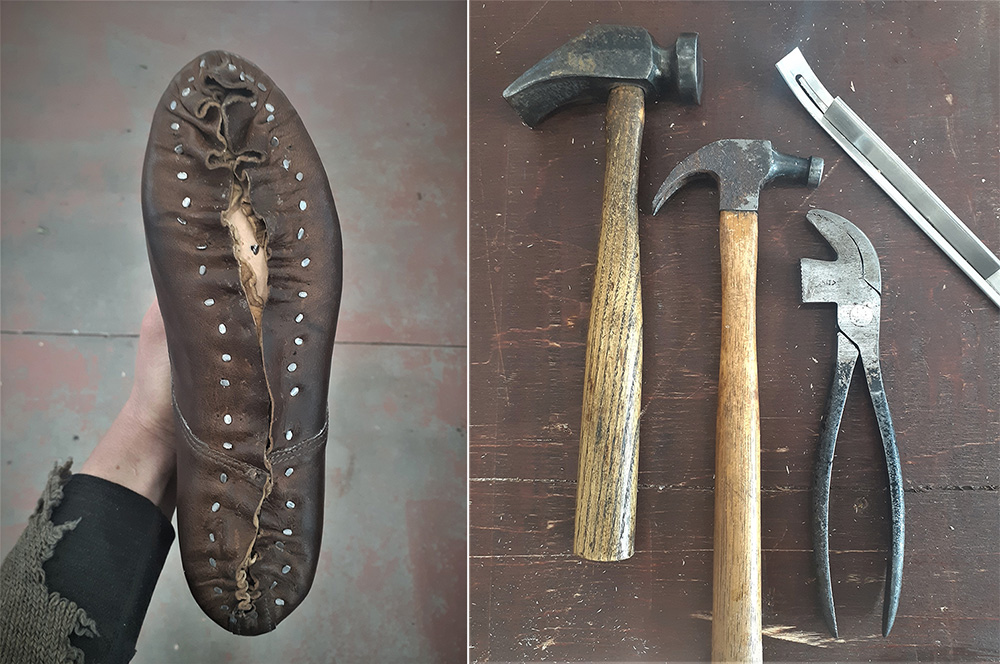
The pre-lasting followed. The shoes were starting to take shape as I stretched the wetted leather around the lasts for the first time. Each layer of leather is nailed into place.
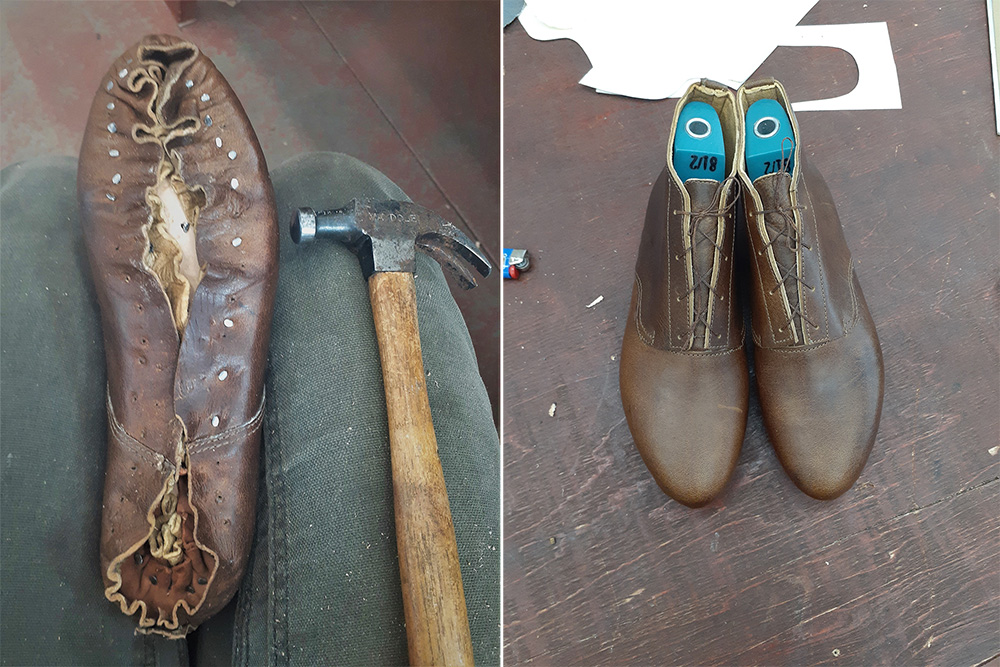
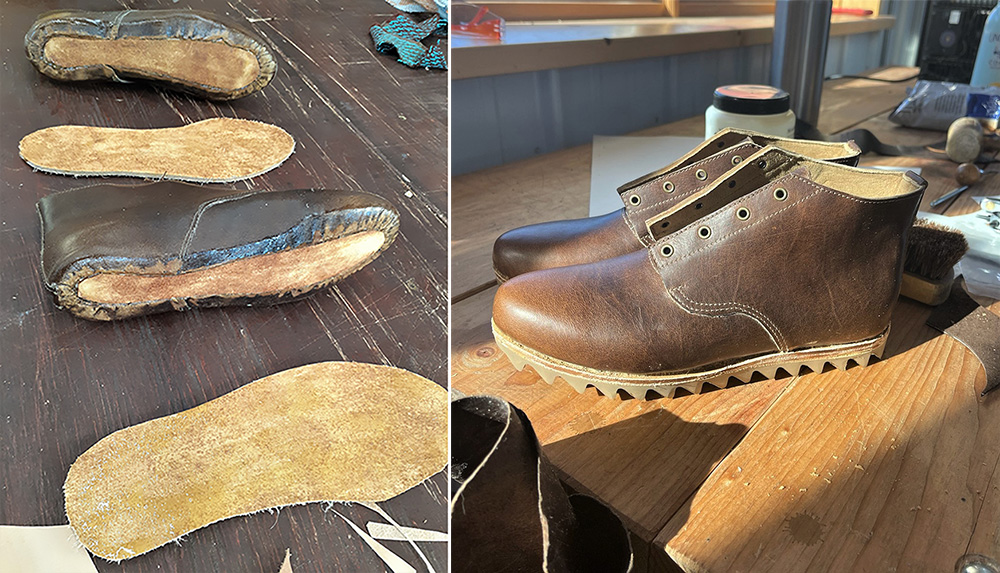
The shoes would be stretched around the lasts two more times before they were done, with time to rest and dry in between. Stretching, glueing, waiting, cutting, hammering, nailing, cutting, glueing, waiting, pegging, hammering, sanding.
So many parts and pieces, and so many details to make things just right.
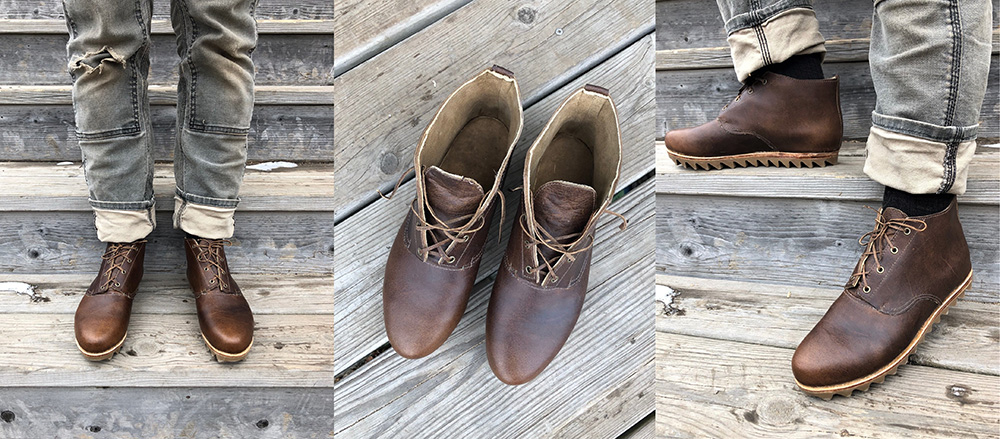
The final steps came together under careful guidance, bit by bit. And oh, what a treat to then put them on and feel them so perfectly hugging my feet.
If this tanning stuff is interesting to you, check out this video from 1909. There are many ways to tan a hide using different materials. This shows just one account of tanning cattle hides using oak bark. And it looks like the bark is being poured out of large willow baskets!