Spice Jars & Chip Carving
Marybeth delves into the world of surface design
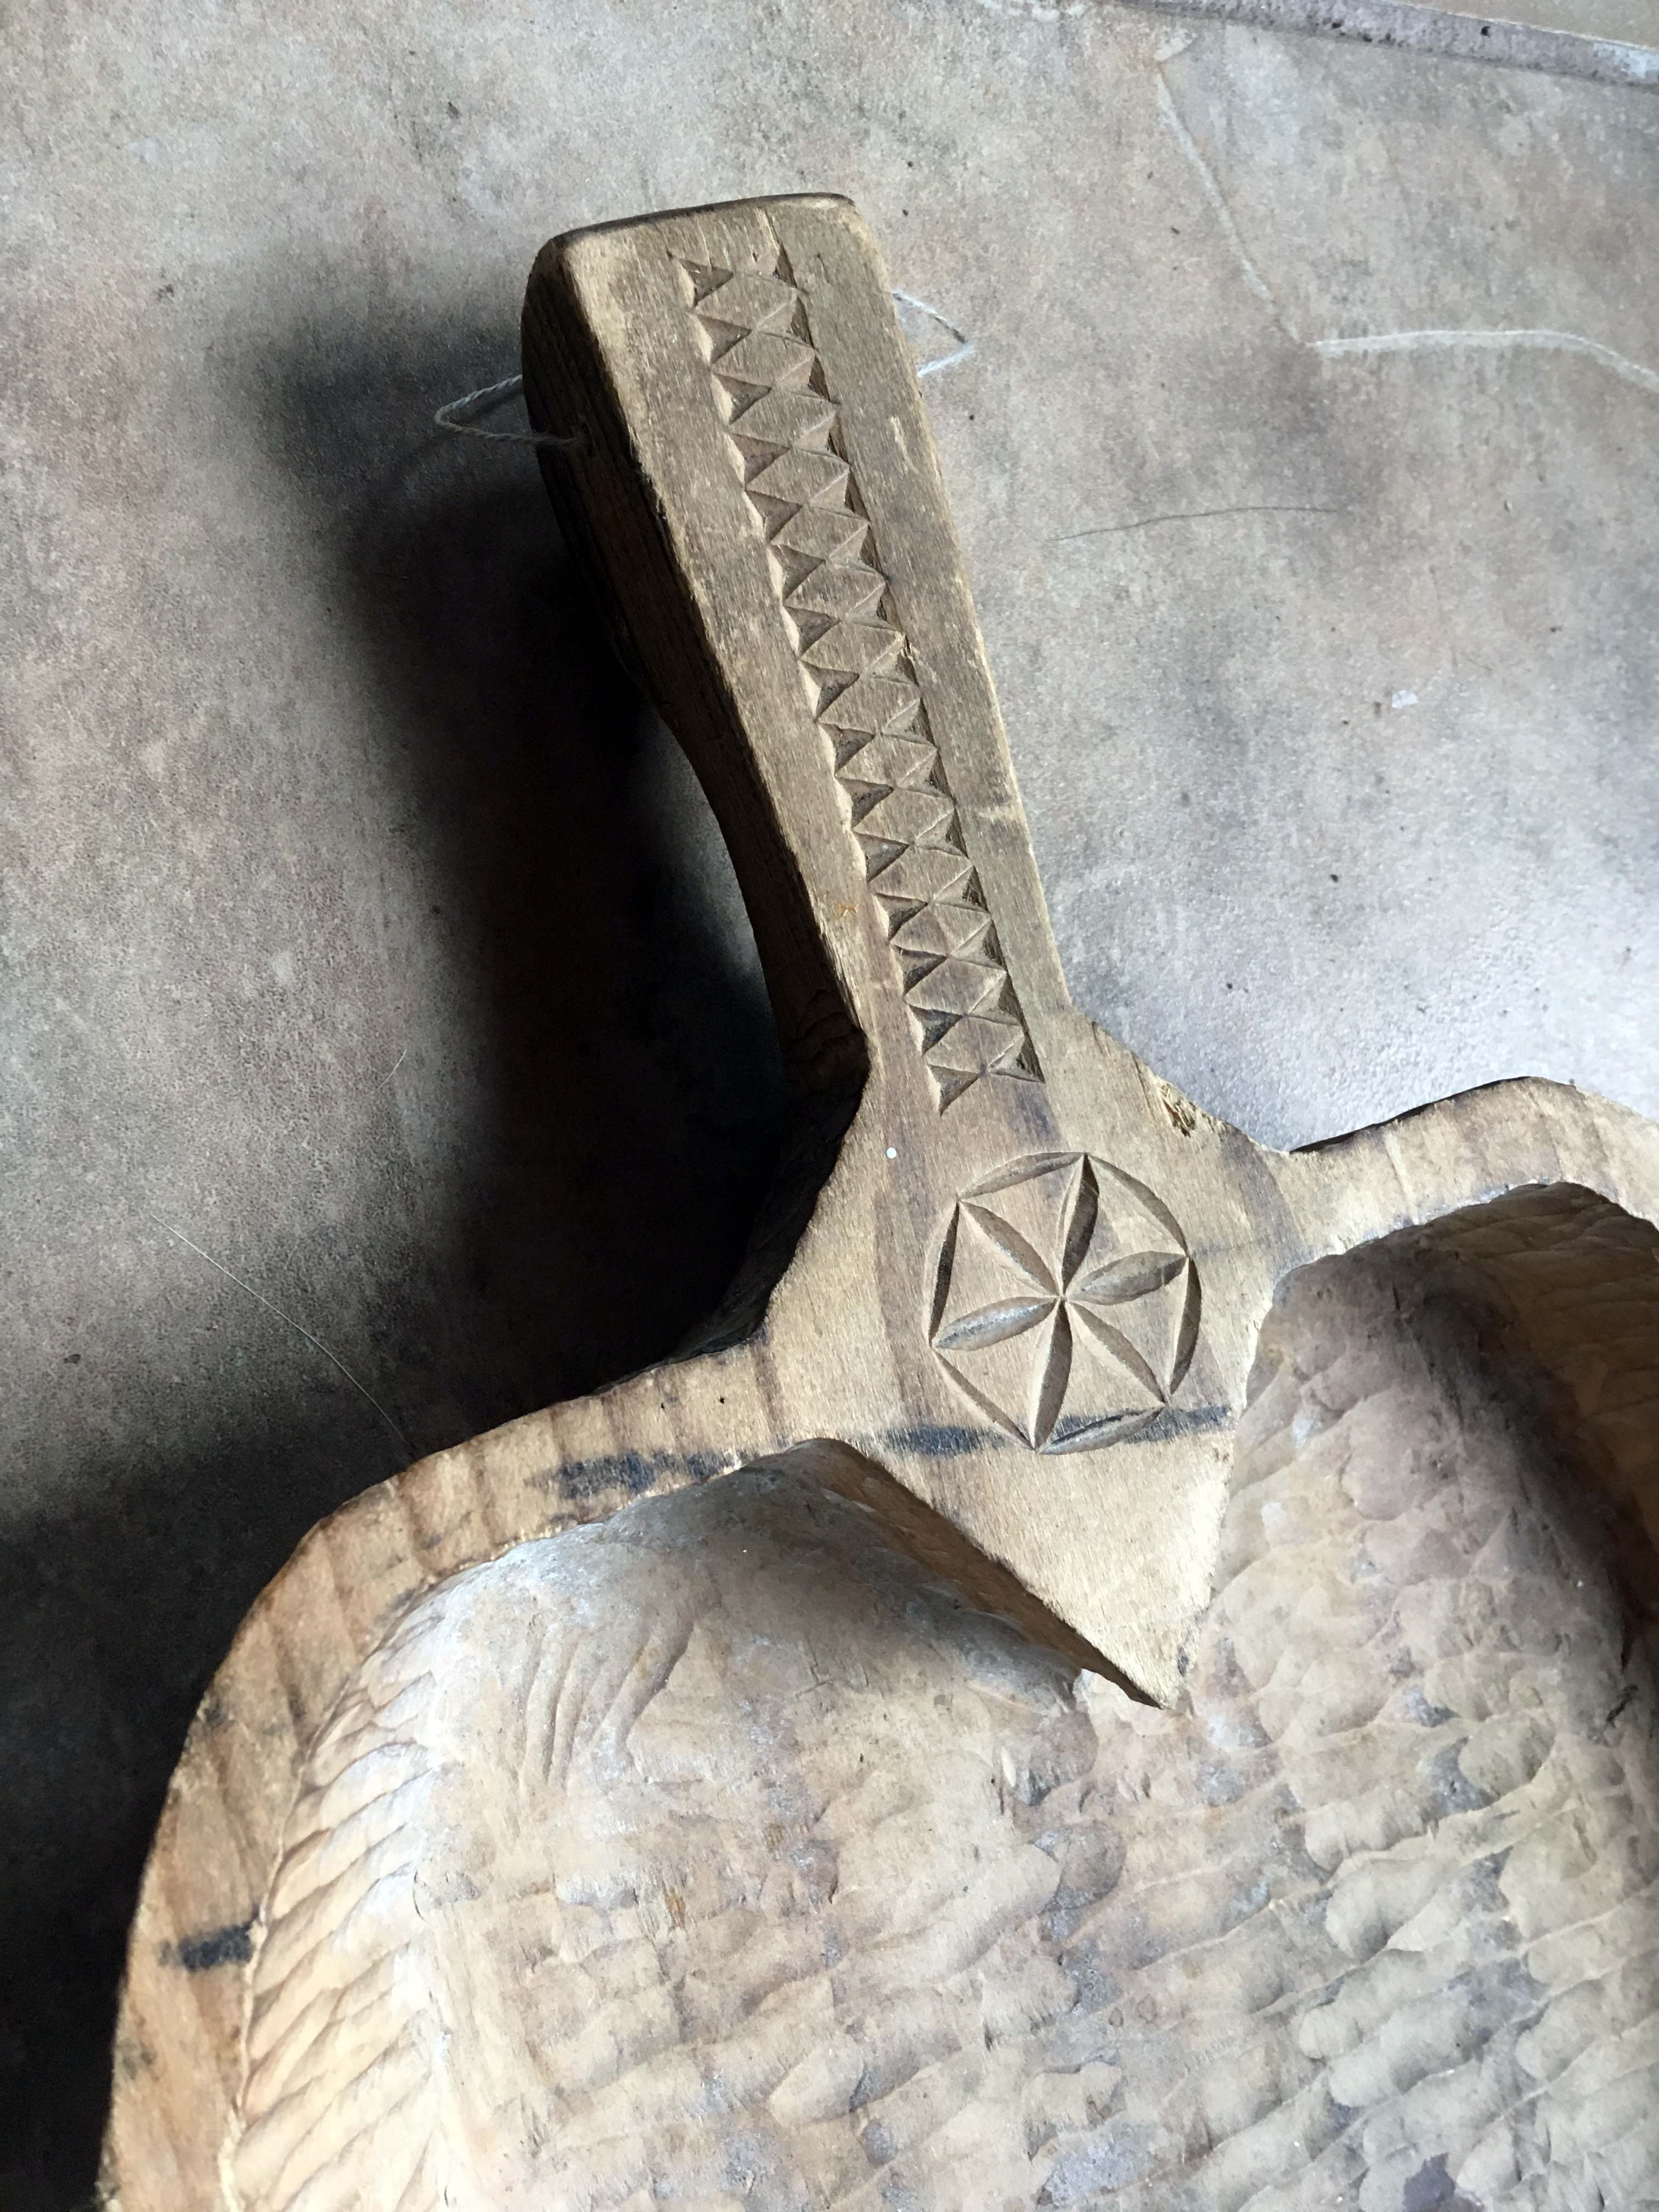
Surface design, be it carving or painting or inlay, is fascinating to me. Just a simple embellishment can bring an everyday item from being strictly utilitarian to the status of usable art that can be enjoyed both while in use and while being stored on the shelf or hanging on the wall. I’ve lately been delving more into the world of surface design, focusing over the past month on freeform chip carving and various painting techniques. Chip carving is generally defined as a method of carving in which one makes angled cuts into the surface of the wood which results in clean chips being cut away. The chips are removed in such a way that a form or pattern takes shape, often quite geometrical in nature. This picture of an old wooden dustpan that was lent to me (and which I hope to replicate sometime soon!), shows two typical chip carving patterns that are often repeated in traditional Scandinavian chip carving.

Though there are examples of a huge variety of chip carving methods and techniques from around the world, this one was common in Scandinavia during the 1700s and 1800s as a method to decorate chairs, tables, clocks, spoons, and many other household items. A quick online search will give you an idea of how intricate some of these designs can get and will likely lead you down a rabbit hole! One of the things that I love about this method of embellishing work is that it generally only takes one or two small knives to achieve a huge variety of shapes and patterns, so it is extremely attainable for those with limited budgets.
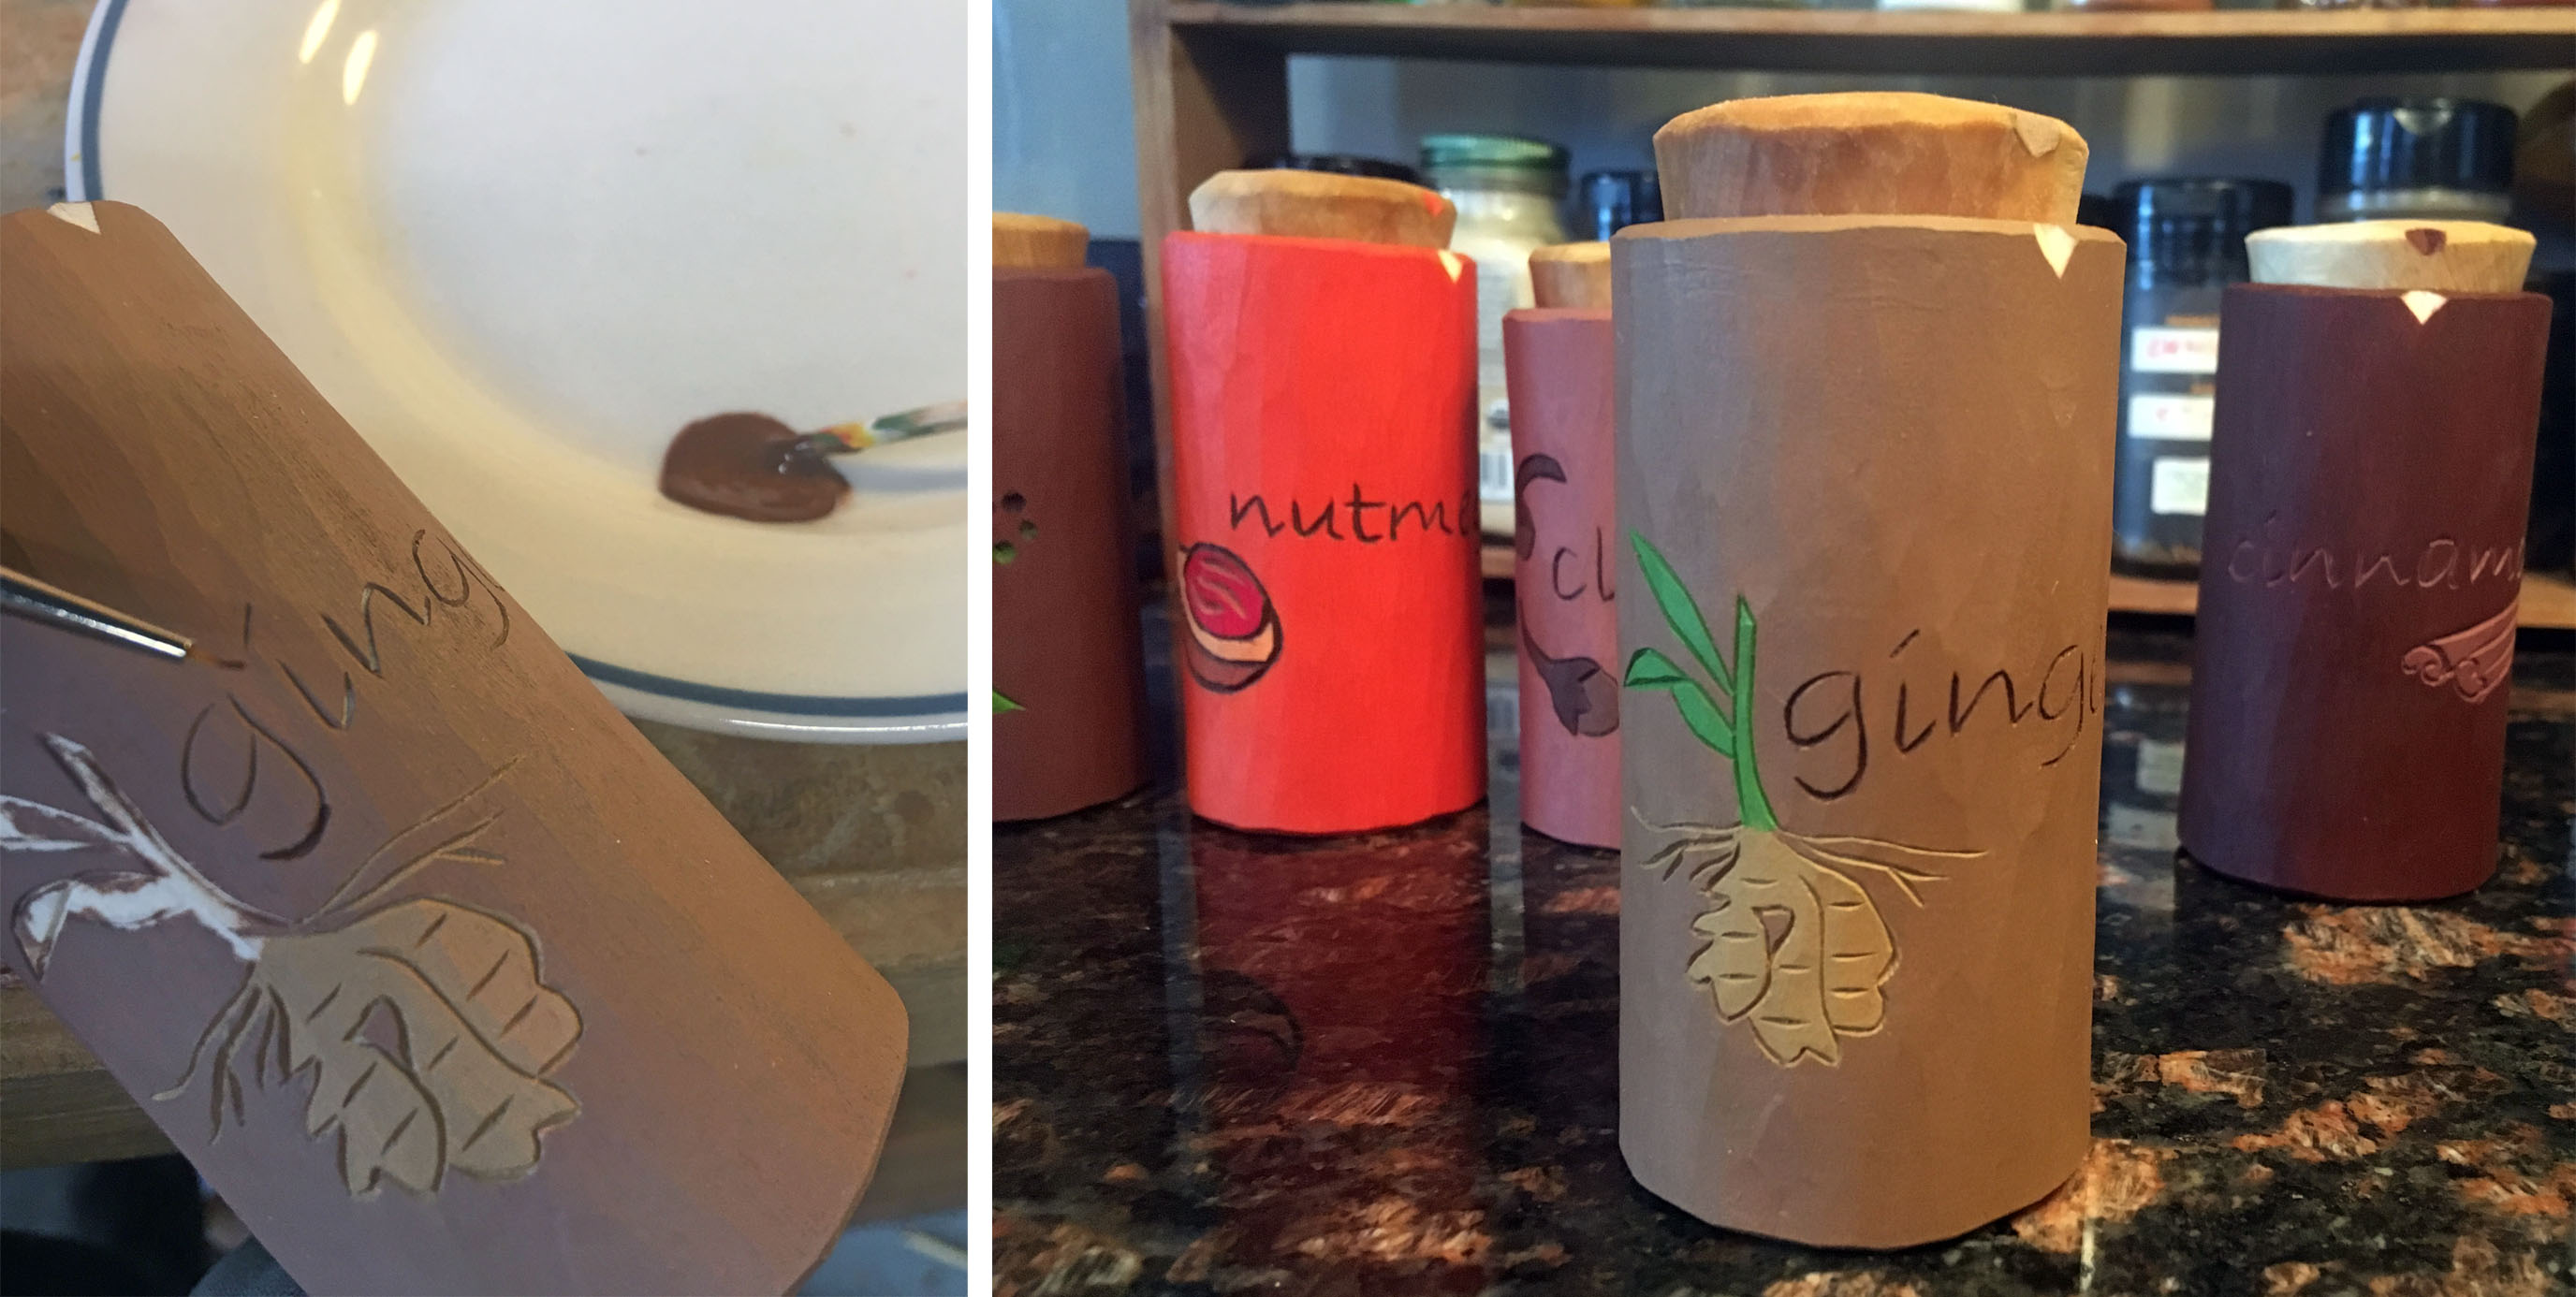
Although I’m intrigued by geometrical styles of chip carving, I’ve been mostly exploring what is referred to as freeform chip carving, which generally takes the form of long flowing lines combined with smaller shapes to create designs that mimic the natural world such as plants, animals or really anything you could imagine. I’m still on the shrink box journey that I wrote about in my last blog, and these little containers are the perfect project with which to explore chip carving. Over the past couple weeks, I’ve been making a bunch of spice jar sized shrink boxes and I am now using chip carving to add the name of the spice and an image to each jar. Below is a series of photos showing the methods I use for carving into these little containers. After penciling the design, I use the chip carving knife to slice out long smooth cuts, doing my best to meet the bottom of each initial cut with a paired cut that leaves a clean line in the wood. Tight corners are still challenging, but it’s fun to push the limits.
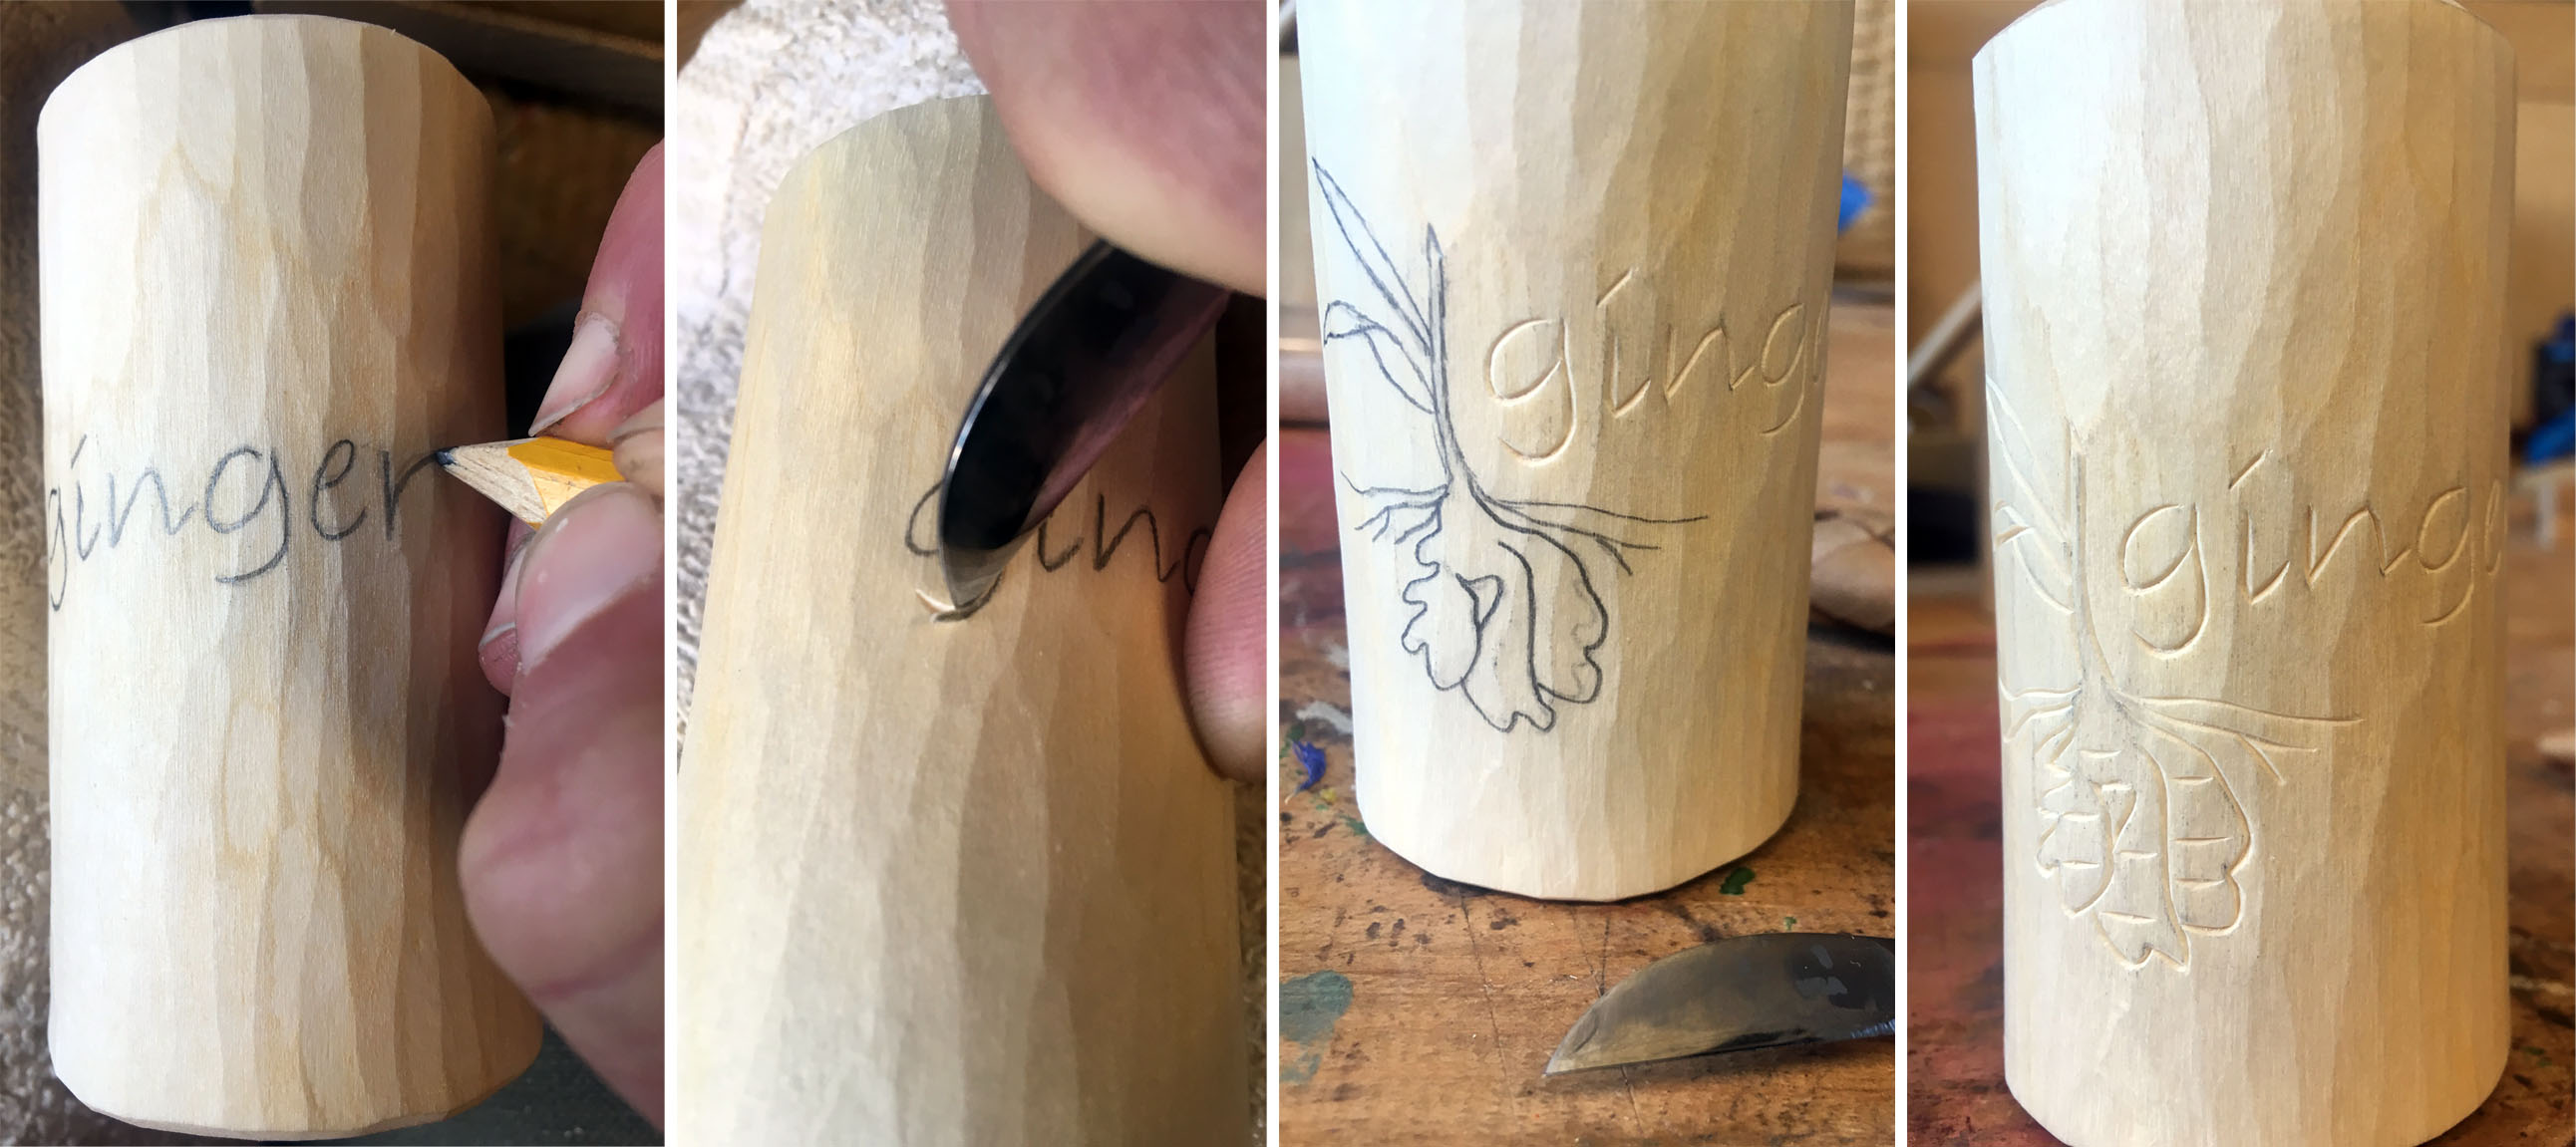
After finishing the carving, I get to explore paint and color. I’ve been working with milk paint, acrylics, and oil paint to learn about the various finishes and methods required to achieve the look I’m trying to obtain. I’ve been having a lot of fun mixing colors and using teeny tiny little brushes to fill in the letters and images. I’ve been called crazy by numerous people so far, but I just love painting the little details while sitting in the studio listening to music or an audio book.
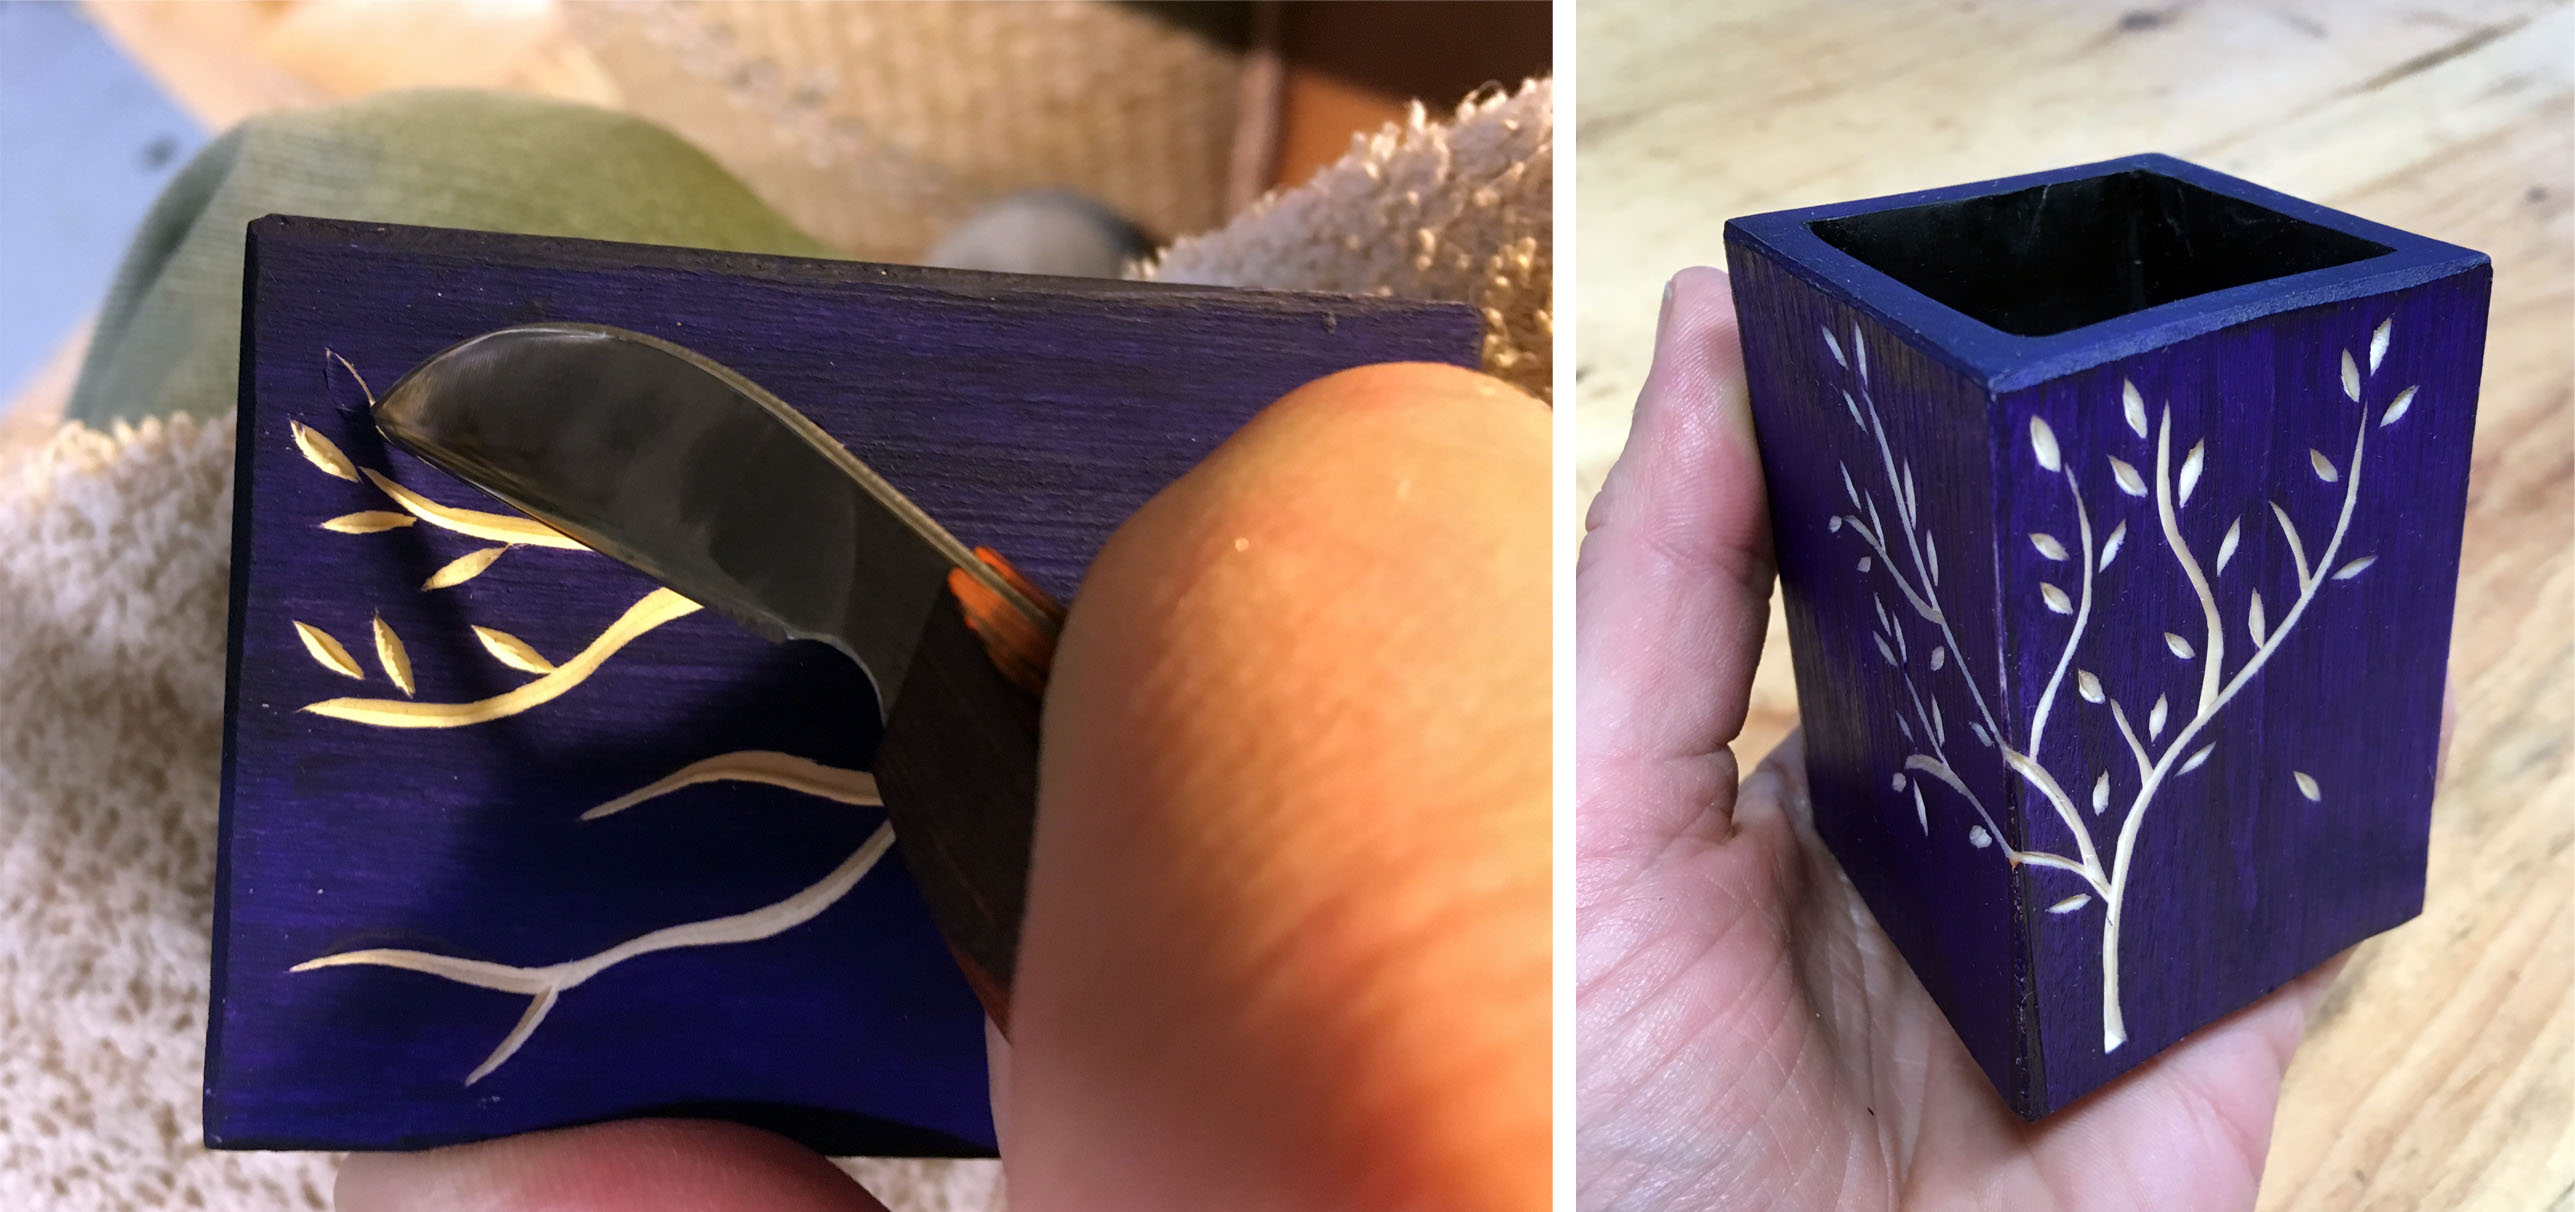
In addition to my ongoing spice jar adventure, I’ve been continuing to play around with different forms of shrink boxes. I want to make square or rectangular ones for storing loose tea, so I made a small square shrink box as a test run on how to hollow it out and how to cut the groove for the base into the very corners of the box. With my trial run finished, I had a little box that was in dire need of some chip carving decoration. I wanted to try out the method of painting the box first, then carving through the paint so the bare wood creates the pattern. I painted the box in a deep purple-ish blue then carved the image of trees through it using the combination of long smooth curves and smaller pointed ovals. Though there were no tiny details for me to paint with my little brushes, I really like the results and plan to continue exploring this method as well as many more.
