
Practicing Color Alchemy: Getting Started
Take your first steps down the path of natural dye work. In this blog post, Liz O'Brien offers a step-by-step guide to the mesmerizing process of color alchemy.
If you have a curious mind, a couple pots and spoons, and a little extra time on hand, you’re in good shape to wander down the path of natural dye work. Be warned, it is a multi-step process that can be all-consuming, yet is almost always well worth the time and effort put into it.
To practice color alchemy, there are a few essential steps to assess when starting out. The following are a few of those considerations:
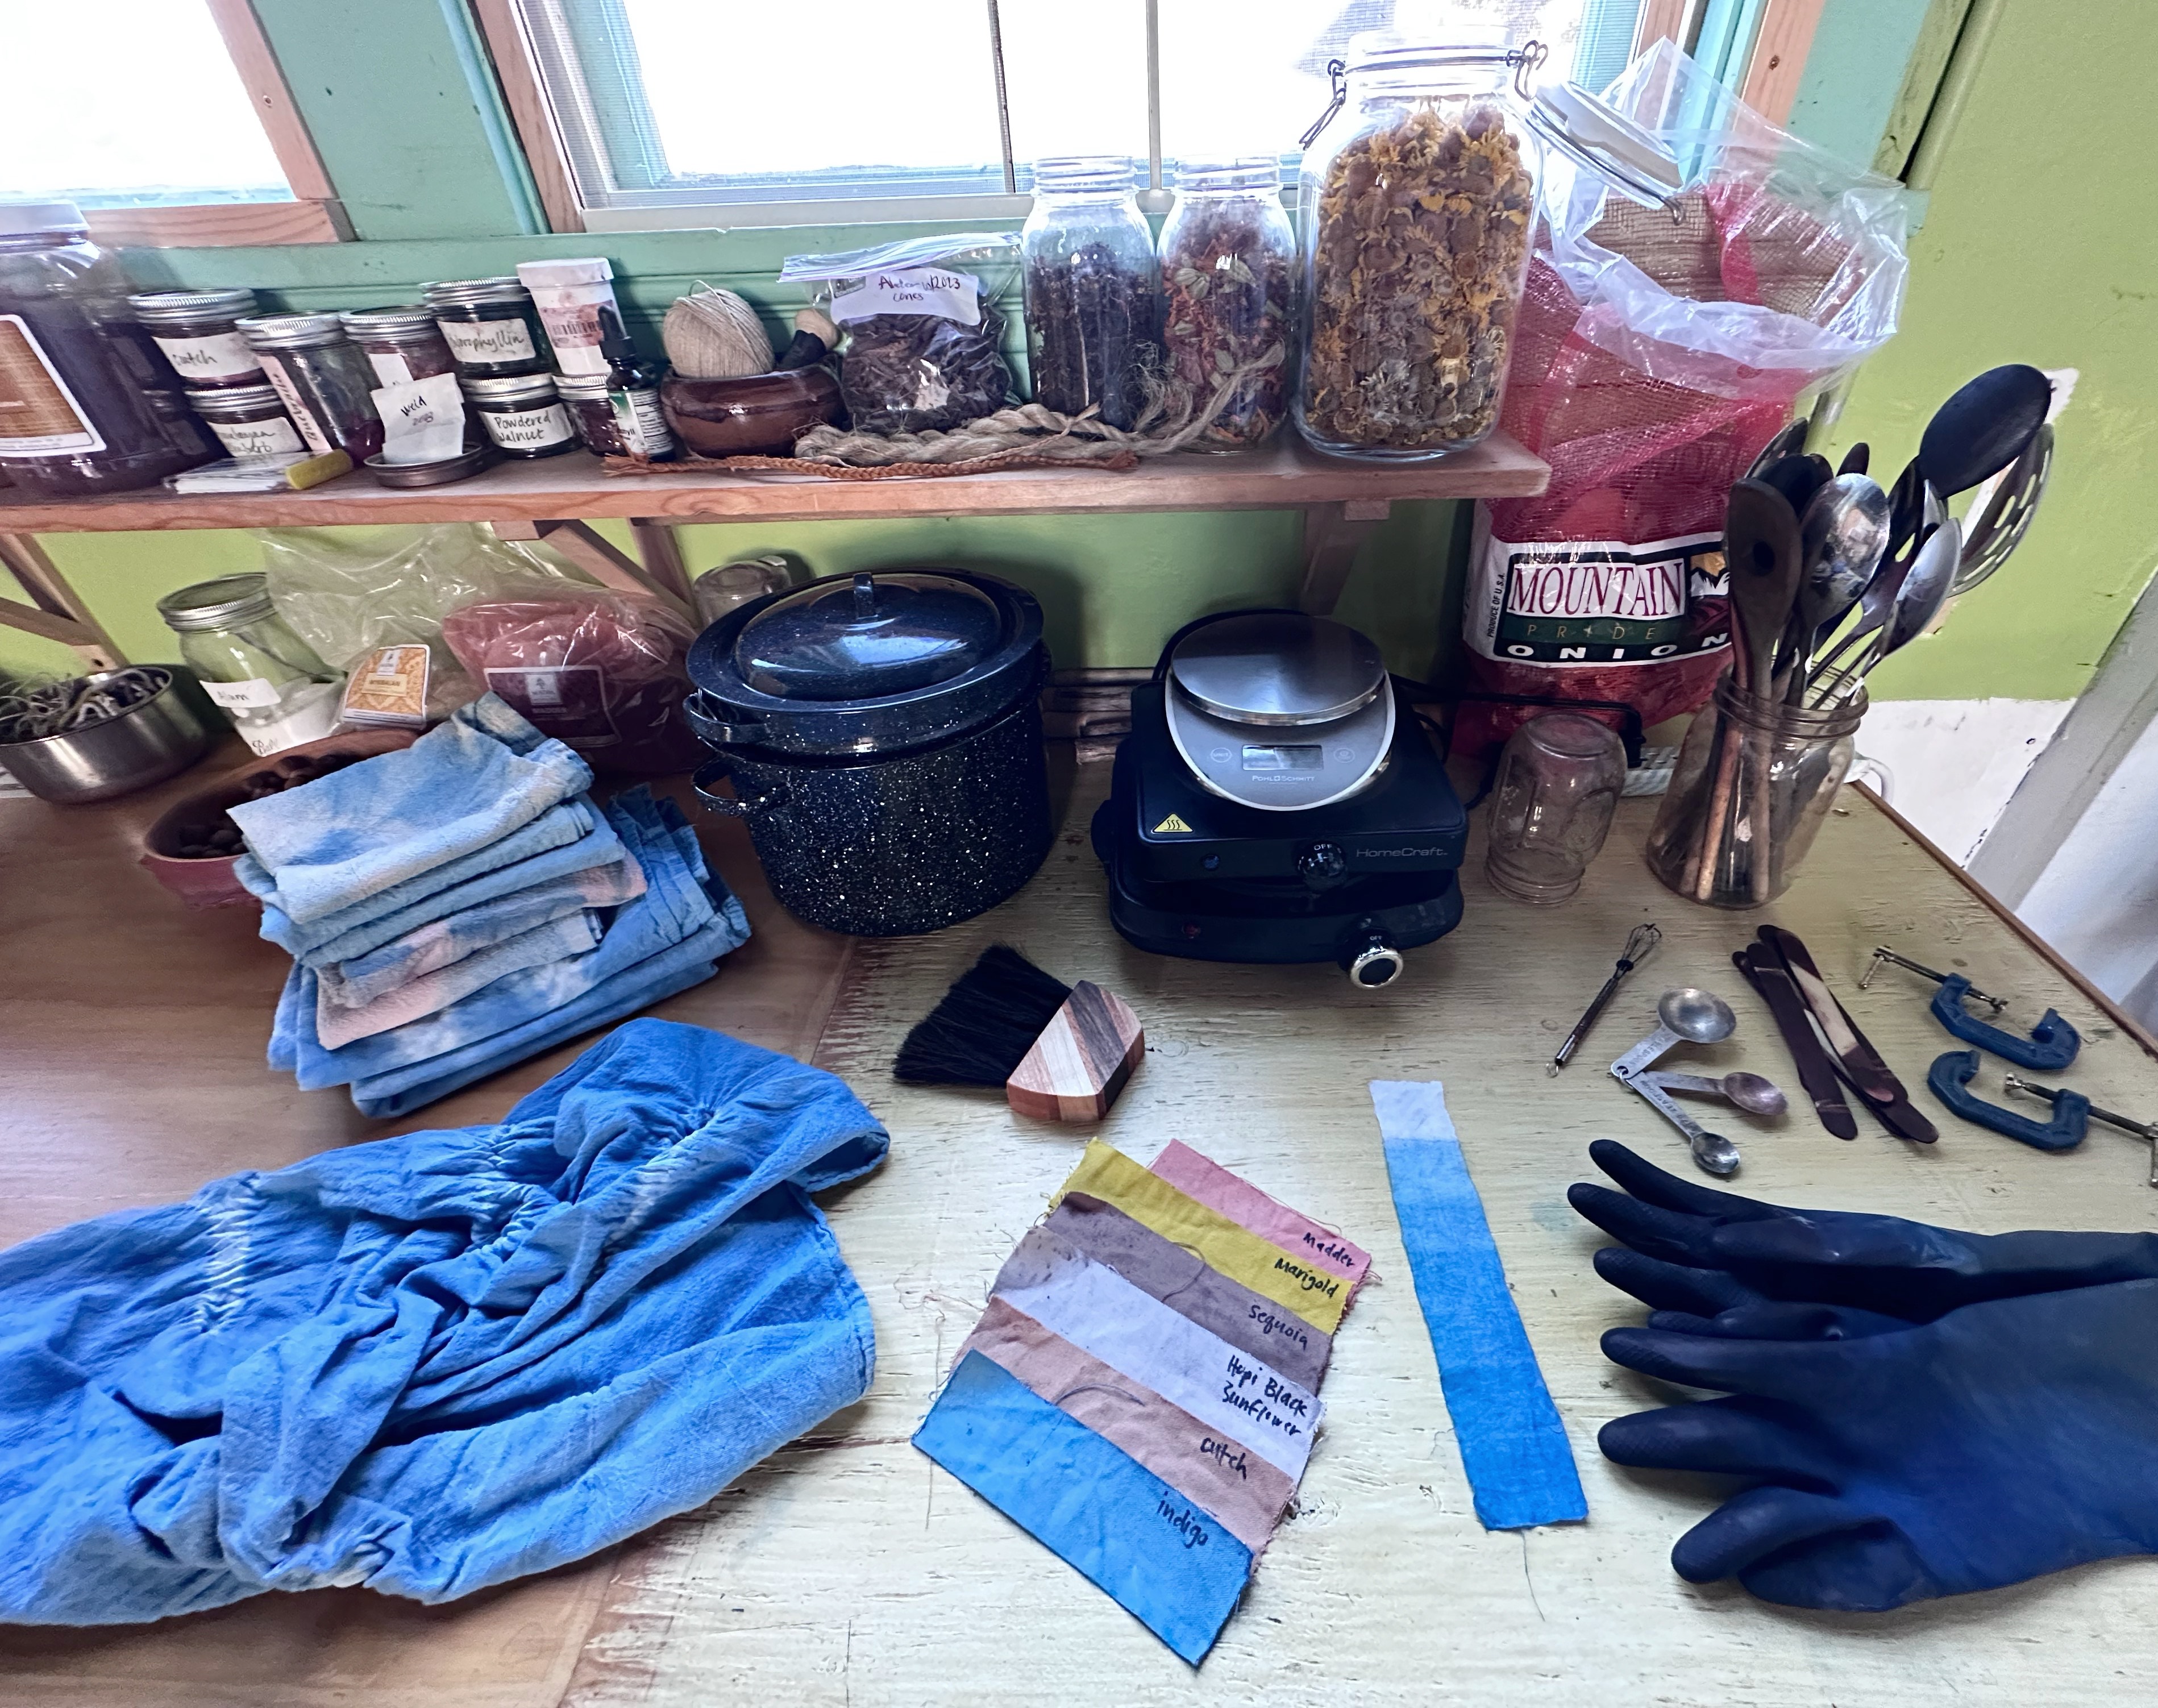
1 - Dye Space - Almost anywhere can become a studio space - kitchen, garage, shed, etc. Wherever you plan to practice, take care in being organized, especially if it’s a multi-purpose space. Next, consider some of the tools to get started - a few large stock pots, stirring spoons, measuring spoons, a strainer, a small kitchen scale, a heating source (if not using your stove), and rubber gloves. It’s very important to note that once you use a pot or utensil for dye work, it should NEVER be used for everyday cooking afterwards. Though natural dyes are (mostly) plant based and environmentally safe, it does not mean they are always safe to be ingested.
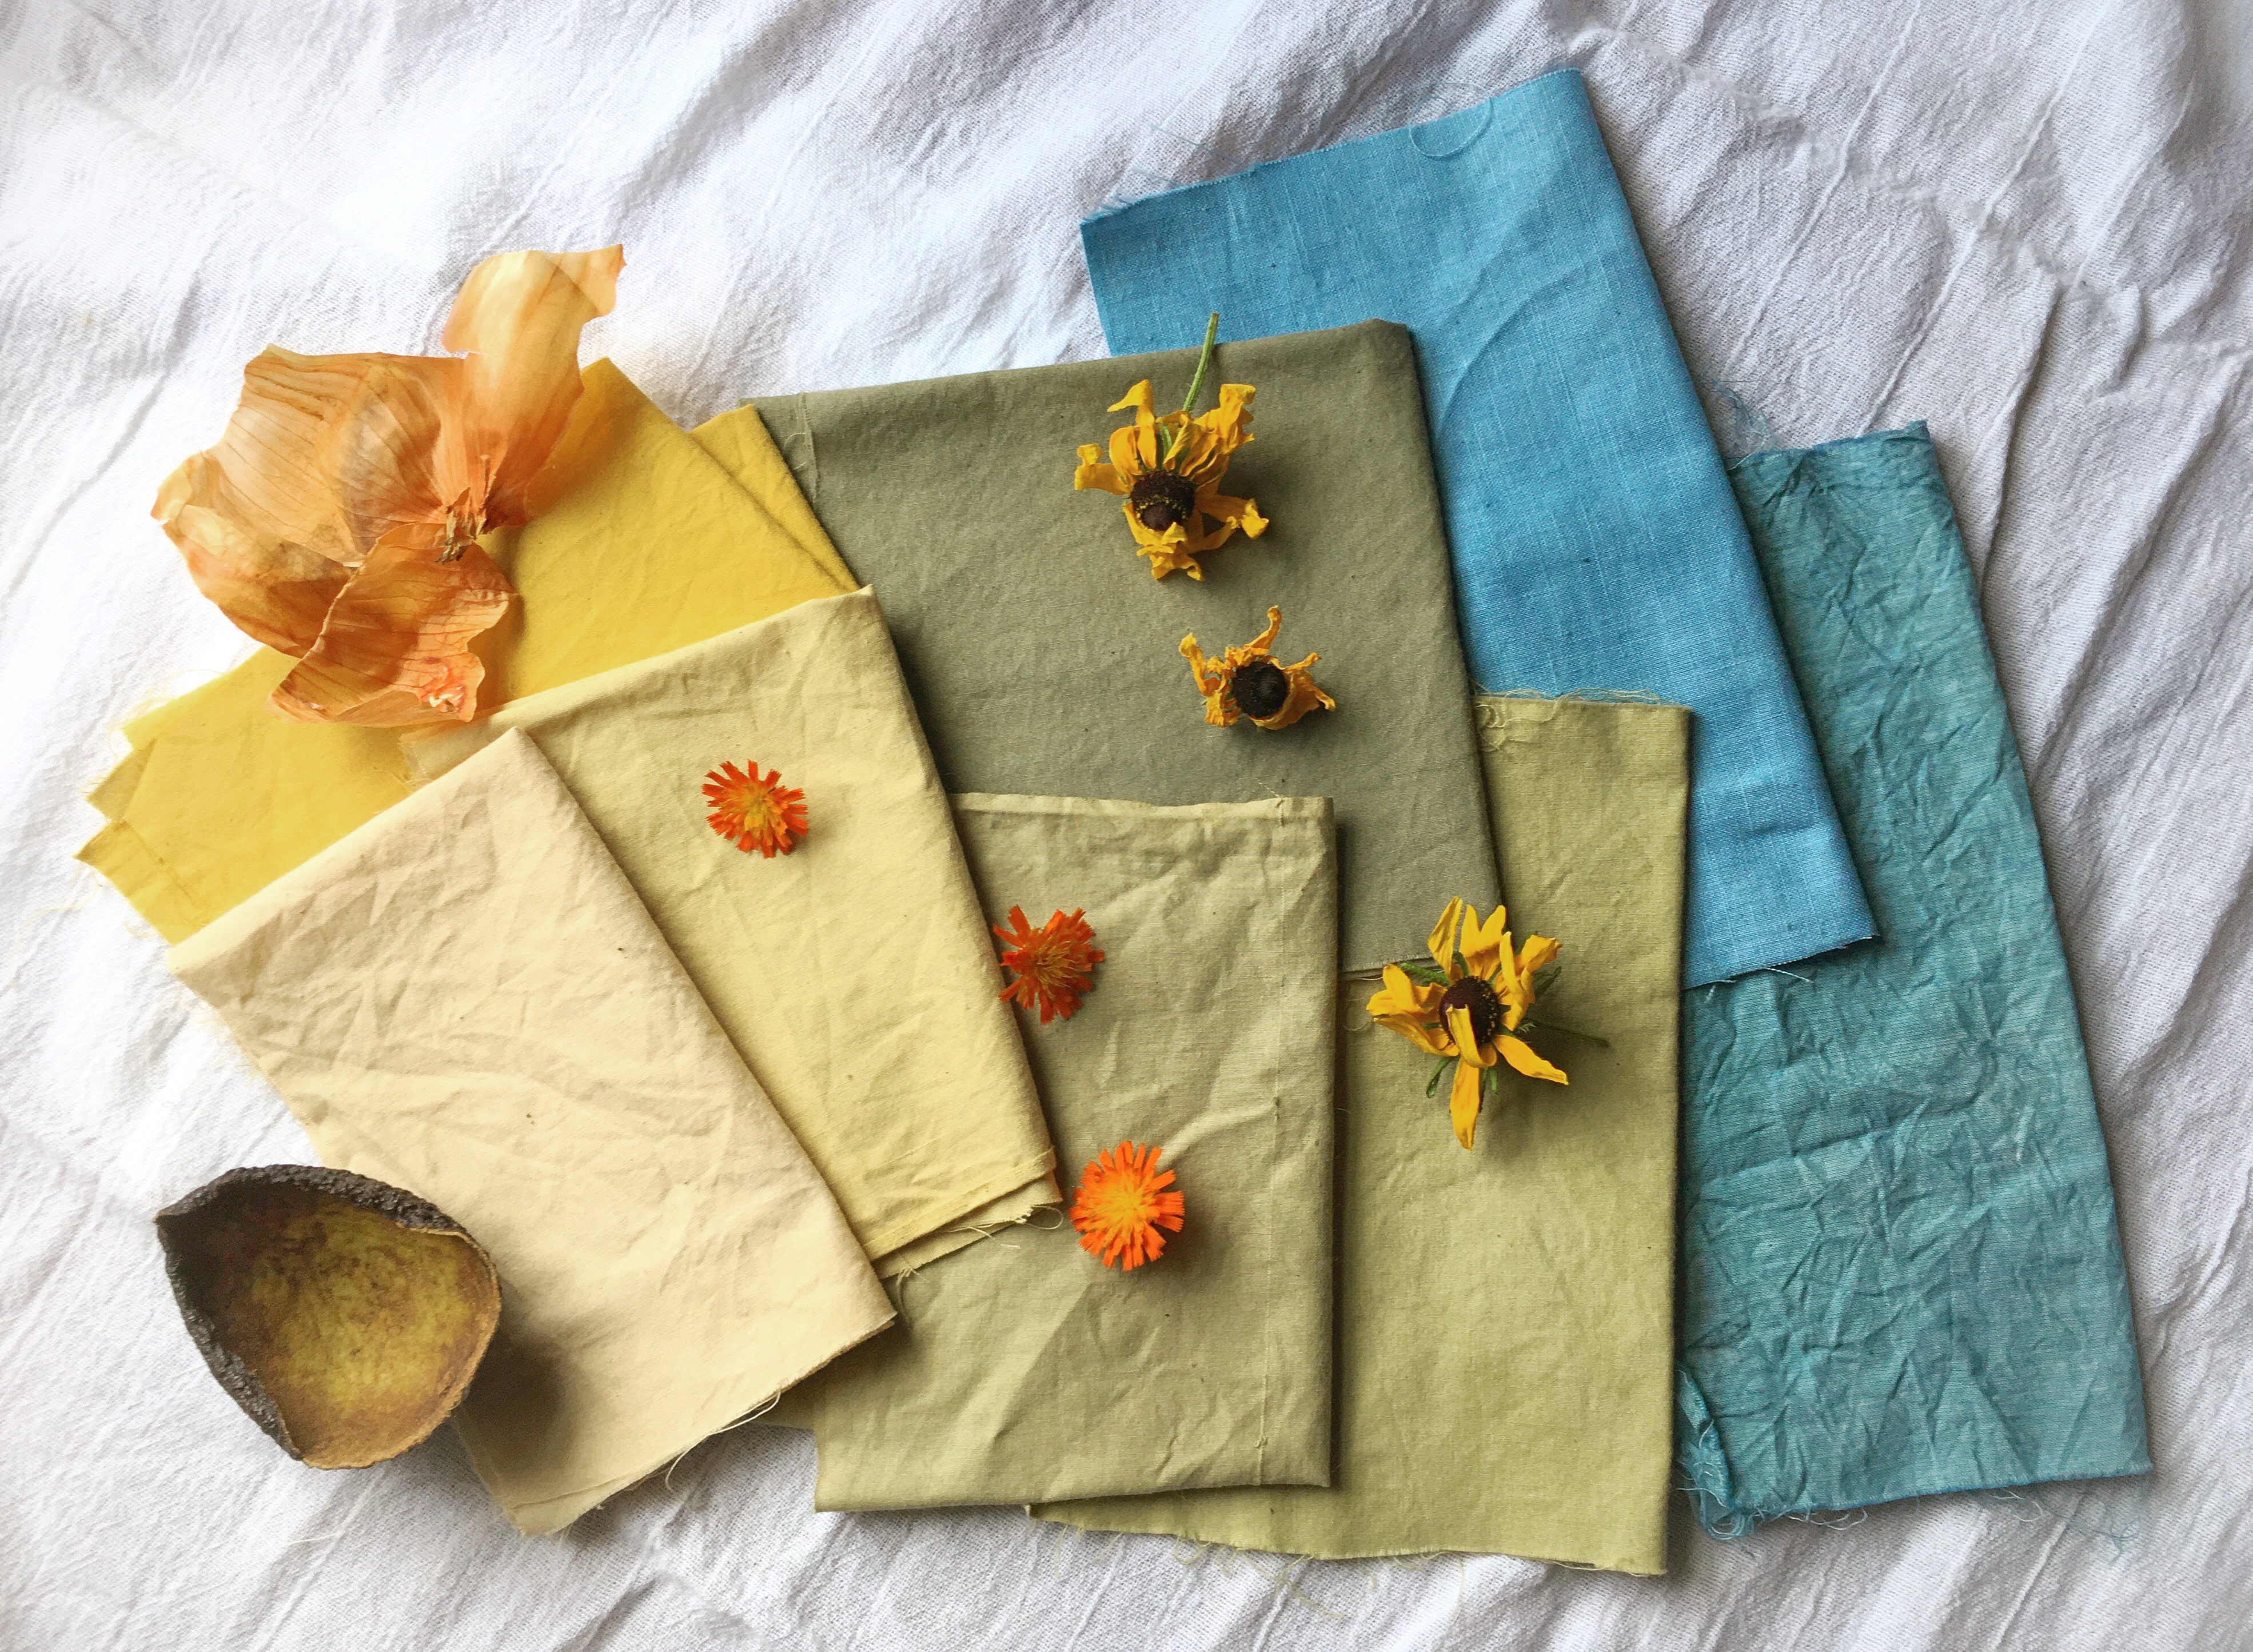
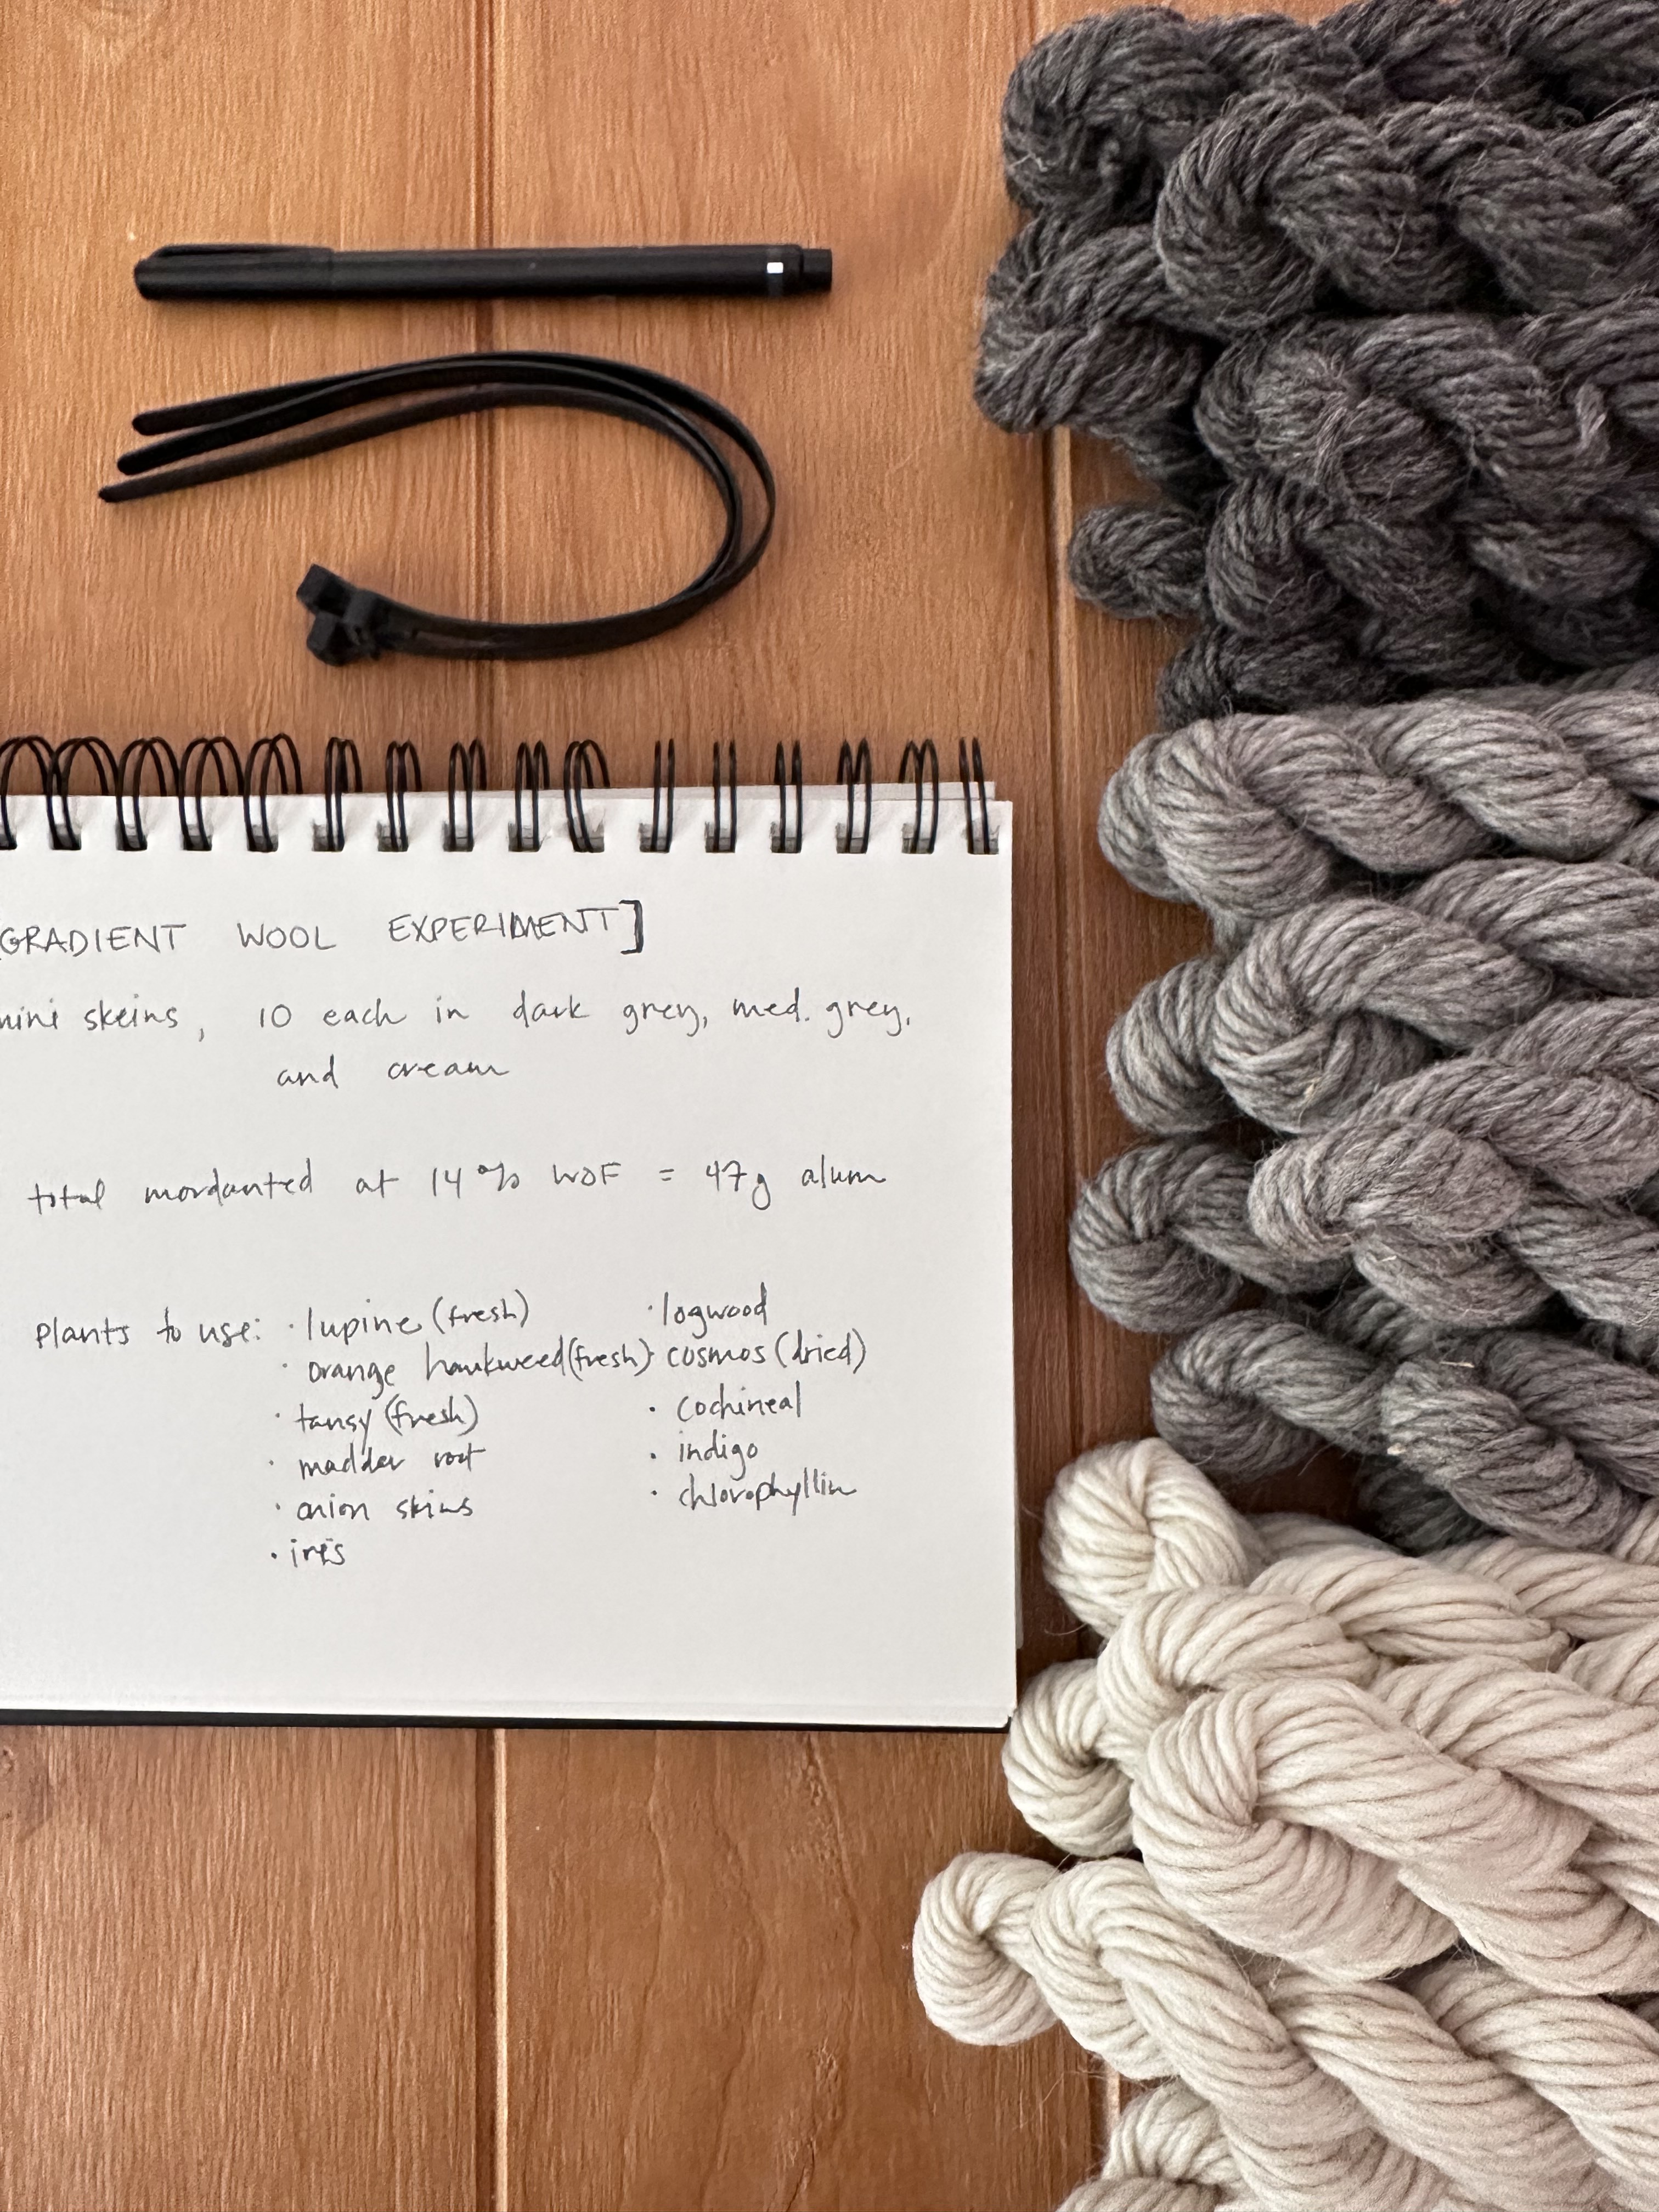
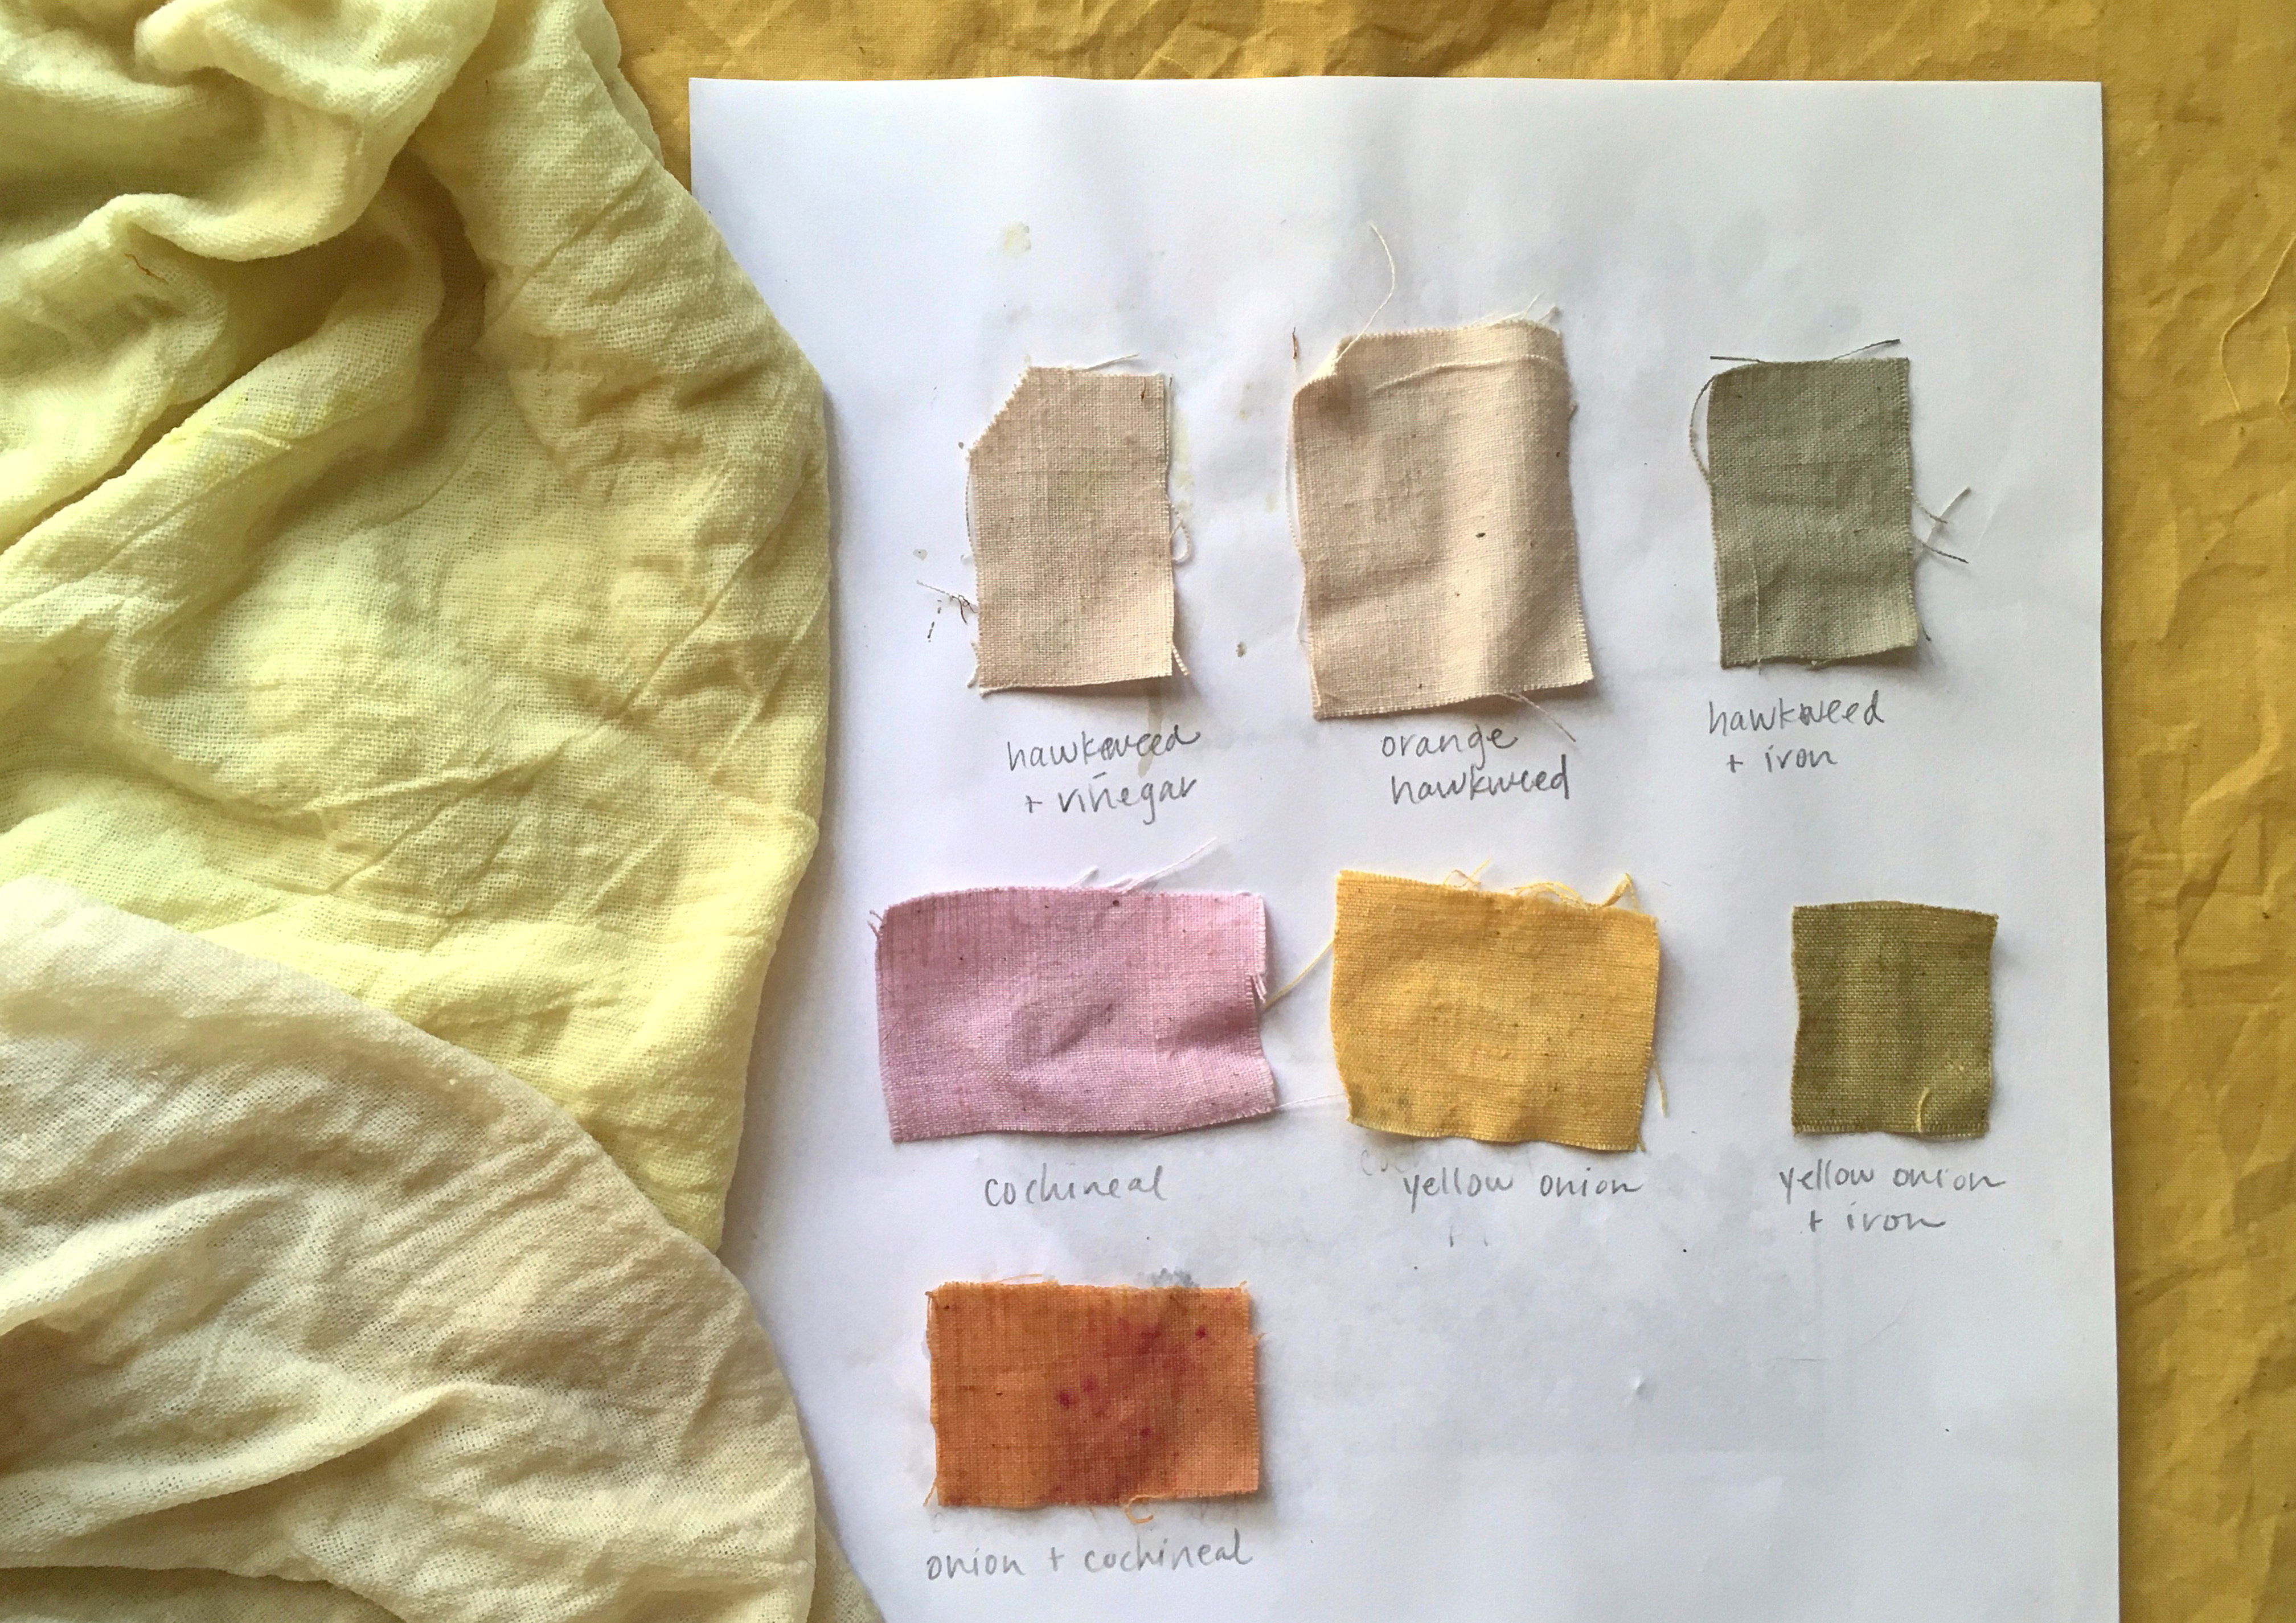
2 - Dye Apothecary - One of the simplest places to begin sourcing dye materials is your kitchen and garden. Onion peels, coffee grounds, irises, and marigolds are commonly found dye sources that create a range of colors. In addition to dye materials, you’ll also need mordants and tannins - more on these later!
3 - Fibers - In order to become a successful natural dye alchemist, you must start with natural fibers. Natural dyes do not bond well to synthetic fibers. Wool, silk, cotton, linen, and hemp are commonly used fibers. A good starting point is to look through your own closet or at thrift stores for goods to experiment with. An old cotton bed sheet is a great option to cut up for testing out colors!
4 - Weight of Fiber - Now that you’ve established your dye space and acquired the necessary tools and fiber to dye, the next step is weighing out all the goods. WOF is a common abbreviation dyers use to denote the weight of fiber. It is always taken when the goods are dry and is the starting point for all the work you’ll be doing after this point. Record the weight on the selvedge edge of the fabric or in a notebook that can be referenced easily.
5 - Scouring - Now that you’ve weighed all your goods, you’re ready to scour them! Scouring is important to achieve even dye colors and can be done with a mild detergent combined with soda ash. The amount of each is based on the dry weight of your goods. This process can take anywhere from an hour to a whole day depending on the amount of goods you’re scouring.
6 - Mordants/Tannins - The next step is to apply a tannin and mordant to your scoured goods. Tannins and mordants act like glue for natural dye molecules. Depending on the type of fiber you’re working with there will be one or two parts to this process. For protein fibers, you can skip directly to mordanting. Plant-based fibers however, must be treated with a tannin first and then mordanted. This is arguably one of the most important steps of natural dye work as you are laying the foundation on which natural color will be applied. The percentage of mordant or tannin needed is based on your WOF. Have patience, grasshopper, and take care during this step of the process as it can take anywhere from 6-24 hours, sometimes longer. You will thank yourself later.
7 - Color Alchemy - the reason we are here! The most charismatic part of the process and where you begin to see the fruit of all the preparation you’ve been doing. Dyeing can take anywhere from 2-24 hours. The amount of dye material you need is determined by your WOF. You’ll need to extract color from dye materials, strain out the material, allow the dye bath to cool slightly before adding goods, simmer them gently for about an hour while stirring every so often and then allow the goods to cool for a few hours up to overnight.
8 - Rinsing - Once everything has cooled, it’s time to rinse. An initial rinse in warm water and then a second in cool water will remove excess dye. Hang the goods to dry for a few days out of direct sunlight to allow the dyes to cure to fabrics. After a few days, rinse the goods thoroughly until water runs clear, dry and store in a dark place until you’re ready to use them!
Some final thoughts: While you can learn a lot from taking classes, reading books and watching videos, there is no substitute for personal investigation. Keeping a detailed journal is one of the best tools for learning and keeping track of your observations. It takes time and practice to achieve the results you want, and even then, things will sometimes still go awry. Color alchemy can be as simple or complicated as you make it, but one of the most important lessons is to have fun and experiment fearlessly, regardless of the outcome.
If you are curious about dig deeper into natural dye work and for more tips on getting started, some of the books I reference the most include: The Modern Natural Dyer by Christine Vejar, The Wild Dyer by Abigail Booth and Wild Colour by Jenny Dean