
Exploring Handmade Dustpans
Exploring Handmade Dustpans
By far the most common question I get while demonstrating or selling brooms is “how long does it take you to make a broom?” Many artists and craftspeople cringe at this question. If I dare to answer, I can almost see the equation happening in the questioner’s head, figuring out how much I’m paying myself per hour while not considering material input, studio rent, festival fees, liability and property insurance, transportation costs… I could go on and on. Sure, some people really are just curious, but it is a hard question to answer and I usually start my answer with a story: “Well, it all starts on a winter morning in early February when I strap on my snowshoes and walk into the forest near my home, ax and saw in hand. I carefully select saplings that are what I think of as the right size for broom handles, dig down through the snow…” By this time the attention span has wavered, as it becomes obvious that the simple answer of a specific number of minutes or hours that they were looking for is not going to come.
This leads me to one of the next most common questions I’m asked, often from people who are actually purchasing a broom. The question comes in person, through email, the comment form on my website – it finds its way to me through many different channels and in numerous forms and is simply “now what do I use as a dustpan?” Most dustpans out there are plastic. There are a select few that are made from various sheet metals that are at least not plastic, but at best still not the most aesthetically pleasing and very rarely handmade. And so, just as Quaker Oats introduced Aunt Jemima Syrup, the broom-maker began a foray into handmade dustpans.
Since the question arose so often for me, I had spent a fair amount of time on the internet researching handmade dustpans. The internet is a vast place where people can generally find everything they desire, but handmade dustpans are almost entirely limited to a Japanese version made from washi paper. For the past few years this quandary of how to provide handmade dustpans has been swirling around my mind. After one conversation, my mom even tried to convince my dad that dustpans were his calling – I don’t think he was convinced! I was excited that venturing into this realm would be a connection between woodworking and broom-making, but was also intimidated by the time, tools and materials input that would be required to design, test and start marketing them. And here enters a Career Development Grant through the Arrowhead Regional Arts Council. Dustpans as art?! Well, apparently I convinced them because my application was funded and the journey has been memorable thus far. The last six months has been filled with conversations with former teachers and mentors, learning new methods, working with new materials, or old materials in new ways, and plenty of sweeping to test out the functionality and durability of my designs.
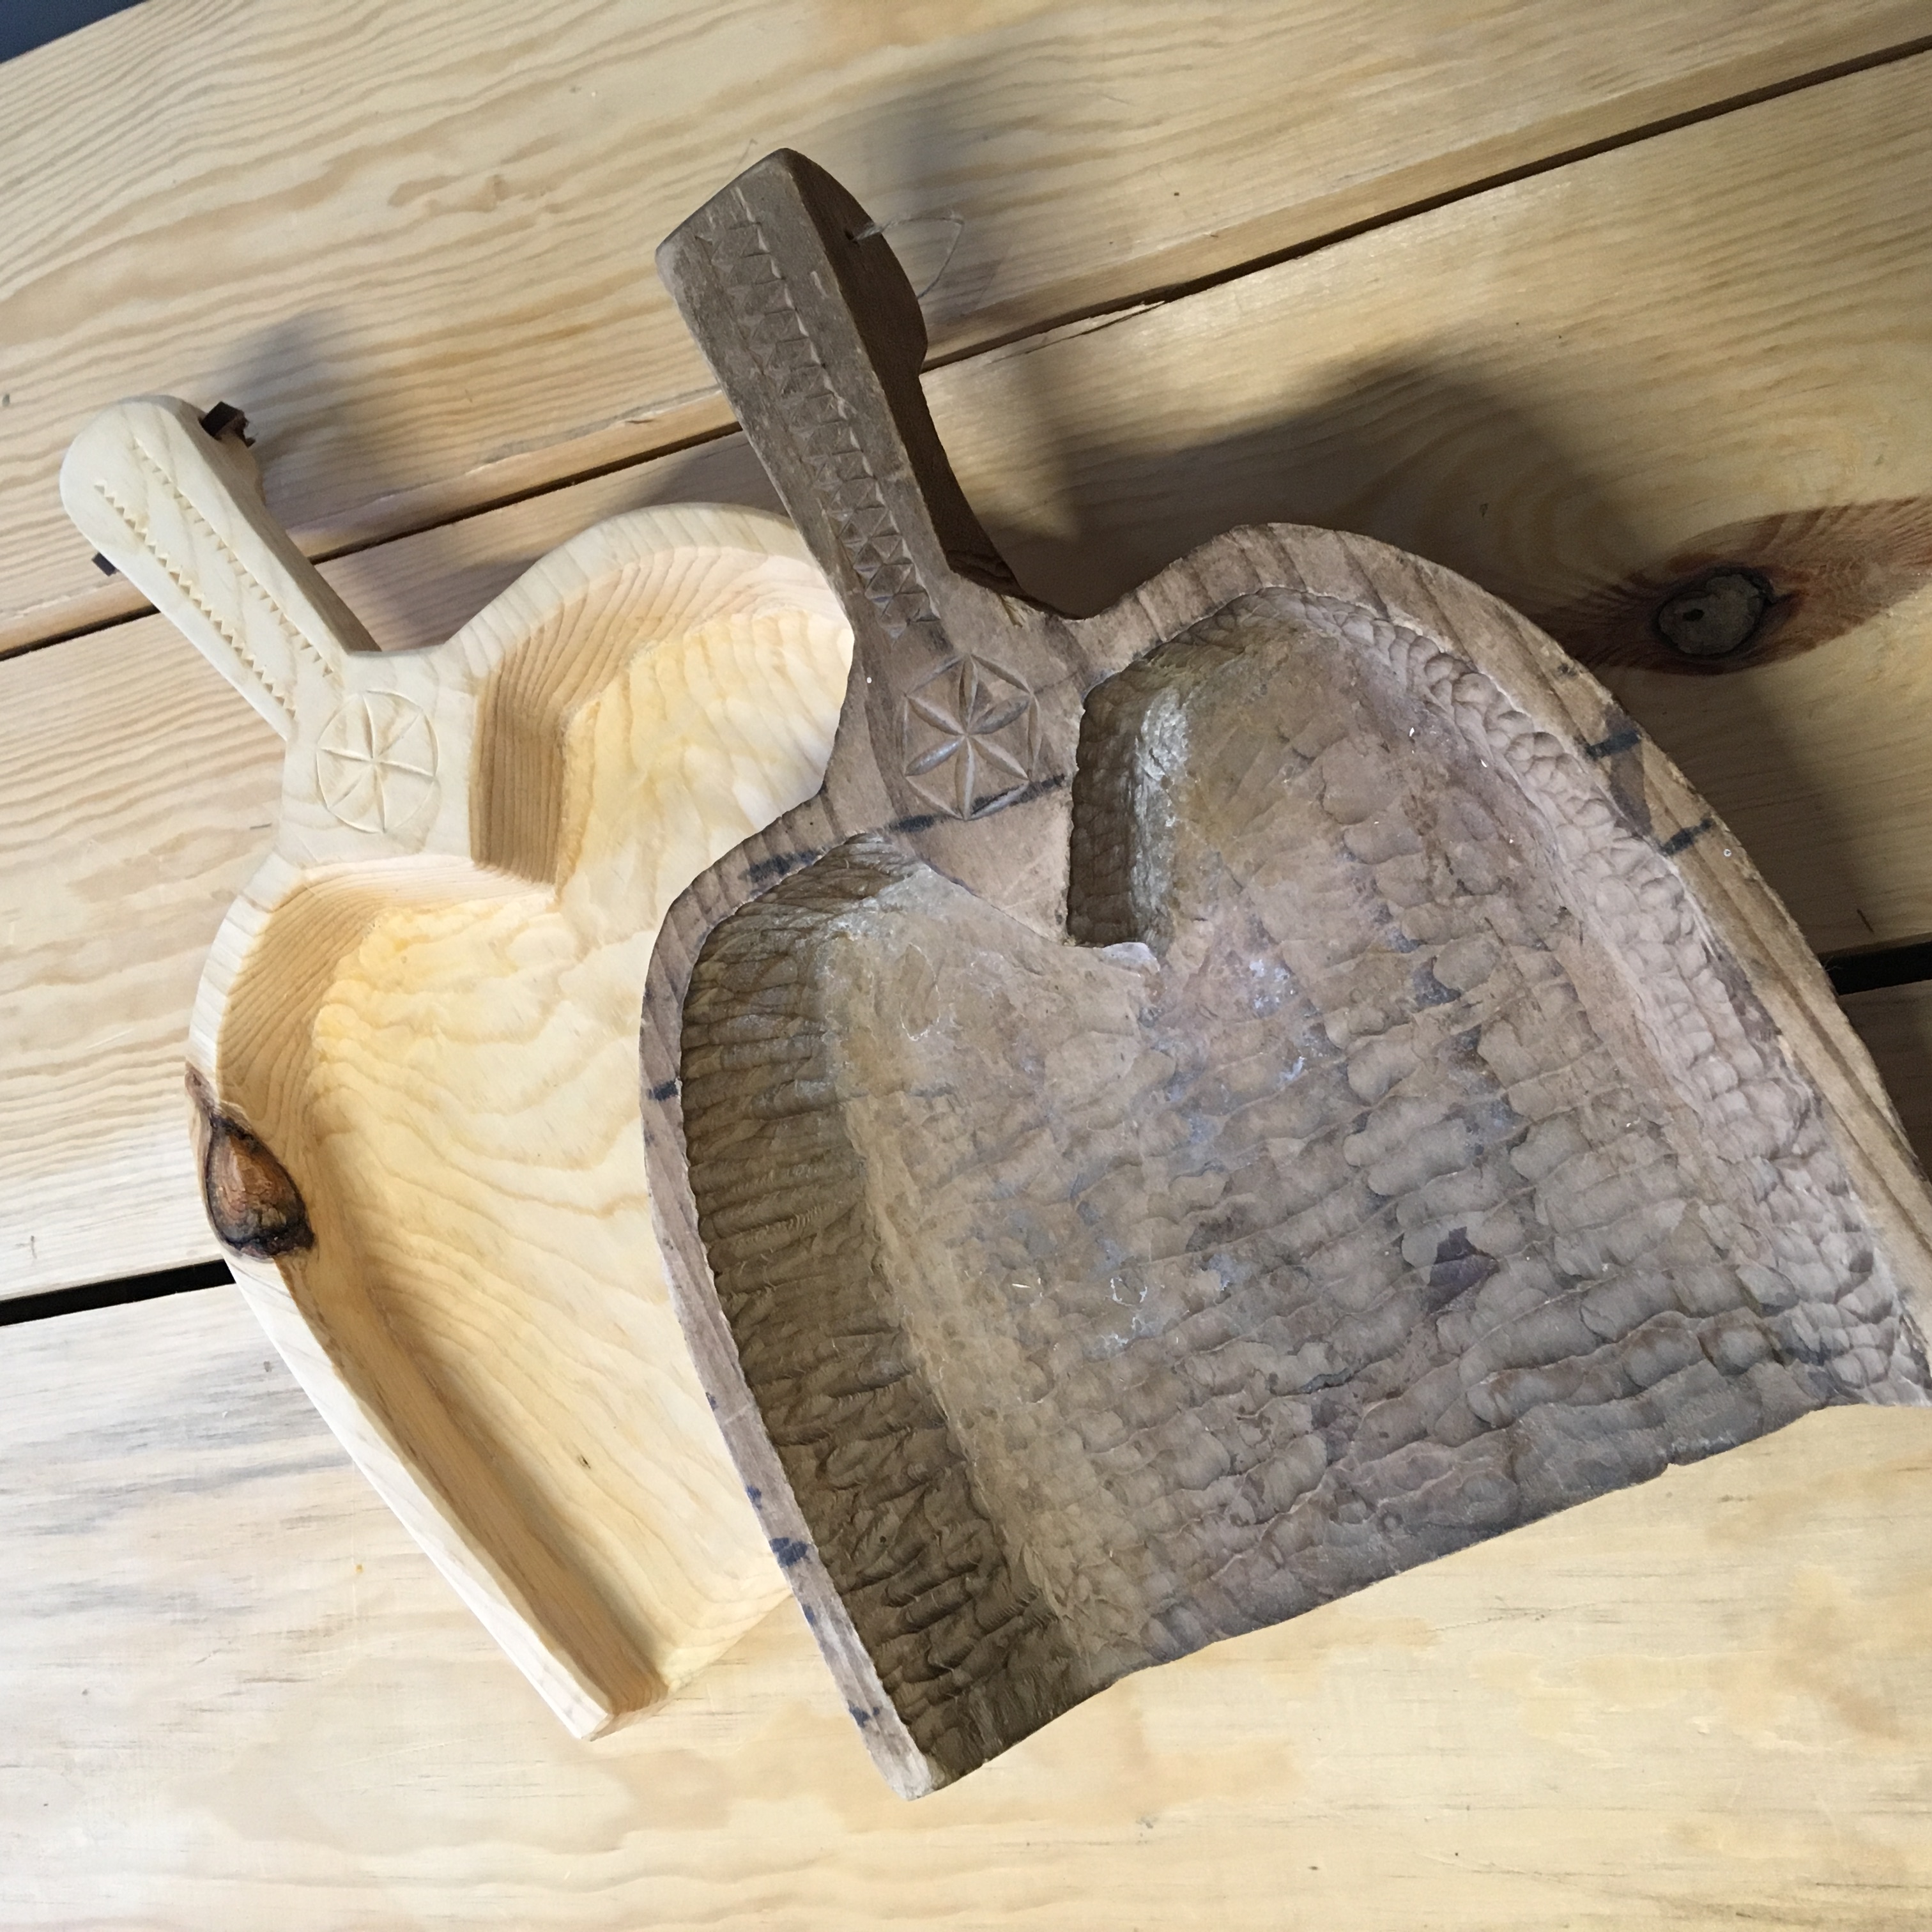
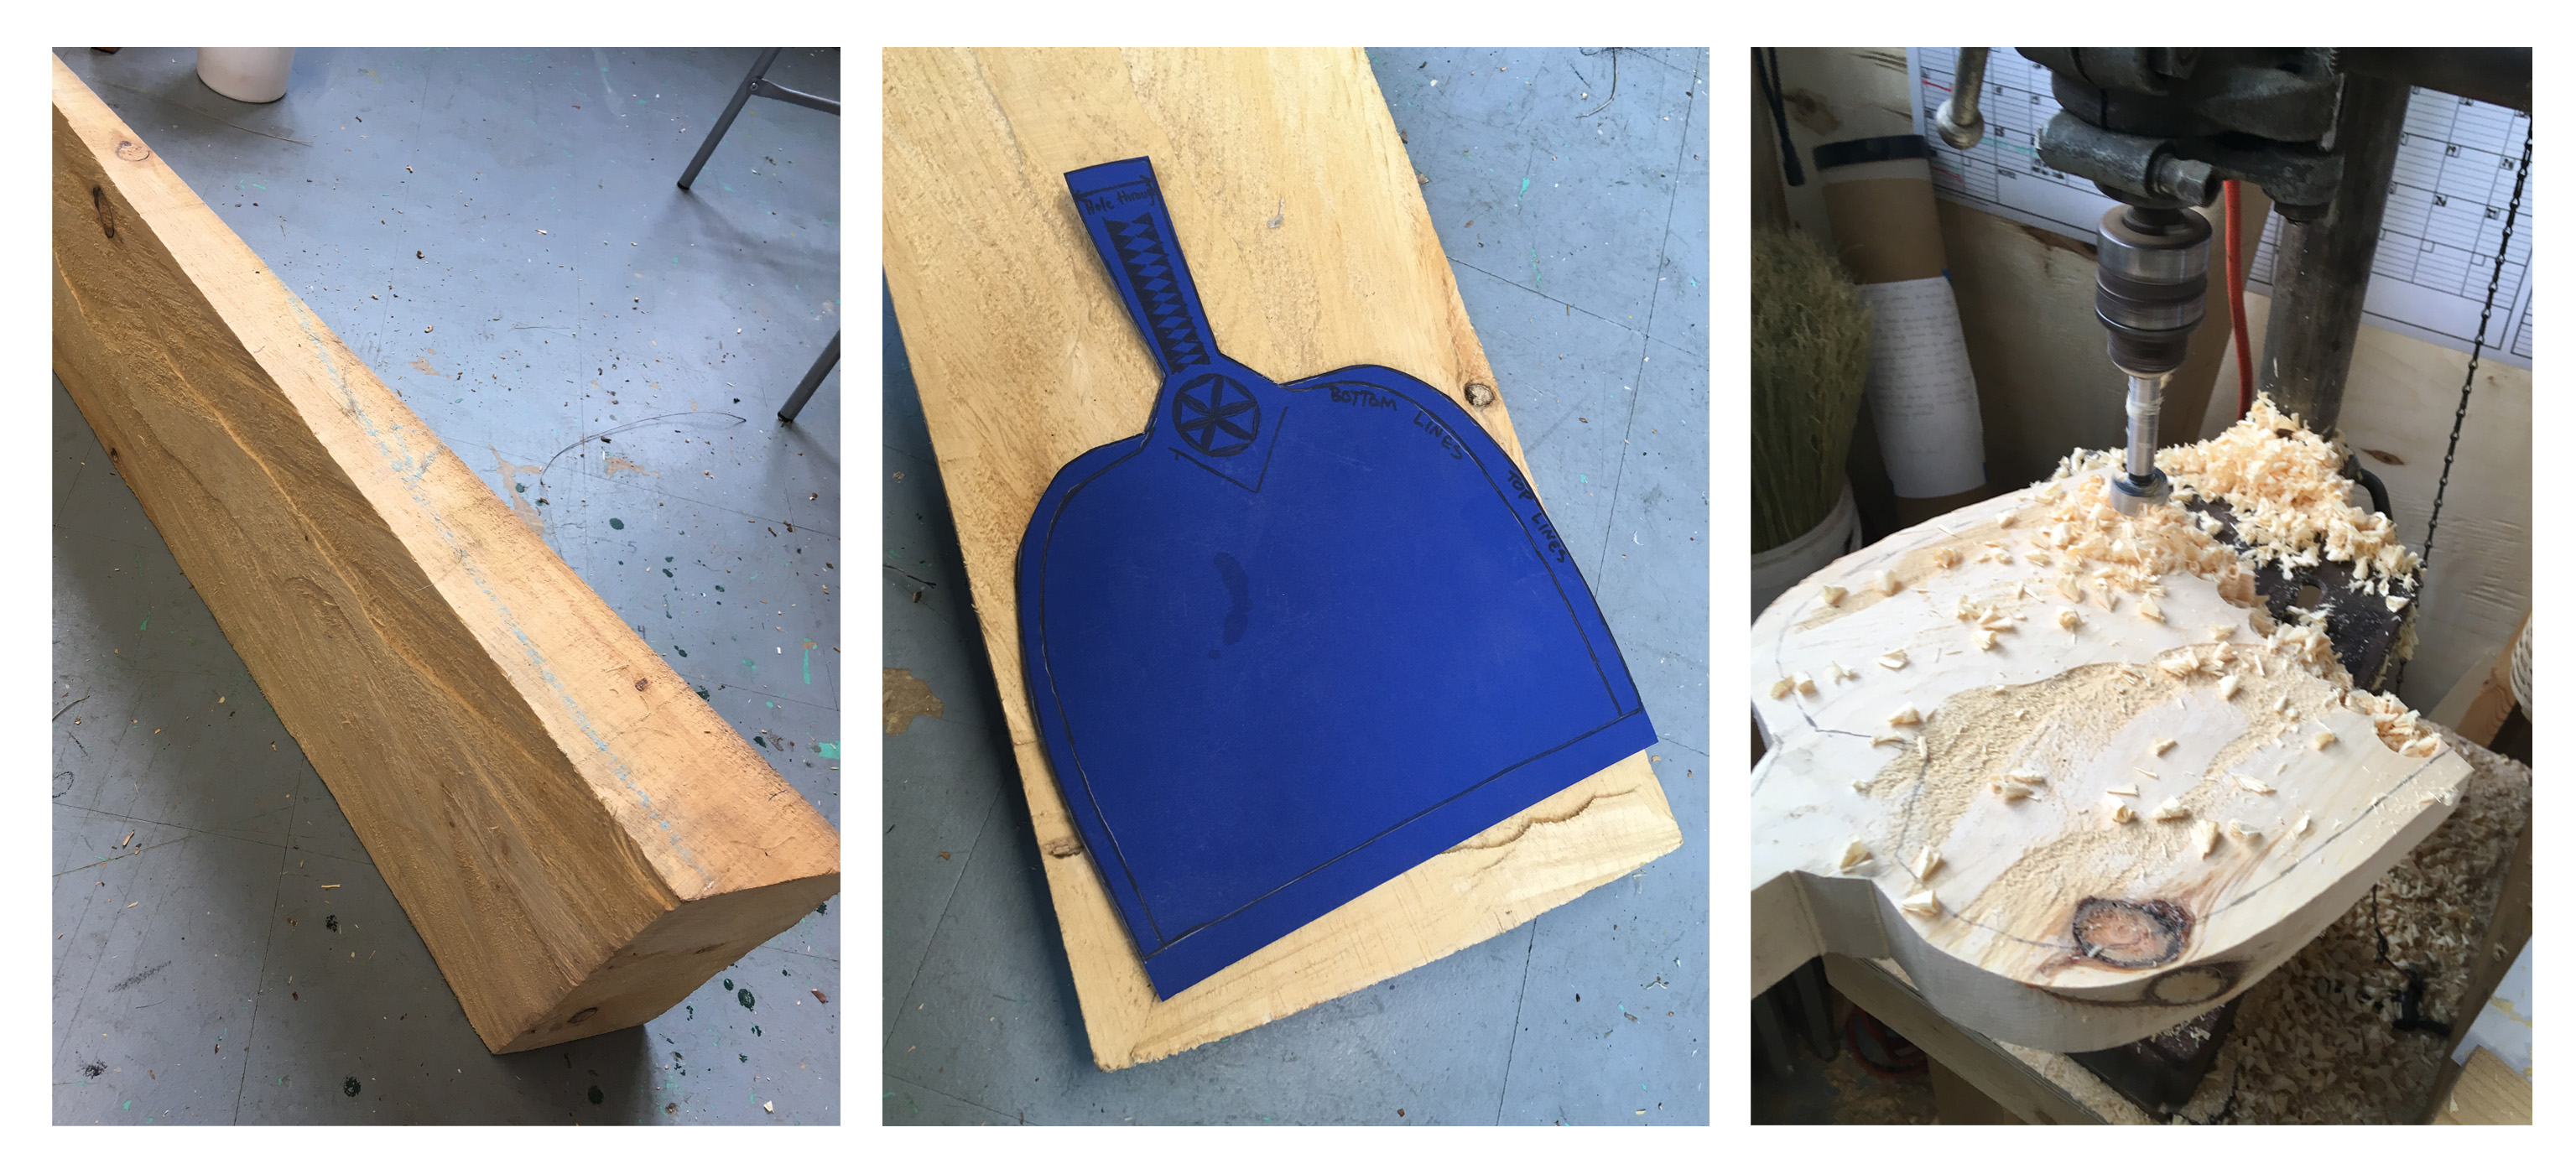
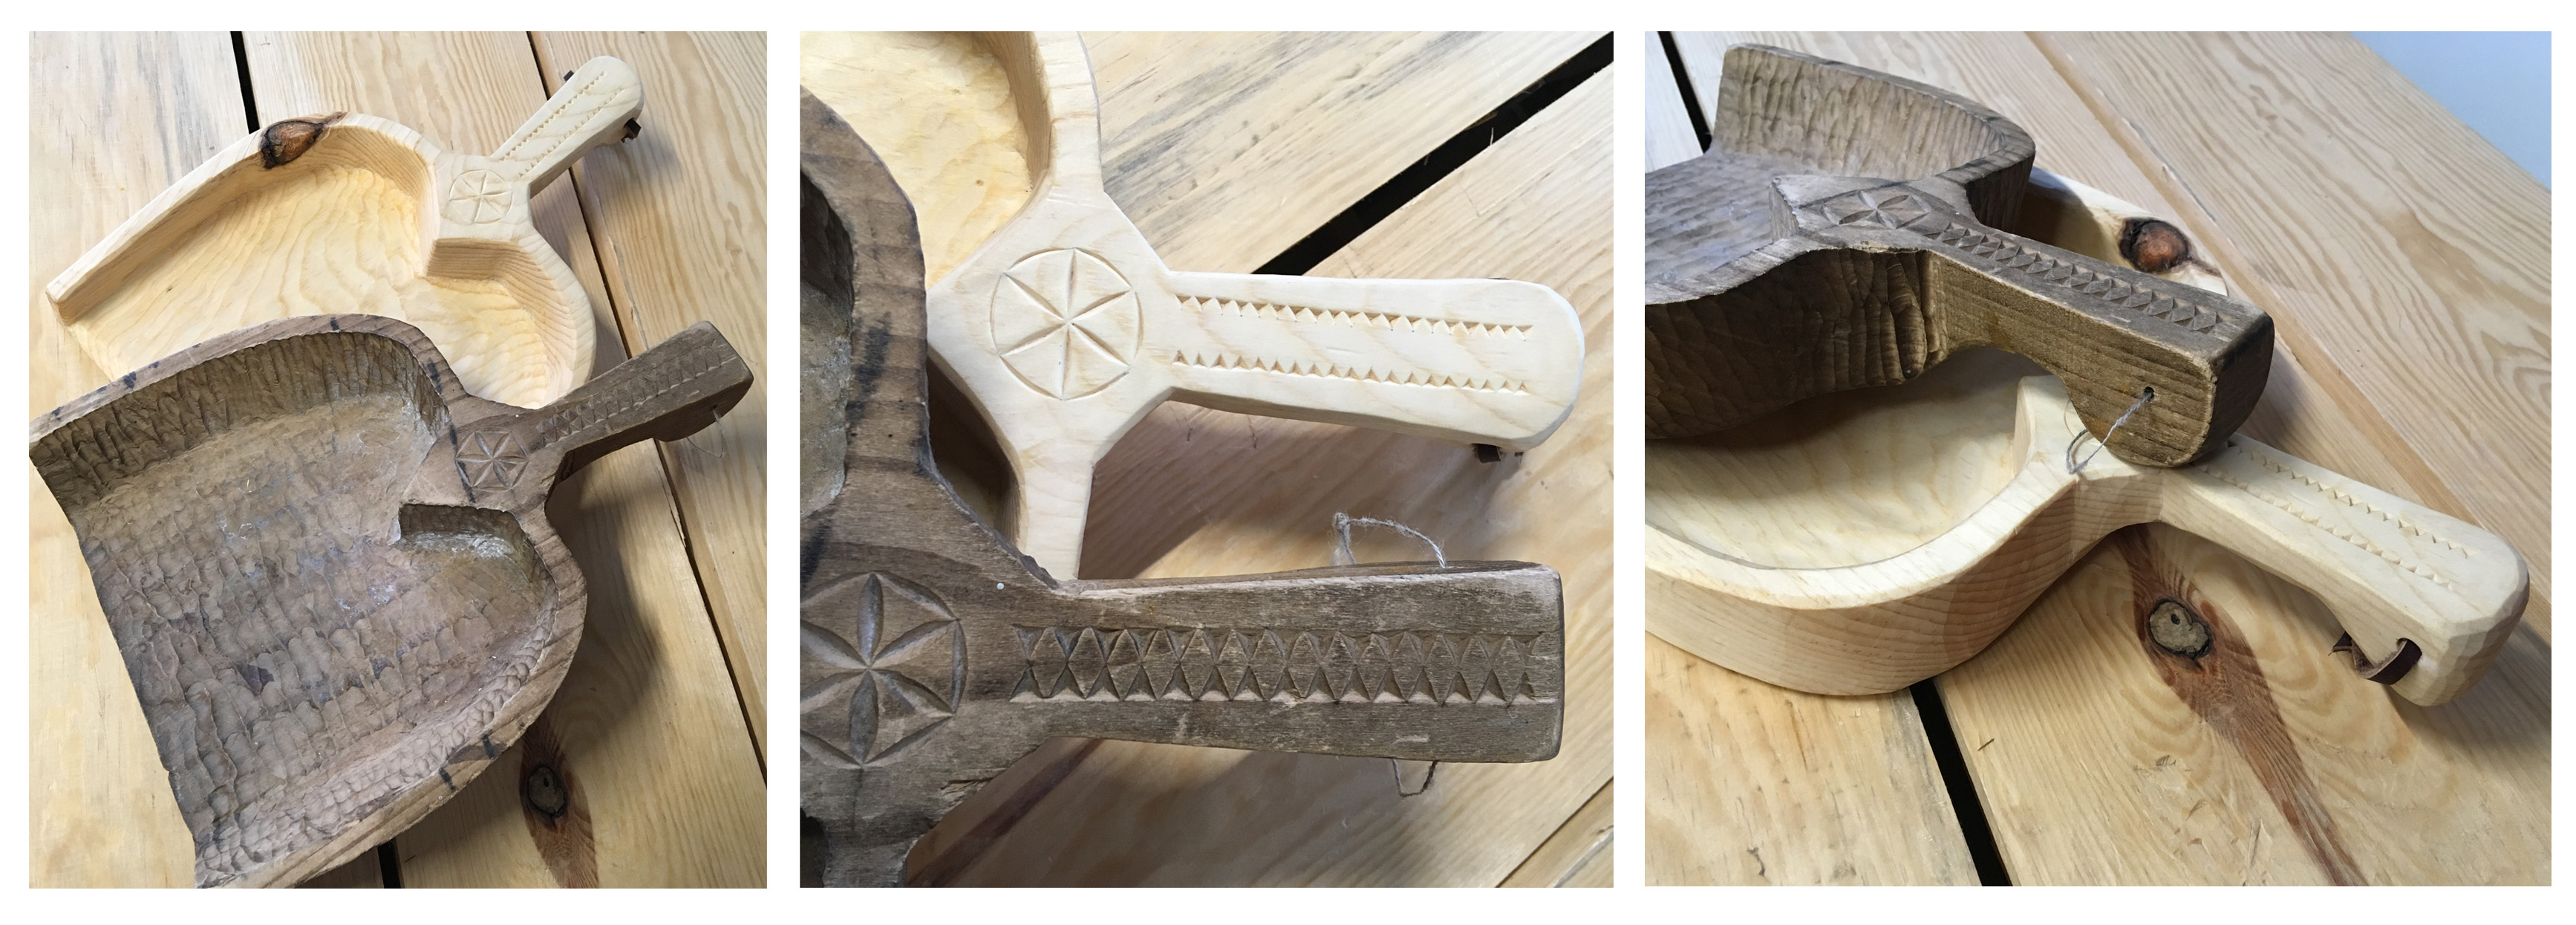
One of my prototypes is based on a dustpan that is hand-carved from one piece of wood – likely pine. Another North House Folk School instructor caught wind that I was interested in dustpans and generously lent me this gem. I traced it, took photographs, studied the tool marks, and pondered for weeks. And then I felt guilty for how long I had it in my possession and returned it. About a week later, I was poking through a pile of offcuts from a timber framing class and pulled out a piece of wood that told me it was meant to be a dustpan. I took it back to my studio, traced the outline onto the wood, cut it out, and got going. I could have removed the material from the inside with an adz or gouge, but I decided on the easy route and took it to my drill press with a Forstner bit mounted in it. Next time, I’m planning to try an adz!
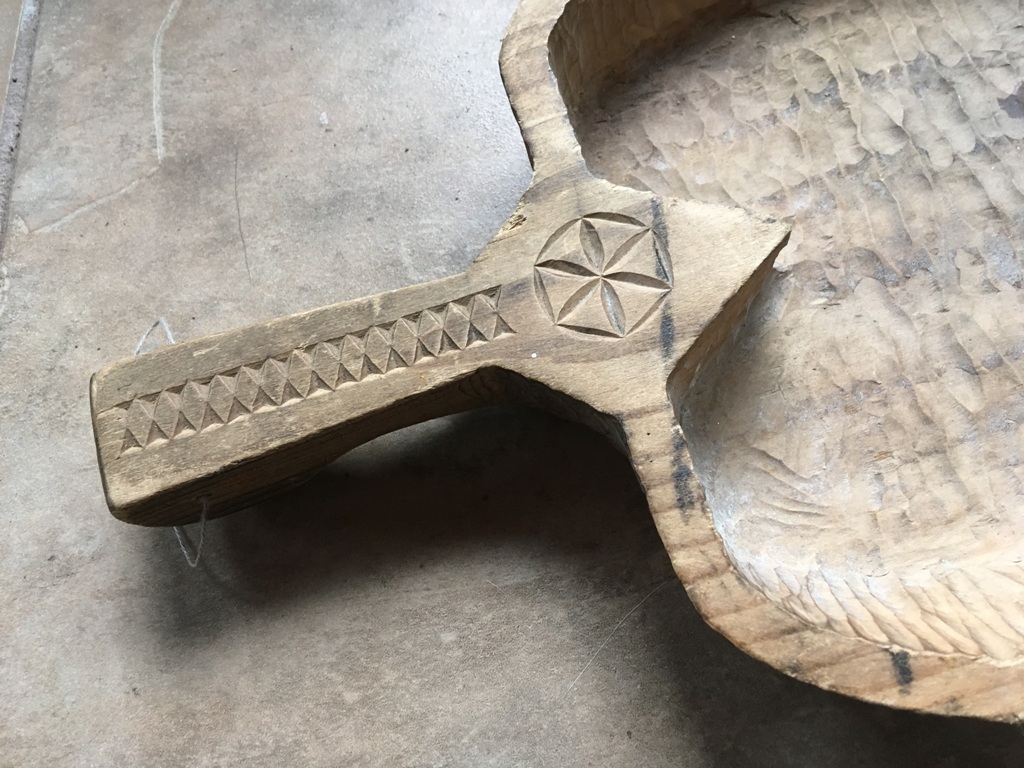
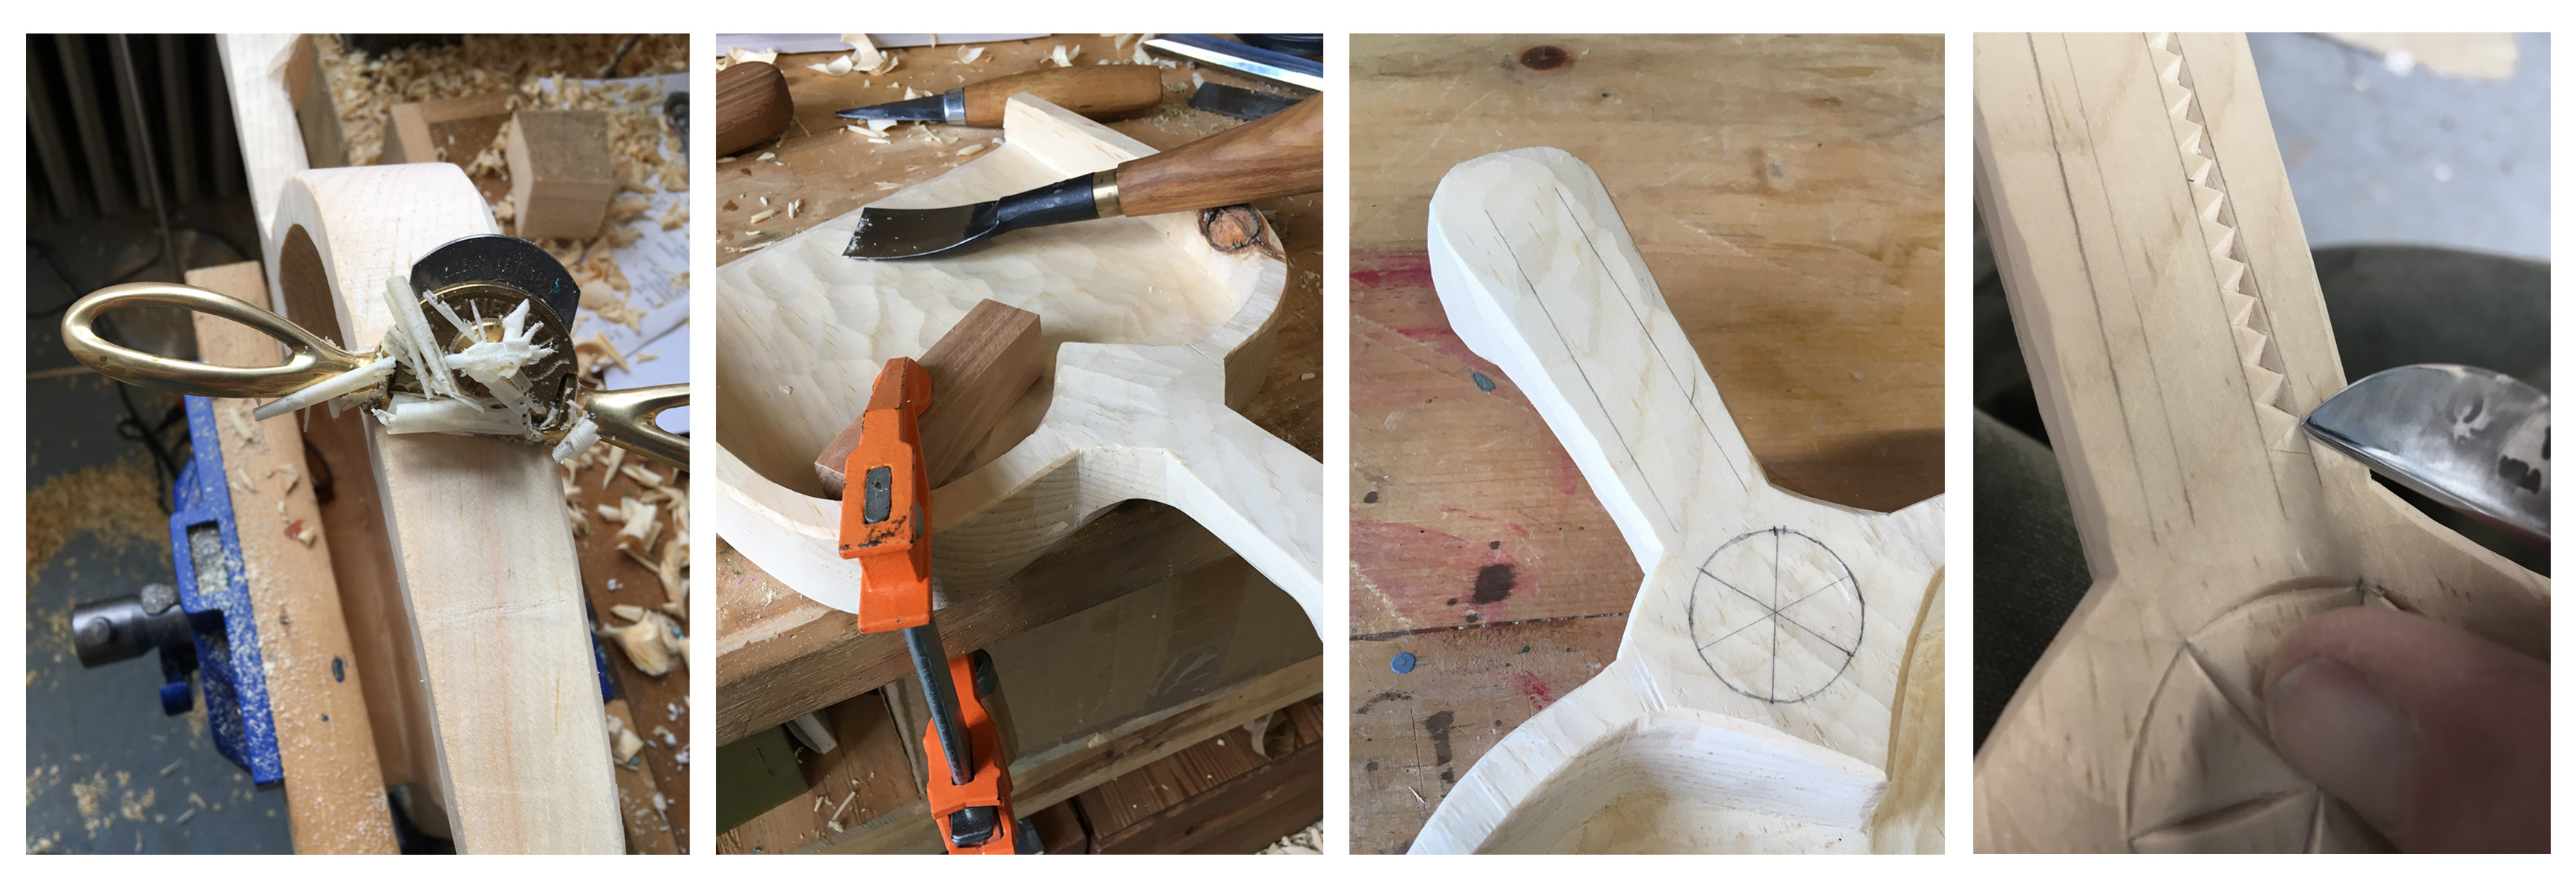
Then I took what was now starting to look like a dustpan to my workbench where I finished hollowing out the inside with a gouge and shaped the outside with a carving knife and spokeshave, working the handle until it fit nicely in my hand and being sure to bring the edge down to a fine taper for ease of use. Then it was time for decorating! I toyed around with the idea of creating my own design for the handle but settled on a design very similar to what I remembered from the original. Future renditions will hold more of my own voice, but I chose to look at this one as an approximate reproduction.
After finishing, I had no idea how close I had come to the original. I hadn’t looked at photographs while I was working on this reproduction, and no longer had the original in my possession. So, I asked to borrow it again, and had fun comparing the differences in design, tool marks, feel and function.
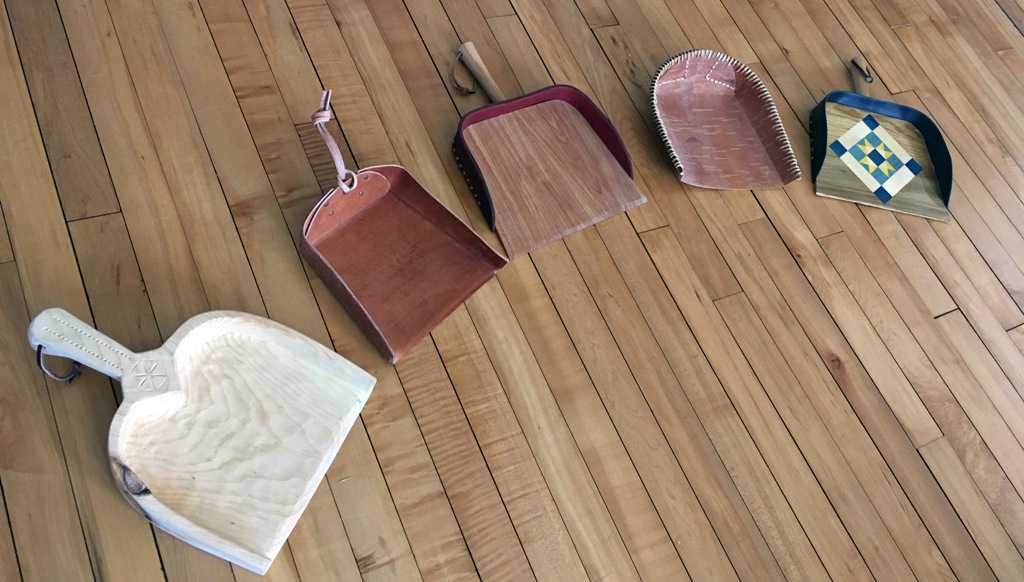
This is the dustpan that I consider most traditional, and also the one that excites me the most. I’ve been working on numerous other designs as well: wood combined with leather using a laminated base, birch bark, all leather, and a version with wood and leather with marquetry (the piecing of wood veneers to create designs or images) on the base. I am still hoping to explore a sewn leather version and have a few more ideas cooking, but I am so excited that now I have an answer to the question “now what do I use as a dustpan?”
If you’re interested in staying updated on my future dustpan projects and more, follow me on Instagram @marybethgarmoe.