
Chair Exploration
I’m continuing on my exploration of chairs this winter and, I must say, it’s been a fun challenge. There’s been some successes, failures, and lots of opportunities to learn. I have a number of great books on the topic that are invaluable in this prototyping process.
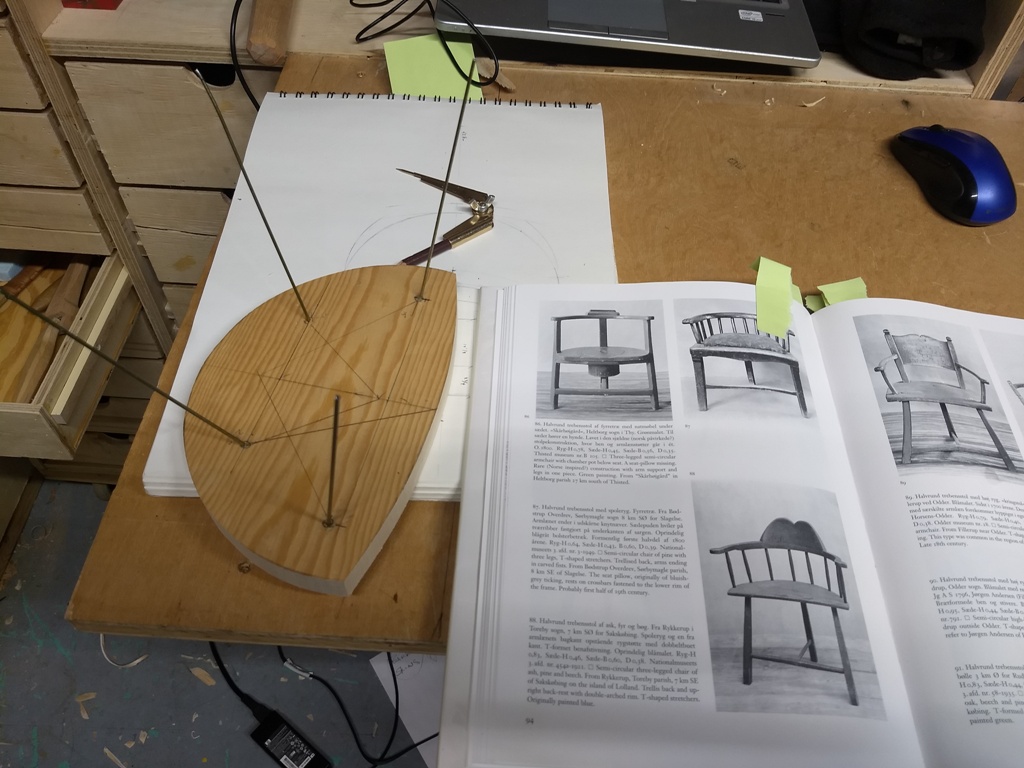
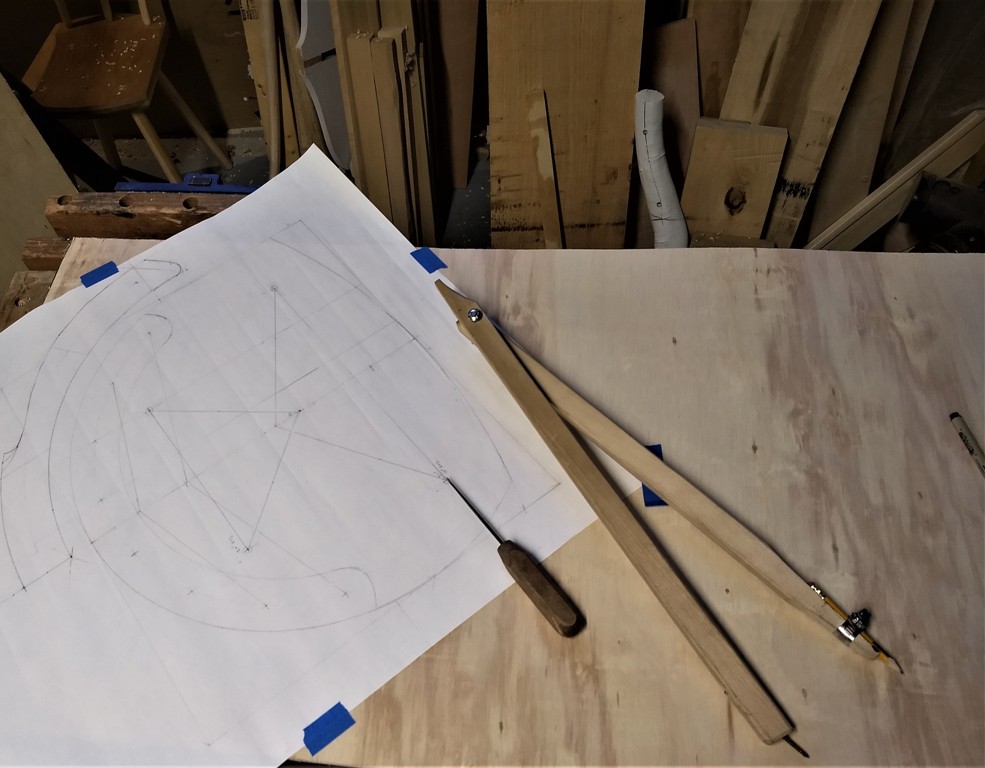
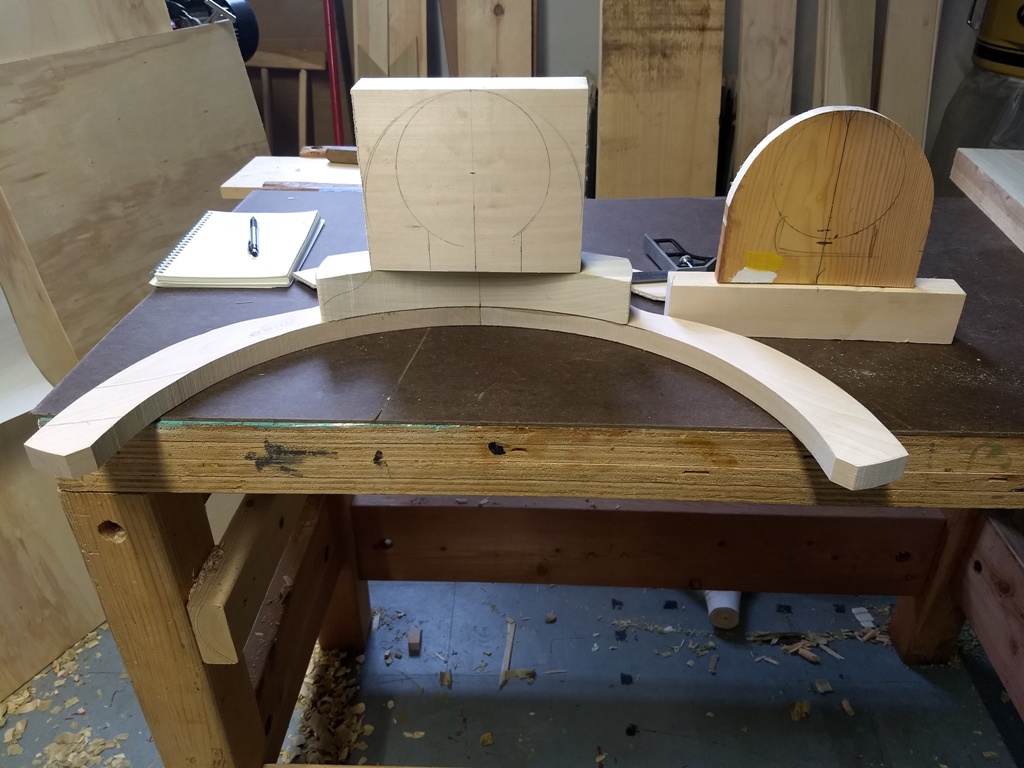
I started the second chair design by creating a scaled wooden seat blank and added thick gauge wire pieces as stand ins for the legs. This is a little design tip from Drew Langsner’s book “The Chairmaker’s Workshop.” What’s great about this method is that you can easily manipulate the rake and splay (angles of the legs from side to side as well as front to back) easily to asses the aesthetics before committing precious materials to a full sized prototype.
The first windsor style chair project in the “Chairmaker’s Notebook” is a welsh stick windsor. These chairs are lovely and have less exacting specifications than some of the other windsor traditions. They’re folk chairs, each one slightly different. They are less refined and match my goals and aesthetics. I referenced this chair design as I was making drawings and thinking through the process.

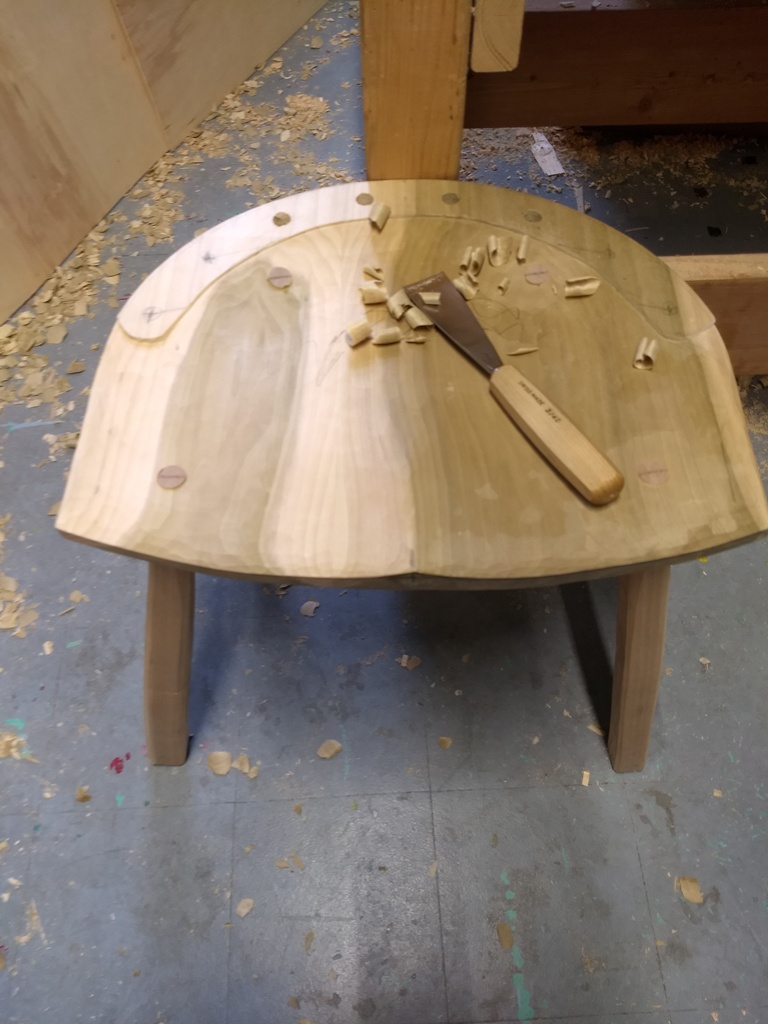
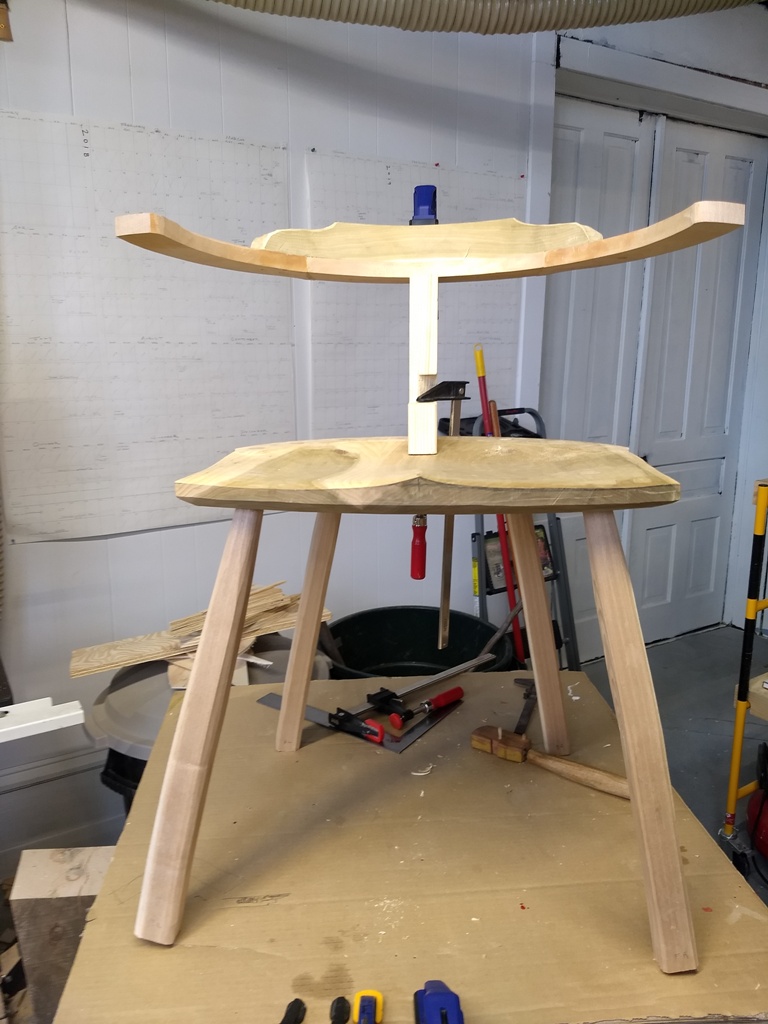
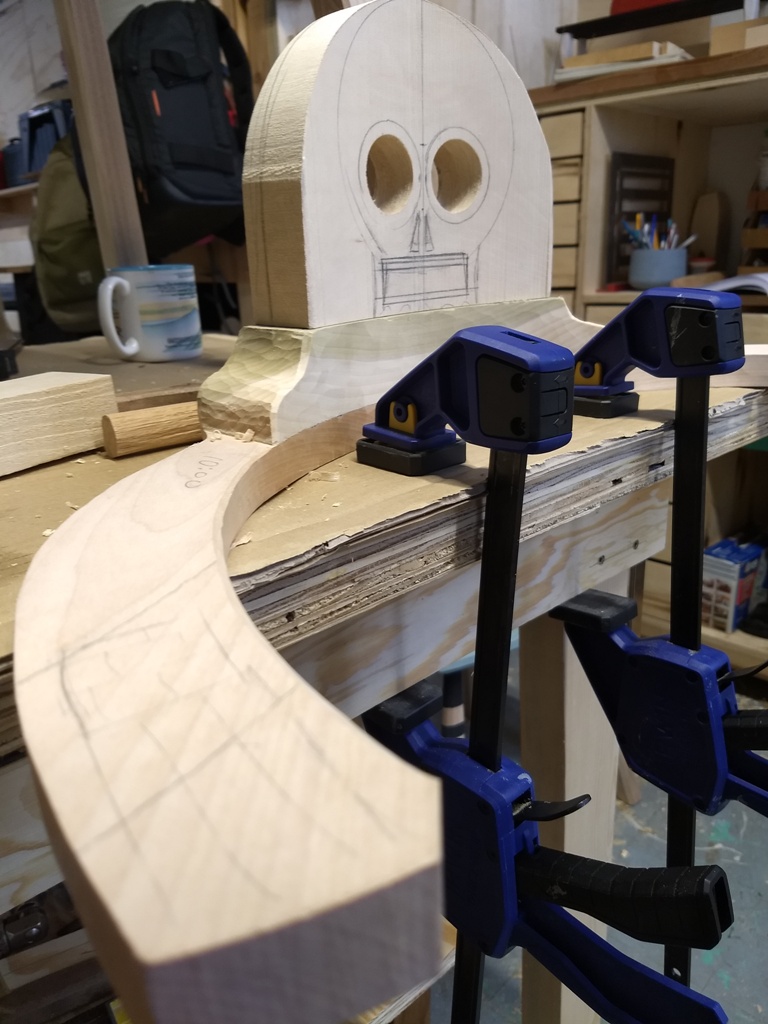
The low-back style I settled on has a pieced together back bow. This particular component of the chair is often made from a naturally curved piece of wood or perhaps a steam bent section. Another common way to crete this curved piece is by gluing up multiple straight grained pieces.
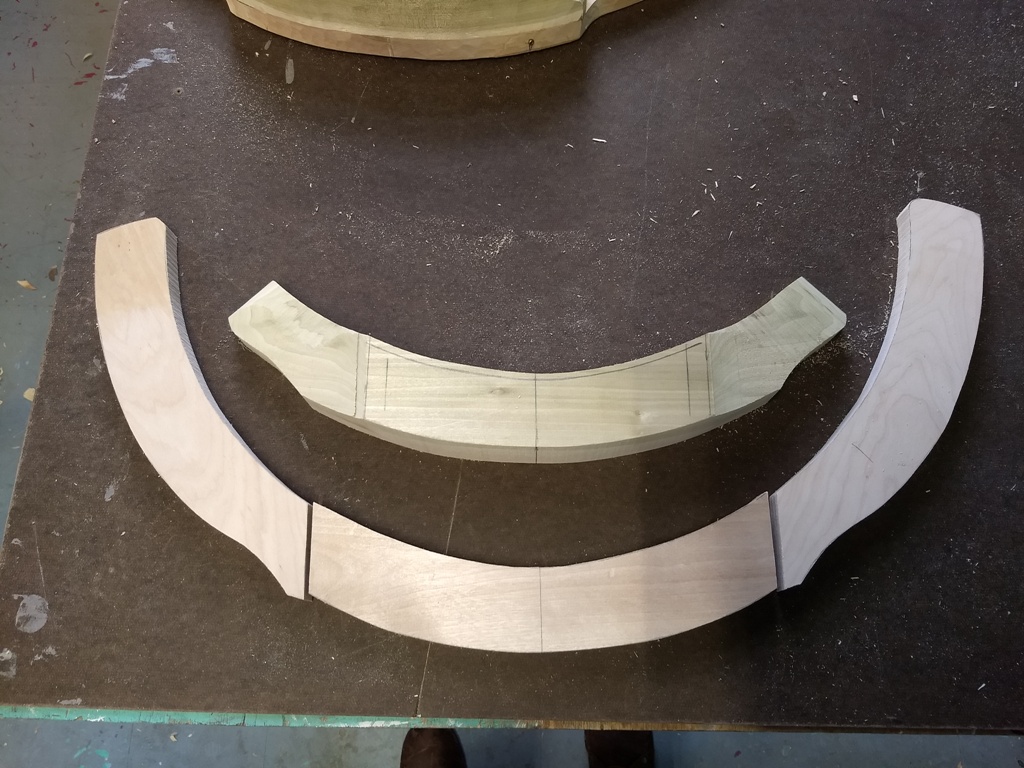
I chose the later because it worked well for my set-up and the materials I had in the shop. The mortises in the seat that accept the spindles (vertical sticks that connect the back bow to the seat) are created by drilling through the back bow aligning the holes by sight. This can be surprisingly accurate and there is something very satisfying about trusting your eye.
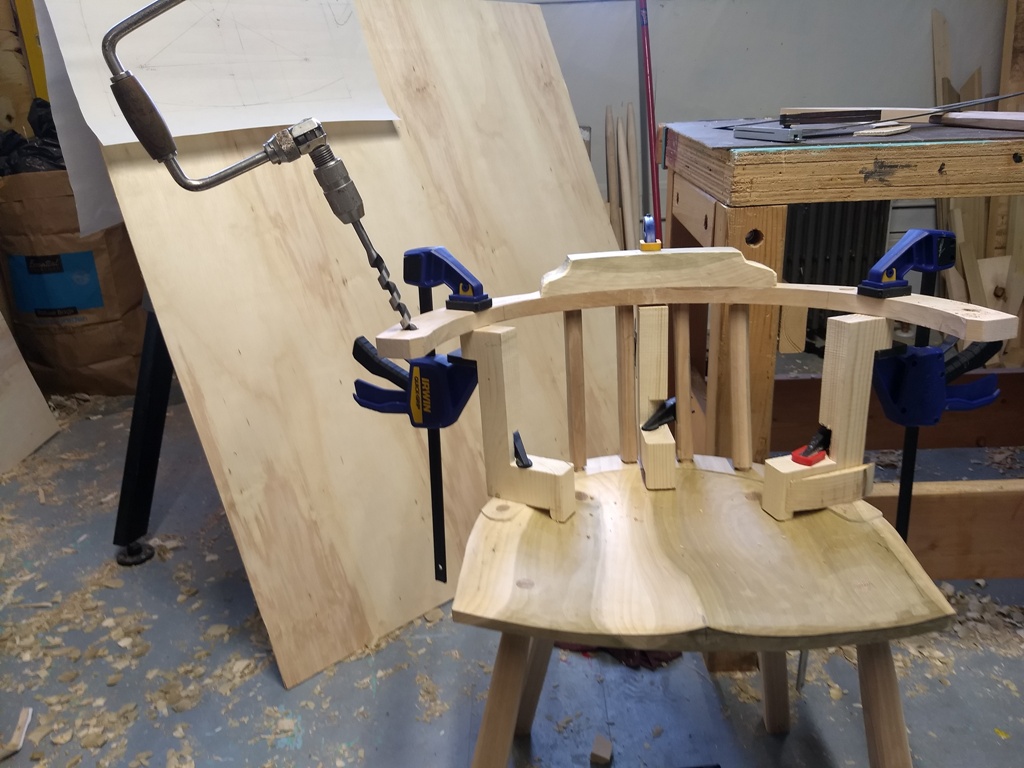
BUT as a person with limited experience with this technique my alignment was less than perfect which created a lot of tension in the back bow during assembly. Right when I got to the final few taps, as I was driving the spindles into their mortises my back bow exploded in dramatic fashion, splitting along some of the short grain in my glued up piece. It’s humbling to destroy a piece that you’ve spent a week on, but the seat assembly was still salvageable so I went back to the drawing board.
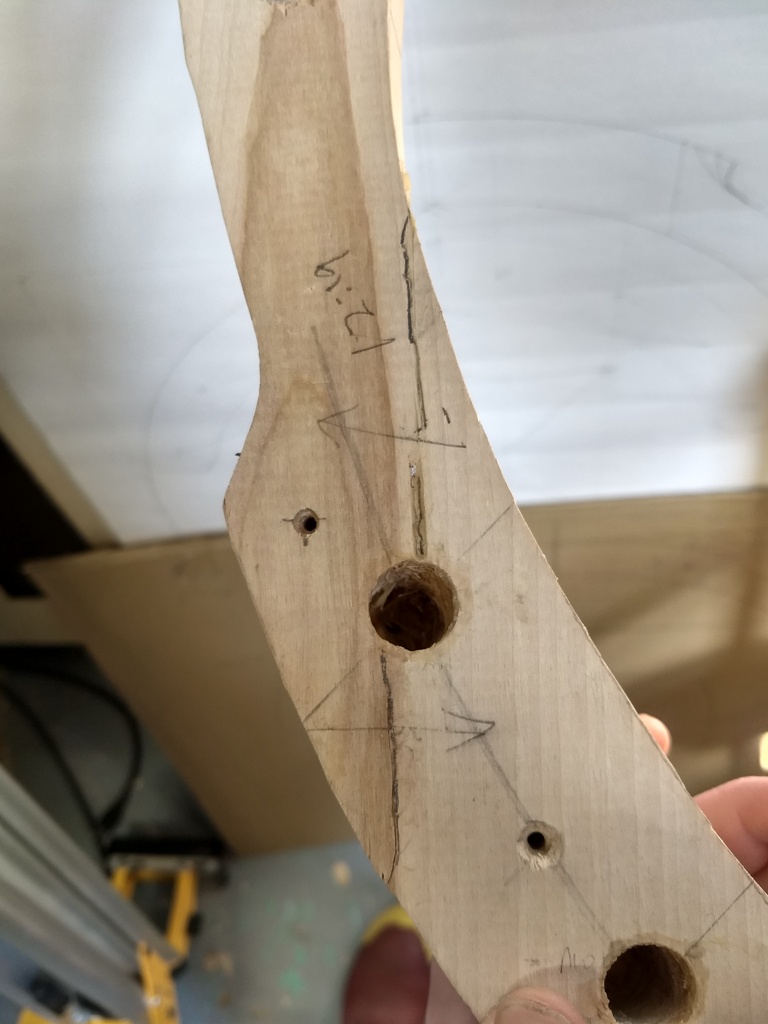
With that excitement under my belt I redesigned the back bow to give it more strength near the spindle mortise where the tension was greatest. After careful redesign and consideration I went to assemble the chair and blew up my second bow piece. I could tell I was closer but the amount of tension caused by my inaccurate drilling as well as the materials I used for the back bow made for a second failure. This struggle has been super informative and though it’s never fun to make those critical mistakes I know way more about this process now than when I started. Luckily the damage on the second back bow was not severe and I was able to repair it.
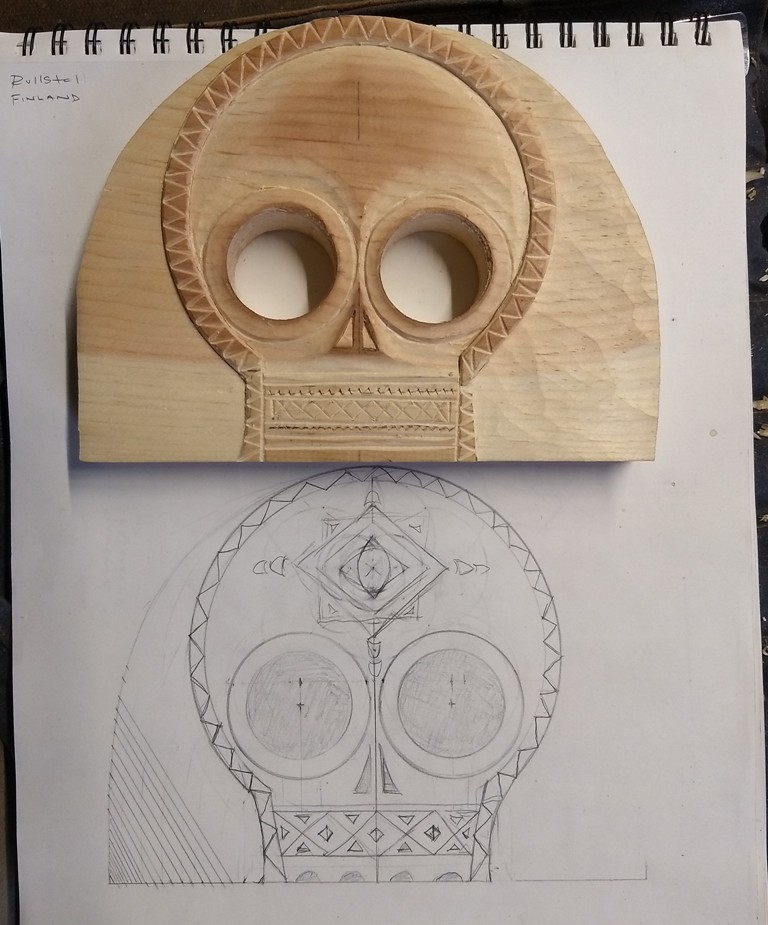
I have been looking through a number of books on various European wooden folk arts and came across these fascinating textile tools from Finland with beautiful human skull motifs.They have a lot of similarities to day of the dead symbols and carvings from Mexico.
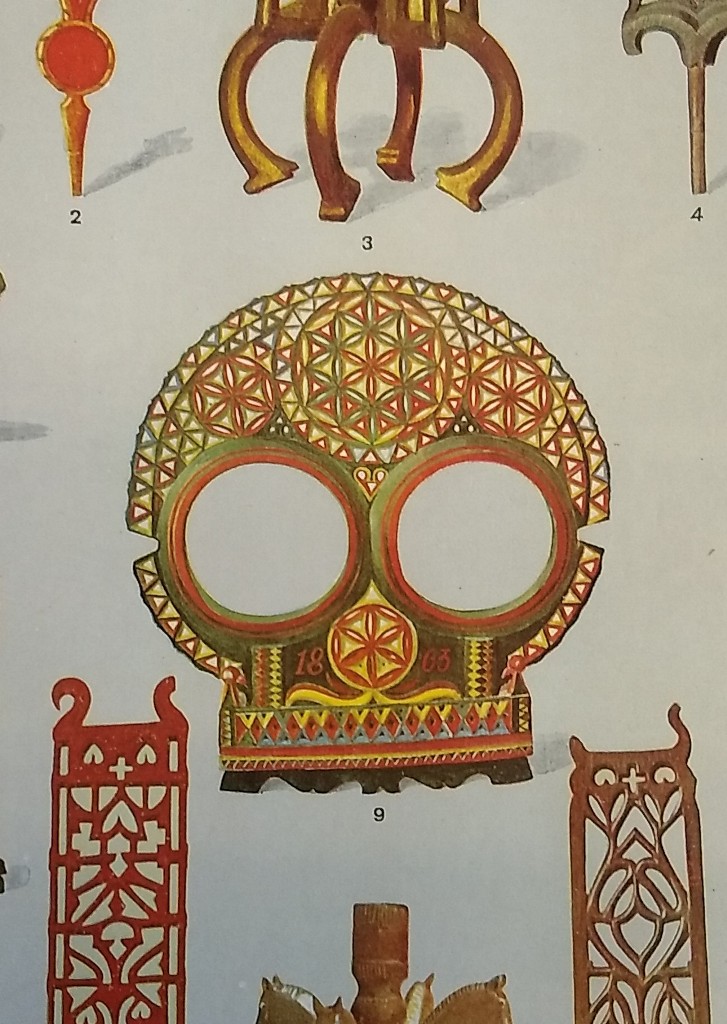
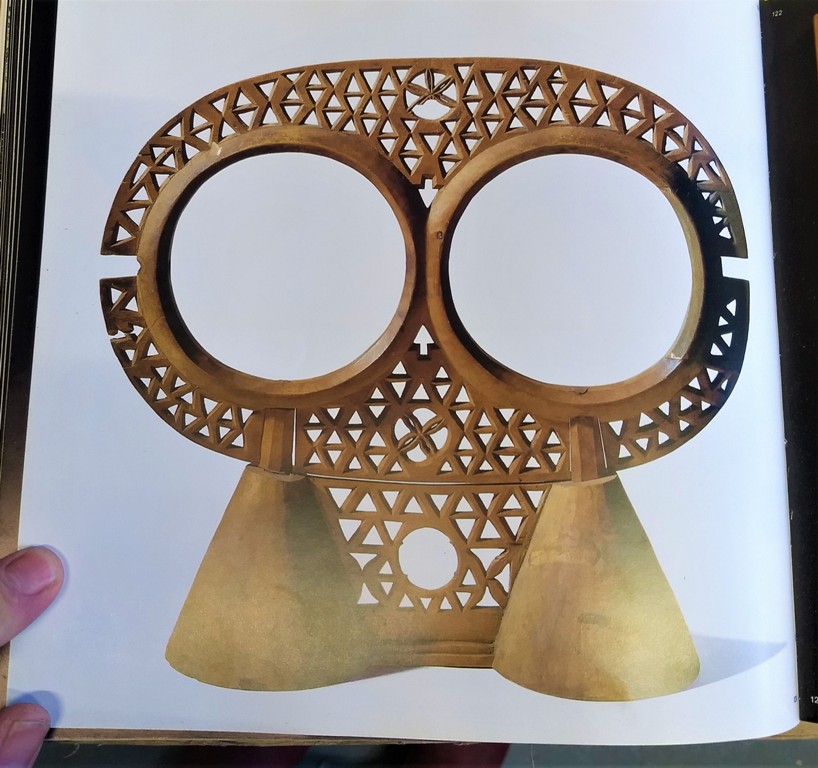
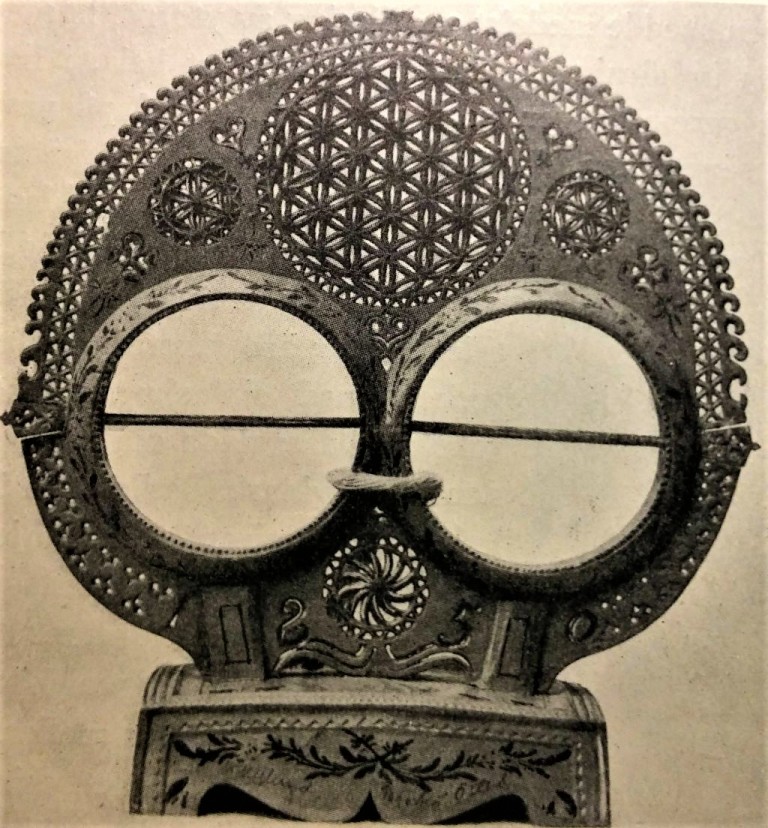
The objects are referred to as Rullstol which translates to wheelchair in Finnish. After asking around it seems that these objects are used to make skeins of yarn from spun fibers. Every example I came across included a flower of life pattern located in the center of the forehead of the skull. If you know anything about this tradition shoot me an email. I have been digging around but haven’t found a lot of information about these objects.
Being drawn to these human skull designs I felt compelled to add one to my stick chair project to give it some folk art flair. Who doesn’t want to sit in a the lap of a wooden skeleton? I made a drawing of the design I was after and then carved a sample to work out any kinks.
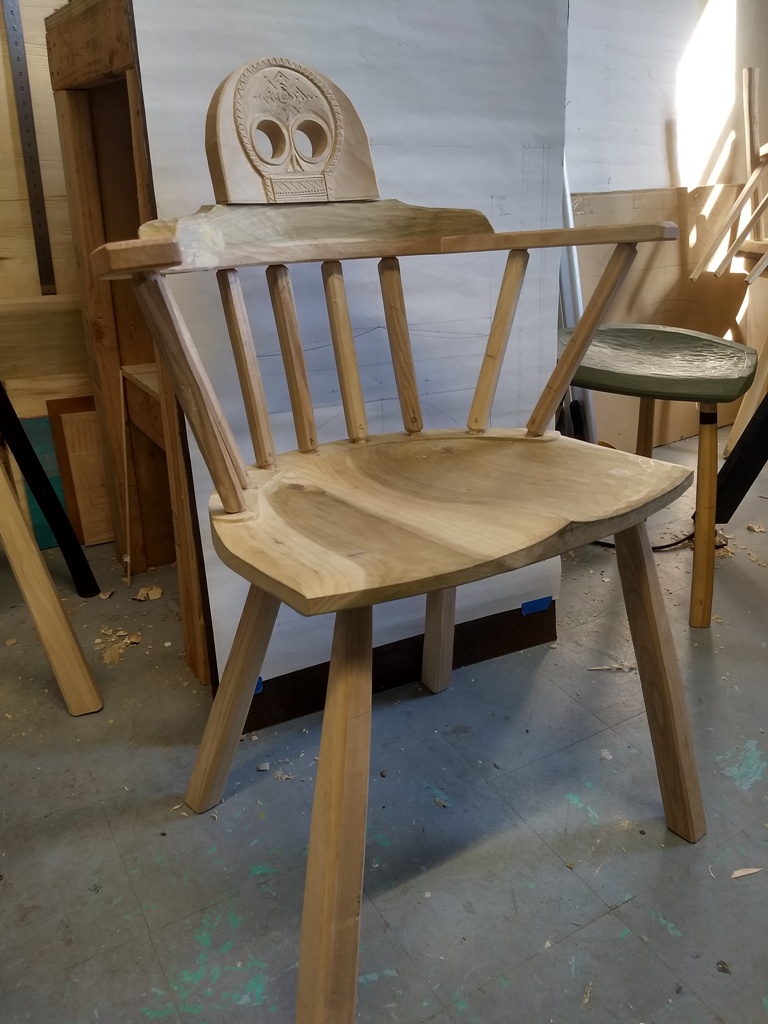
It turned out nice but now I need to paint the chair and painting is whole different challenge. I’ve carved many items that take a turn for the worse when I break out the paints. This might be a discussion for another time; the trials and tribulations of color selection. To finalize this project I’ll be putting together some color samples and using my carved test skull to help make some finishing choices. I’ll be posting pictures of this process on my instagram account so stay tuned if you’d like to see more. @m.j.loeffler