Building the Aleutian Baidarka
Josh Tolkan is wrapping up his build of an Aleutian Baidarka, and talks about the process, lessons learned, and hopes for the future of this vessel.
At long last I have just about finished the baidarka I have been working on here and there over the past year. All in all, I’m really proud of it and excited to test it in the water very soon.
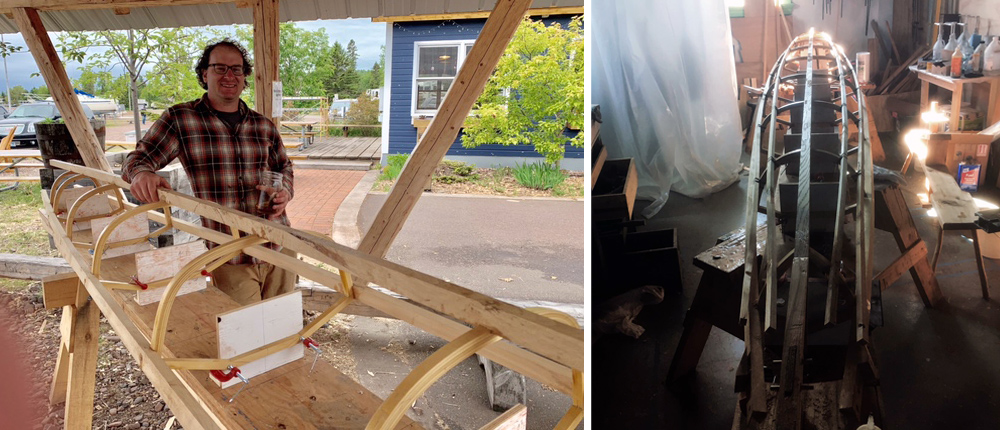
Baidarkas were traditionally built with a large number of very skinny bent frames lashed with sinew to longitudinal members. In the 1970s George Dyson sparked a baidarka renaissance by cutting frames out of recycled metal road signs and using electrical conduit as longitudinals. The strong sheet metal enabled Dyson to build a baidarka with a greatly reduced number of frames, one every 18 inches or so. My approach was inspired by Dyson’s more modern approach to building, in part because a smaller number of very strong frames lends itself to my classical approach to boatbuilding, which starts with lofting and pattern making for each frame. In more folk informed skin on frame kayak building, rather than lofting the shape is determined by rules of thumb relating boat length and width to body size and ratios to determine frame lengths along the length of the boat.
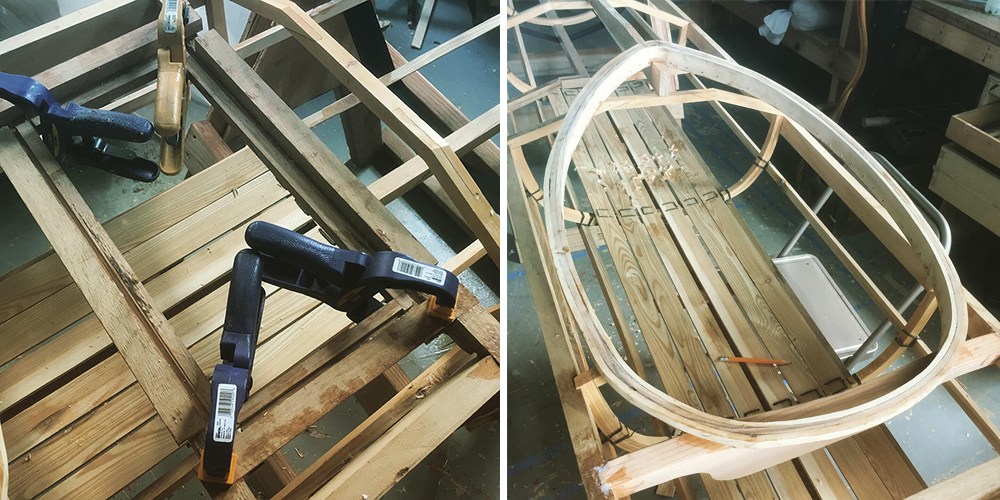
So at any rate I was really excited about bairdarka form and had read Dyson’s book on the subject. I also had a book of baidarkas documented by a maritime archaeologist named David Zimmerly. I chose an Aleutian baidarka that I liked in Zimmerly’s book and lofted that and derived patterns for frames every 22 inches. The frames are bent laminations on the bottom with hard angular shapes on the deck side, joined to the round bottoms with half laps.
The longitudinals are attached in two different ways. The Gunwales and keel are joined to the frames by sawing dados into the longitudinal for each frame. That joint is glued and pegged together with epoxy and a hardwood dowel. A baidarka builder who I met in the twin cities suggested this approach to me and we thought this glued method was appropriate for my very stiff laminated frames. For the remaining longitudinals I switched to the more traditional method by lashing them to the frames.

The frame was finished off with floorboard lashed to the frames along the bottom of the boat. A seat back was carved out of Douglas fir and let into the gunwales. The cockpit coaming is a bent lamination. A wooden hatch was built and installed just aft of the cockpit. The hatch is lashed down with cam lever straps and the hatch coaming mill work prevent water from entering. A 6 inch plastic deck plate style hatch was also installed into the frame near the bow. Furthermore, as a way to get gear into the boat and moved around, and at the suggestion from local kayak builder Keith Mitchell, I installed a pulley system inside the boat to allow bags to pulled toward the bow or stern from the openings in the center of the boat.

Probably my favorite part of building this boat was working out the bow and stern details. Both are very complex shapes and working out the shapes to stay true to the boat wile figuring out the joinery was a fun challenge. Partially due to the complexity and the desire to take time test fitting multiple times to get things perfect, I mechanically fastened with Bronze screws and bedding compound the breasthook and stern assembly.
The bow consists of a breasthook which is carved out of ash with rebates cut in for the gunwales. Below the breast hook the bifurcated stem piece, the distinctive characteristic of bairdarka is joined to the keel with a nibbed scarf. The stem piece itself is carved from a tamarack crook harvested from Bayfield County, WI. I had a strong desire to not wrap the stem in canvas as is traditionally done, rather to leave it exposed and finish it bright. This took some creativity. I installed a vertical plywood stringer that notched into the bottom of the breasthook and through the stem piece. This vertical piece was fastened with dowel pins to allow the stem to be easily removed and reattached. So when it came to canvassing the boat the stem was removed and the stem canvas was wrapped around the nibbed scarf on the keel and stitched in a diagonal line across the plywood stringer to seem around the front of the breasthook.
Canvasing the boat was a big learning curve. So much stitching. It took a lot of patience but I think I got the job done okay. The primary thread used was unwaxed dental floss, and at times fishing line was used when high strength was needed to pull the canvas. The canvas is a ballistic nylon, the kind of stuff parachutes are made from. It shrinks with heat, which was supplied by an iron after the boat was wet down.
The canvas was finished with a two part Polyurethane. The product used by many skin on frame boat builders is supplied by Spiritline Kayaks of Anacortes, WA. Their polyurethane was developed originally for concrete parking garage coatings. It is a very low VOC product that goes on thick dries to a very flexible, translucent rubbery feel. While I think this product can provide the perfect finish for these boats, it proved quite hard to use and was the most frustrating part of the process. I decided to make the bottom of the boat black which I did by mixing small amounts of graphite powder into the polyurethane. I often mix graphite into epoxy which helps make the epoxy cure very smooth and gives it a very hard scratch resistant quality. I figured the graphite would do the same to the Polyurethane. For the top of the boat I tinted the polyurethane with a small amount of a resin pigment I have used with epoxy. The color came out great. However the goopy nature of this product, its slow curing time, and awkwardness of taping off a line of a soft side (canvas) allowed for many runs and a very messy tape line. I went back and sanded runs away but that made for more problems. In some places I sanded the canvas bare and had to try to re-coat which didn’t look great. I also sanded a few small holes into the canvas. In all I just felt the more I tried to fix this appearance the sloppier it got. Lesson learned, you really only get one shot with this two part polyurethane and I’m sure I can do better next time.
In the final trimmings I was able to do a few cosmetic things to hide some of the ugliest parts. I made small rub strips of black locust and installed them along the top and sides of the gunwales. I also made little eye loops of purpleheart that hold an elastic band on the deck for lashing things down.
Beyond the polyurethane I learned several other lessons over the course of this project. I really do not like the way the cockpit coaming turned out. Rather than steam bend the entire pear shaped opening, in the future I would carve the top of the pear out of a solid piece of wood and make a sort of rabbet joint that the rest of the curved coaming could land on. There are a few improvements I could make to the rear hatch as well. Building the hatch at a raised angle might make it more useful. Additionally, the hatch could have been built a little more square. I kind of know what I did wrong in these situations and would like to do this project again to get them all right.
Now that the boat is finished I look forward to using it a little bit next summer and taking it to a few boat shows. After than I plan to try to sell it. Let me know if you might be interested. I think it is the perfect Lake Superior adventure paddle craft!