Timber Framing
Basic Timber Framing
Course Overview
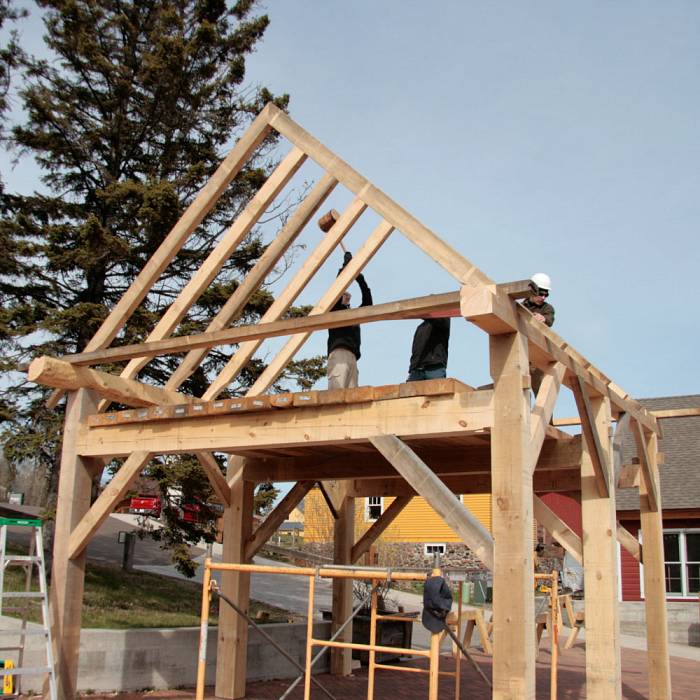
Learn the planning, layout, and joinery necessary to construct a traditional timber frame (post and beam) structure, such the North House's Blacksmith Shop, bread oven shelter, Fish House classroom, Welcome Center, and other structures around campus. The course begins with carving the basic mortise and tenon joint, and expands on these techniques to cover through tenons and shouldered mortises. Thorough classroom sessions and hands-on experiences, students will explore the use of traditional tools and techniques of timber framing, as well as adaptations using common and specialized modern tools. We will also touch upon enclosing the frame, constructing foundations, identifying wiring and plumbing issues, and understanding basic frame and joinery design during class time. Additional information available during an optional evening slide show. The course culminates with the raising of a full-size timber frame completed by the group on the final day of class.
Required Tools
- Ear and eye protection
Optional Tools
- 1 1/2 inch chisel: you will need a chisel with at least a 5” blade. Woodcraft and Sorby make good framing chisels, but make sure they measure exactly 1 1/2". The Barr chisel is an excellent tool and will be available at the North House School Store.
- Mallet: with a wood handled chisel you will want a 20 to 40 oz. mallet with wood, plastic or rawhide head. (Also available @ North House School Store)
- Framing square
- Combination square
- Tape measure
- Pencil
- Circular saw with sharp blade (thin kerf blades work well)
- Extension cord
- Hand saw (Japanese pull saws with both crosscut and rip teeth work well)
- Corner chisel
- Slick
Session Information
North House is looking forward to hosting this course on campus in the safest way possible. Students will be asked to wear a mask at all times on campus, and to practice social distancing of 6 feet, as well as adhere to other safety protocols.
Dates
Course Details
Required
You will need the following tools for this class:
- 1 1/2 inch chisel: you will need a chisel with at least a 5” blade. The Stanley "Contractor Grade" and Buck Brothers are less expensive options. Woodcraft and Sorby make good framing chisels, but make sure they measure exactly 1 1/2". The Barr chisel is an excellent tool and is available at the North House School Store.
- Mallet: with a wood handled chisel you will want a 20 to 40 oz. mallet with wood, plastic or rawhide head. (Also available @ North House School Store)
- Ear and eye protection.
- Lots of layers, including a raincoat and footwear. We will plan to have open windows and lots of outdoor activity when possible.
- Sunscreen, sunhat, again for extra outdoor time
- Please be sure to bring a mask(s) that fits you well and can be worn for an extended period of time.
Optional Tools
- framing square
- combination square
- tape measure
- pencil
- circular saw with sharp blade (thin kerf blades work well)
- extension cord
- hand saw (Japanese pull saws with both crosscut and rip teeth work well)
- corner chisel
- slick
More Information
Once registered, students will receive a confirmation email with further class information. Please call us if you haven't received it within 24 hours.


